Pre-registration in VisiPoint allows visits to be booked in advance. If you are expecting a visitor or other user type to come to your facilities, you can book the visit as an admin or you can provide users with a URL to book their own visit. This speeds up the entry process when they arrive.
Before you can book a visit in advance, you must activate pre-registration in the user type settings. To learn how to create and edit your user types settings, visit this help article.
How to book a visit in advance
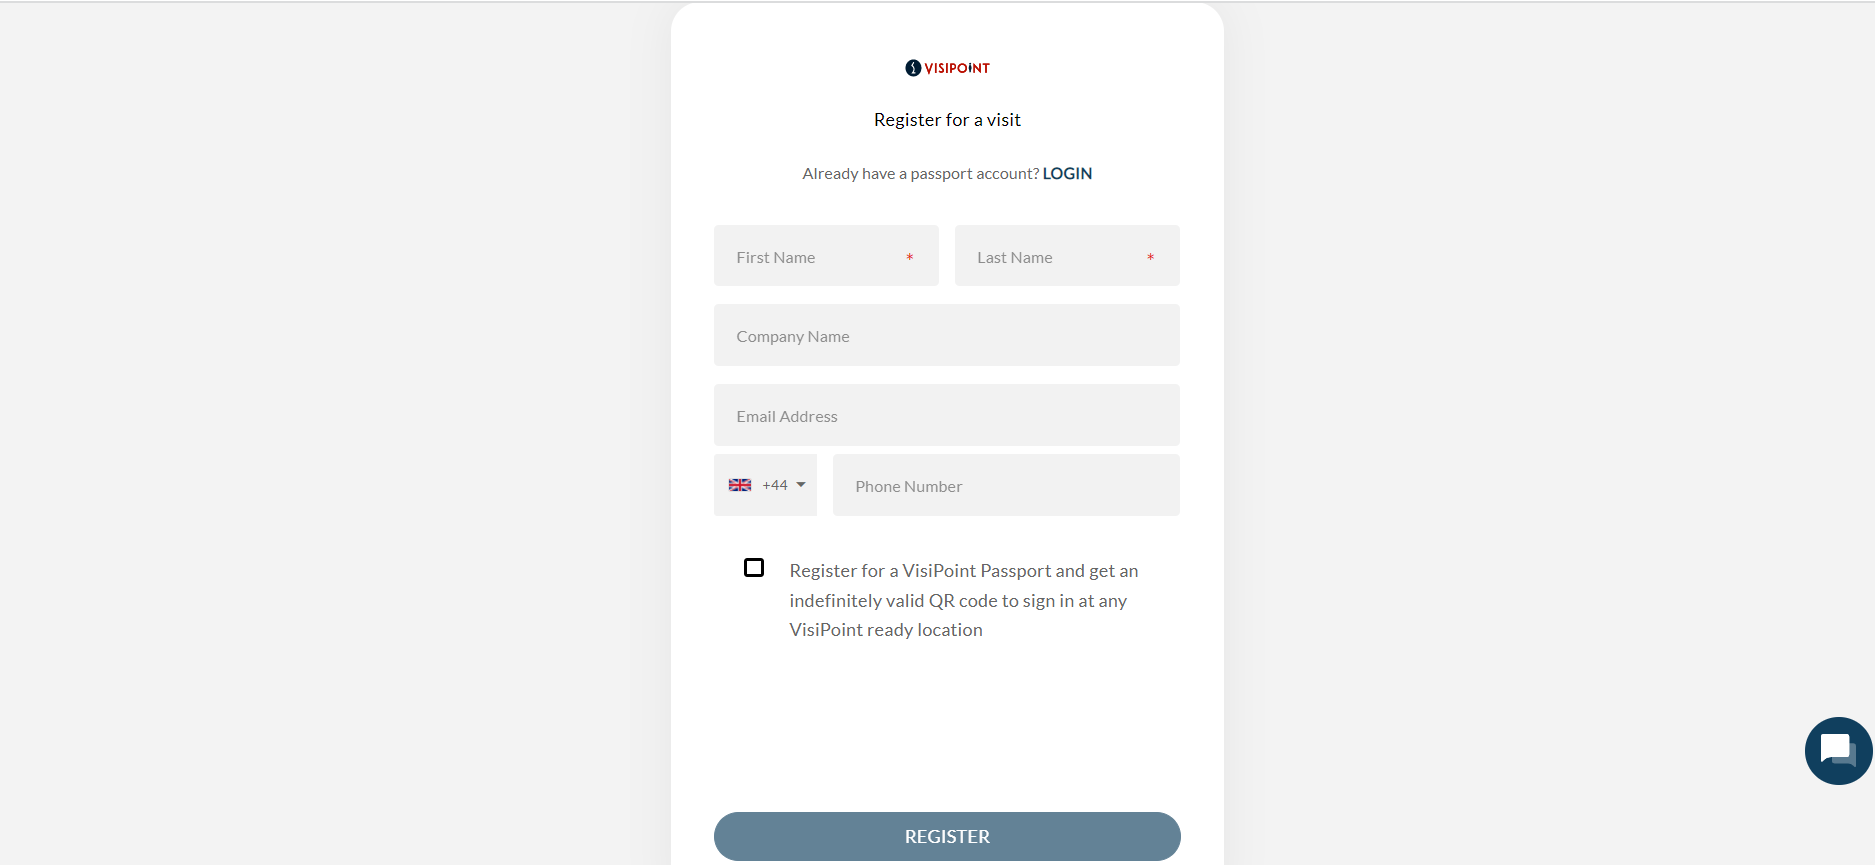
There are two ways for you to provide your users with the ability to complete their registration before arriving at your site. You can book a visit from your dashboard as an admin, or send the visitor a pre-registration URL for the site they will be attending.
Adding a visit as an admin
Click the “Add Visits” button at the top right. You will then see a form to complete.
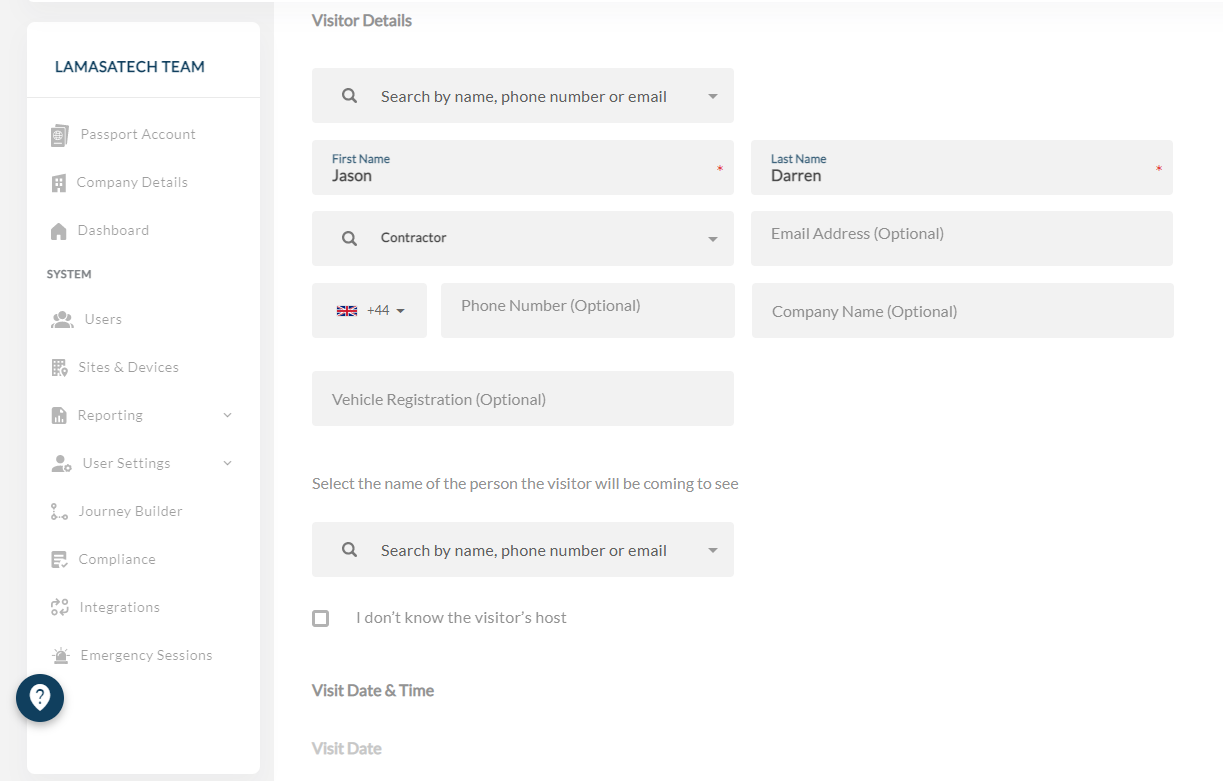
- Select the site and area the visitor will be arriving.
- Fill in the visitor’s details. If they have visited before and their details are on the system their profile will pop up as you begin to enter their name. For new visitors, you will need to add their information.
If you would like the visitor to receive a confirmation of their visit or be invited to complete the remaining registration steps (such as compliance forms) before they arrive, you should enter an email address or phone number for the visitor. More detail on this email is below. - Select the user type of the visitor (for example, visitor or contractor).
- Select the host – the person who the visitor is coming to see. If you have host notifications activated, the host will receive an email when the visitor signs in. For the host field to appear, a host user type must be set in the entry flow for the area where the visitor will be arriving. To learn more about how the host feature works visit this help article.
- Once you have completed these details, you need to select the time and date of the visit and then click “Add Visit”.
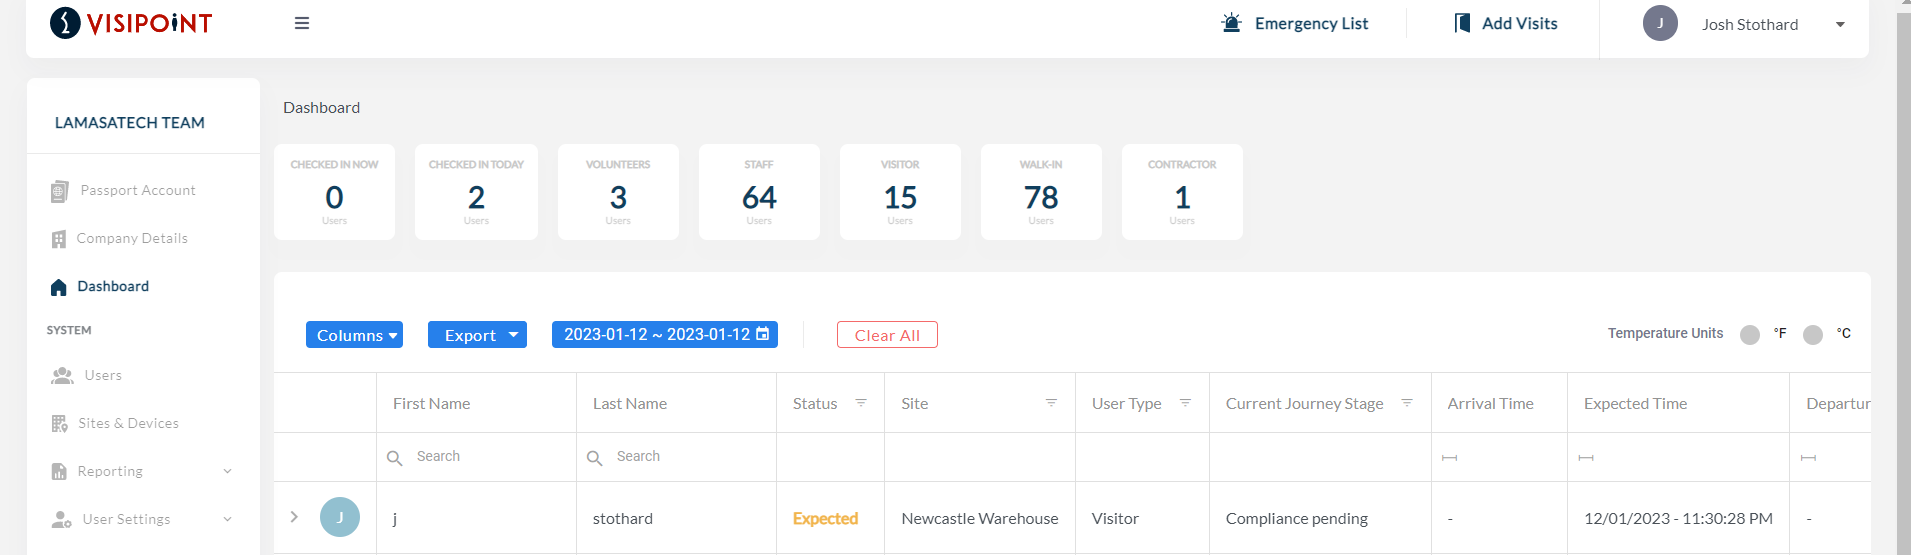
You will now be able to see any booked visits with the status of ‘Expected’ from your dashboard grid.
Visitor invitation email
For the visitor to receive a confirmation message and a link to complete any remaining steps in the registration process before their visit, you must include their email address or phone number in their details while creating the visit.
If you have remaining steps such as compliance checks to complete, the visitor will receive a message which looks like the below email:
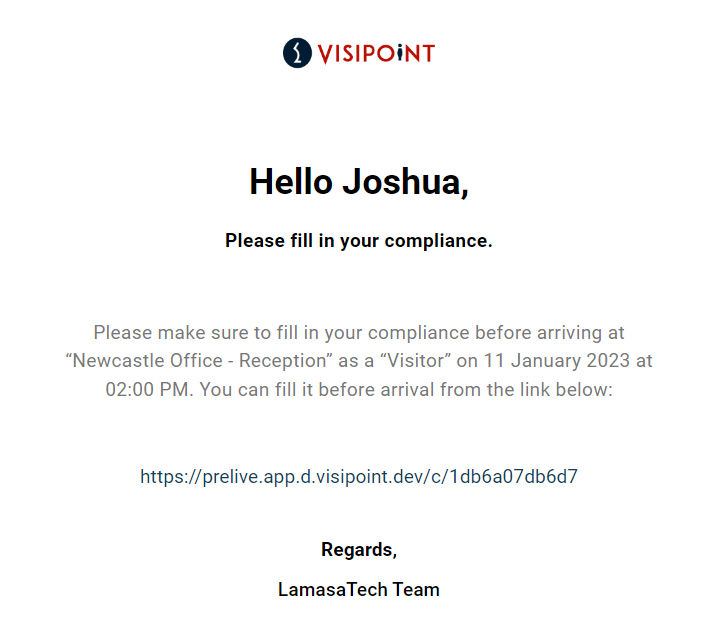
The user will be able to click the link which will take them through your registration process and ask them to complete any compliance checks you have selected.
Journey stage for expected visitors
You’ll be able to track the status of any visits you create by going to the “Dashboard” tab in the left-side menu. Here you’ll be able to see if the visitor has completed their compliance checks yet under the “Current Journey Stage” column. In the example below you can see “Compliance pending” which means that the user has not yet completed their checks. If the visitor fails the compliance check they won’t be able to sign in for their visit.
You can resend the compliance if you need to by clicking the refresh icon that appears in the “Current Journey Stage” cell.
Once the user has been successfully registered they will receive a QR QuickPass that they can use to scan on your kiosk to sign-in when arriving for their visit.
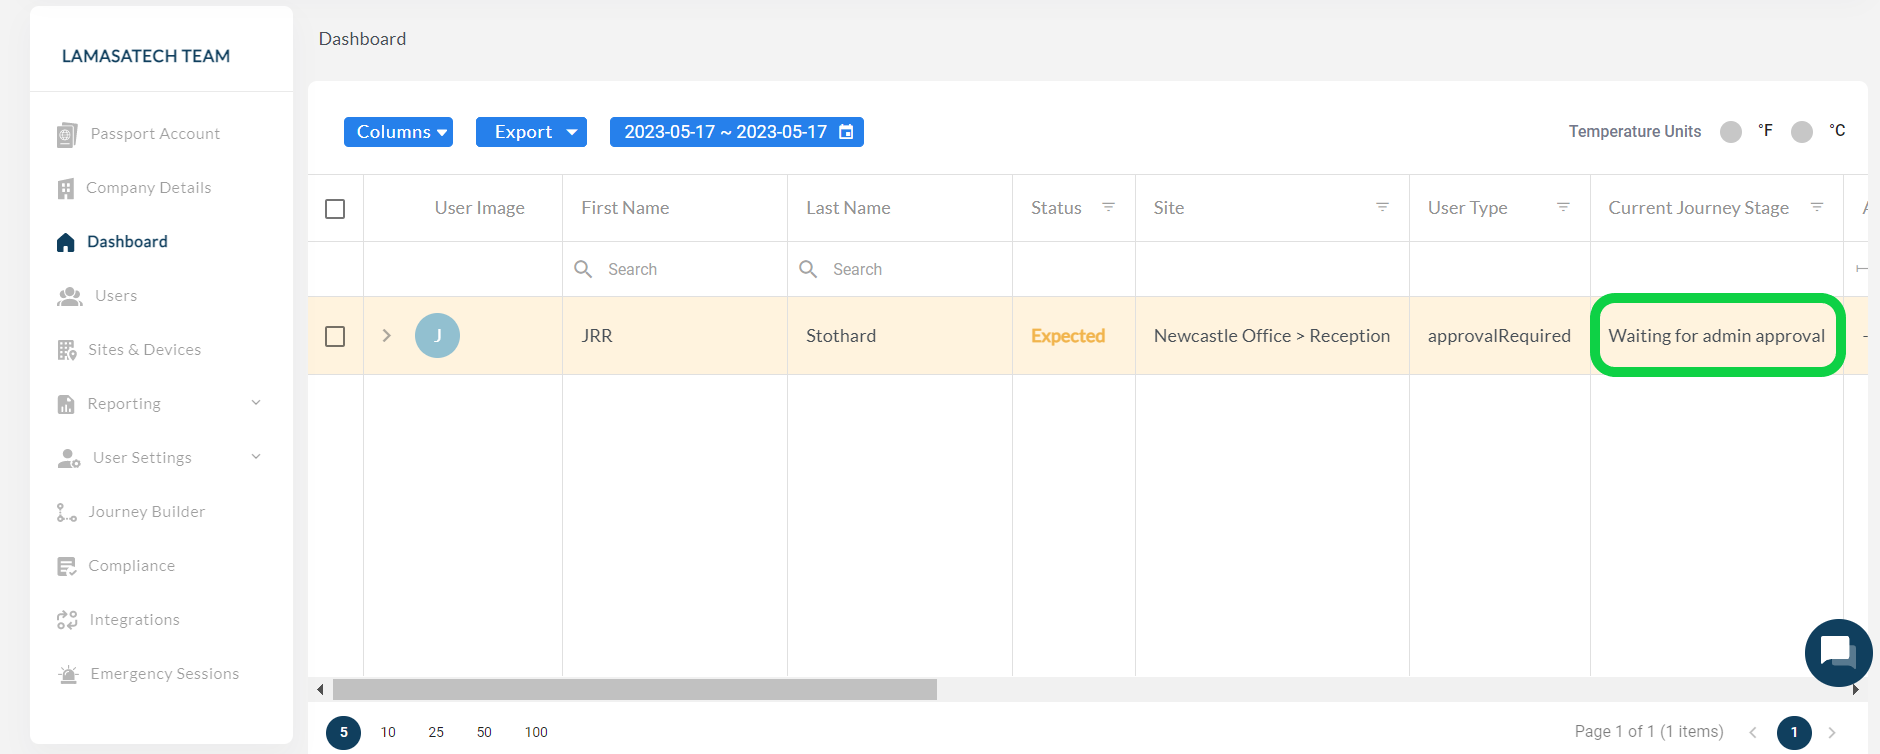
If admin approval is required once the user has completed their compliance, the “Current Journey Stage” will display “Waiting for admin approval”. This will need to be done before the visit can be confirmed.
To approve this visit, you will need to scroll to the far right of the grid and click the “Manage Visit” button. A pop-up will appear showing you the compliance responses the user provided. You will then have the option to approve or reject this user’s visit.
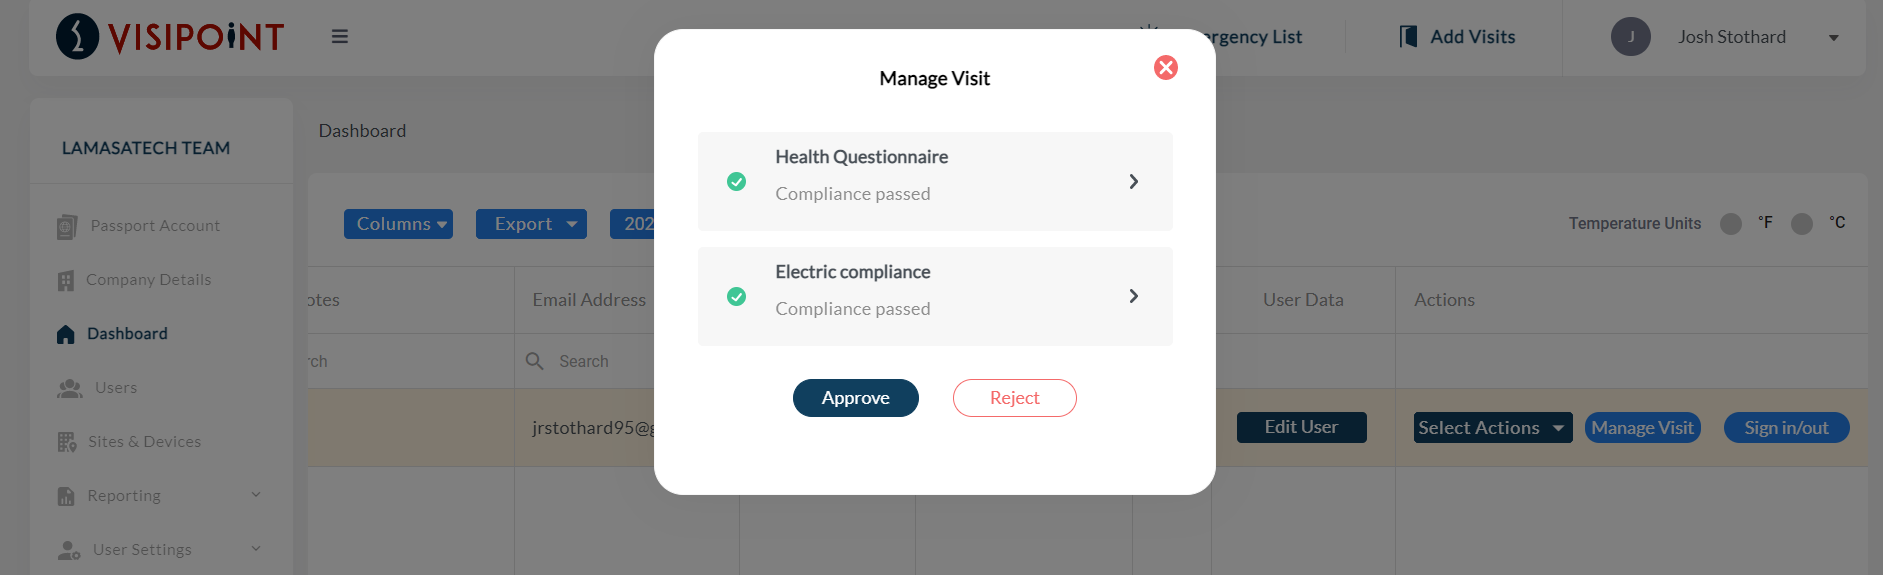
When you click Approve, you will be asked to confirm your selection. Clicking Approve again will take you back to the grid and the “Current Journey Stage” for this visit will have been updated to show “Ready to sign in.
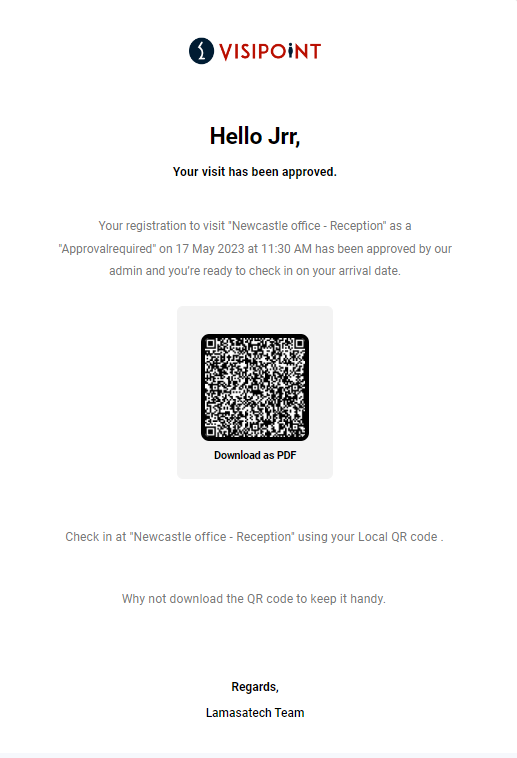
Once the admin has confirmed the visit the user will then receive their QR QuickPass which they can use to sign in on arrival.
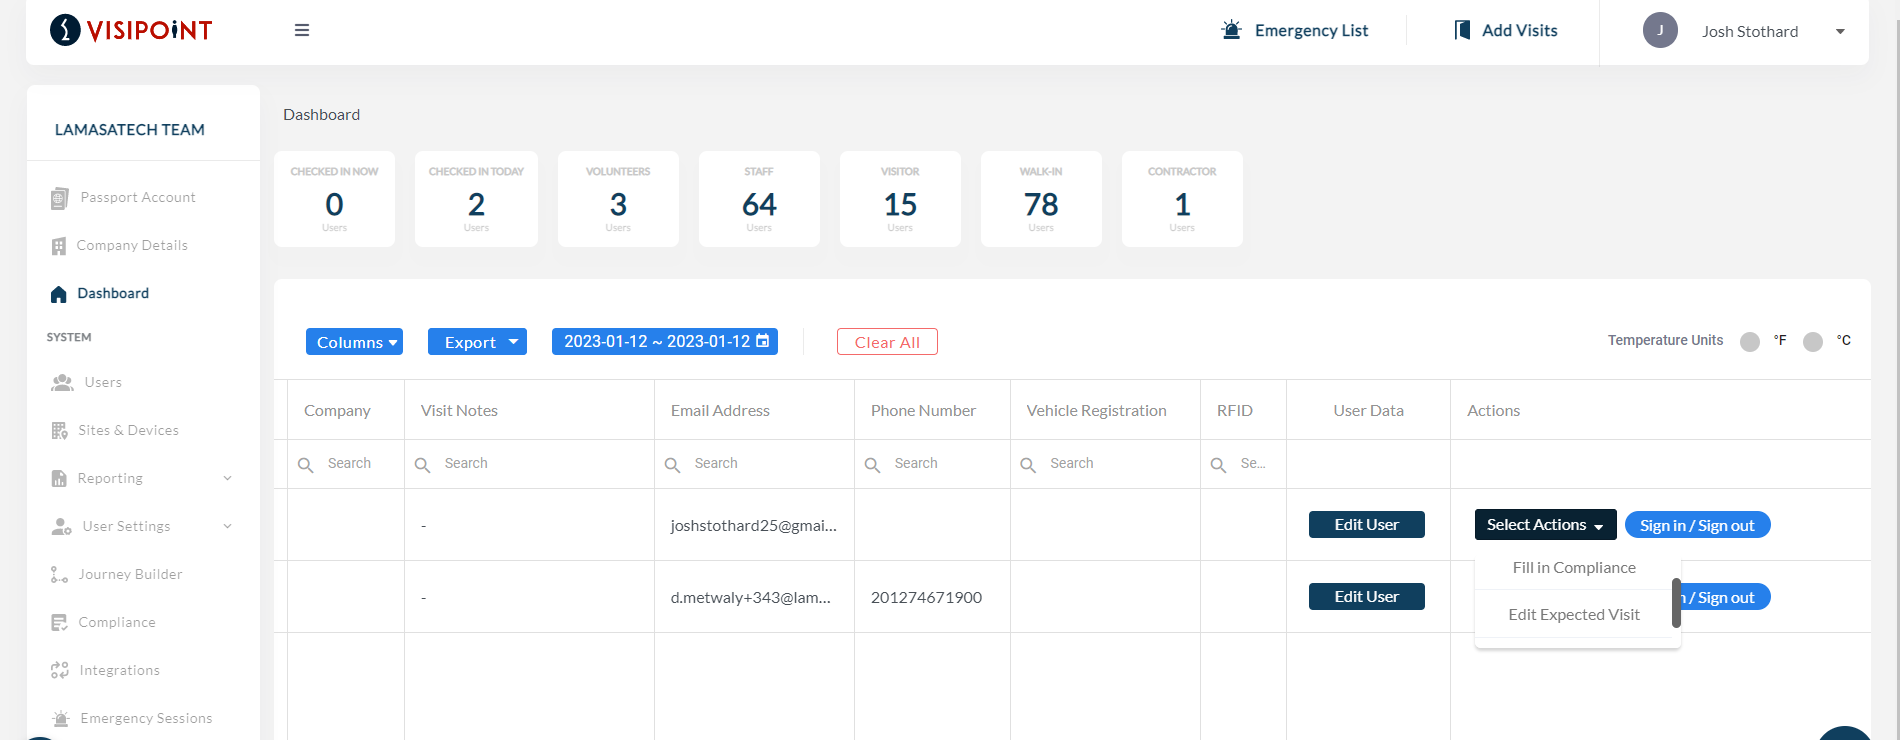
Fill in the compliance on the visitor’s behalf
Admins can also fill in the compliance on behalf of the visitor using the “Select Actions” button at the far right of the grid (shown below).
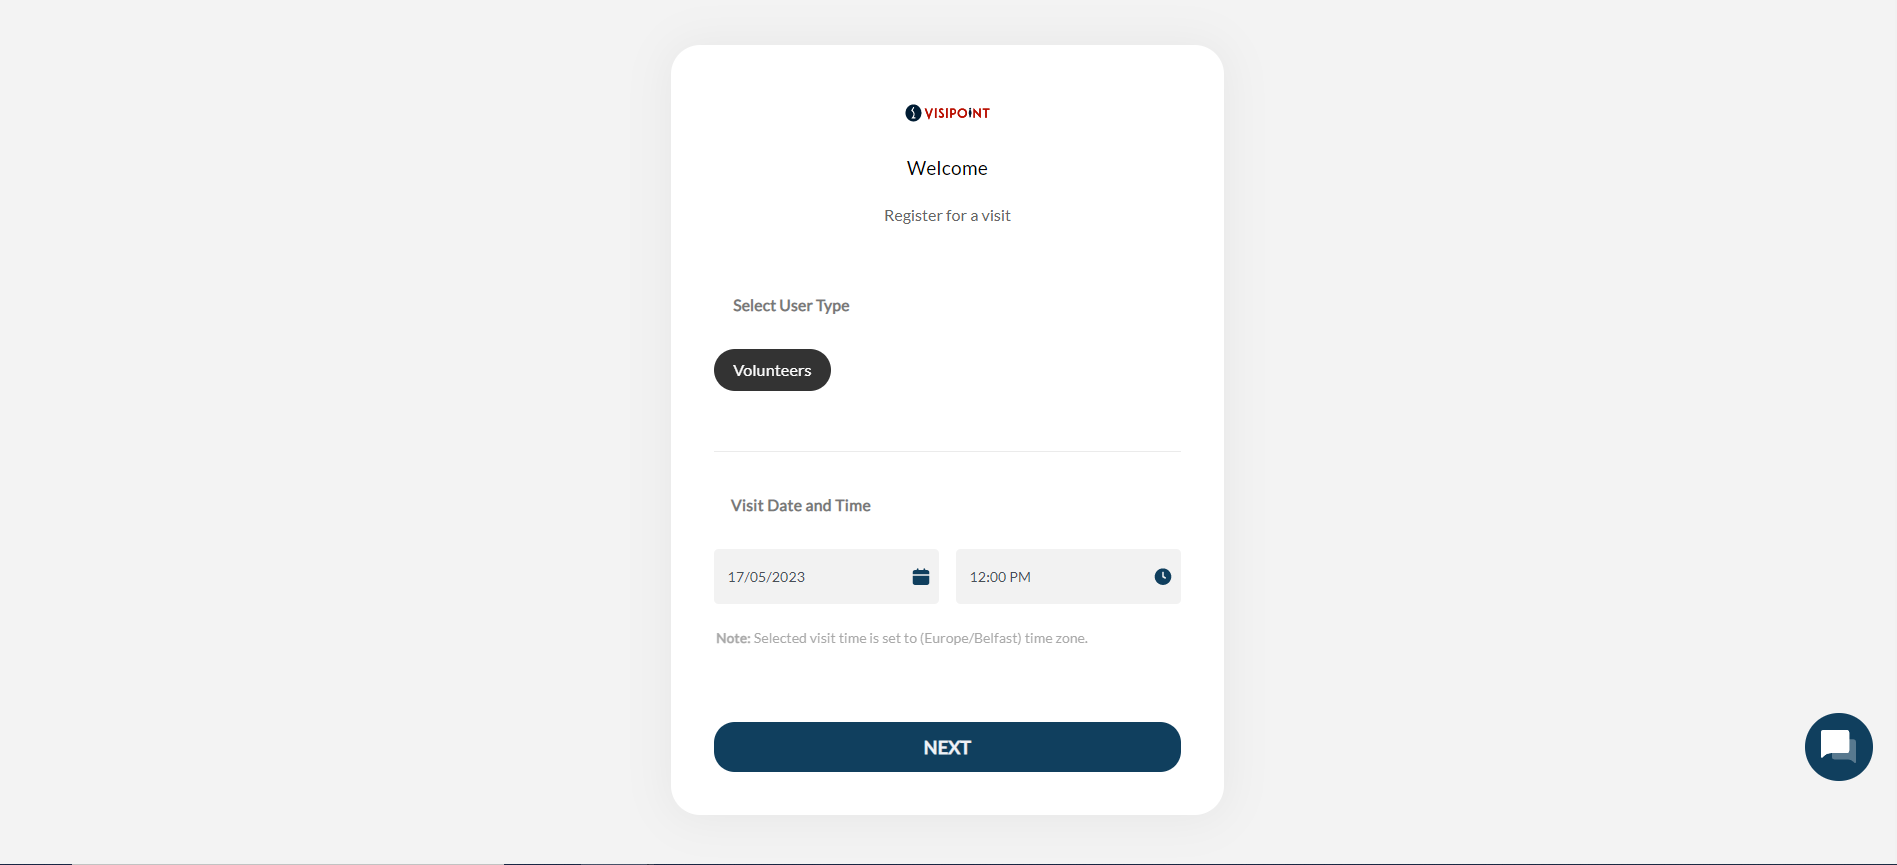
Pre-registration URL for users
You can also send any expected visitor the URL for your pre-registration process to book their own visit.
To do this, go to “Sites & Devices” on your dashboard. Here you’ll see a list of the sites your company has. Clicking the dropdown arrow next to a site will then show the areas within your sites.
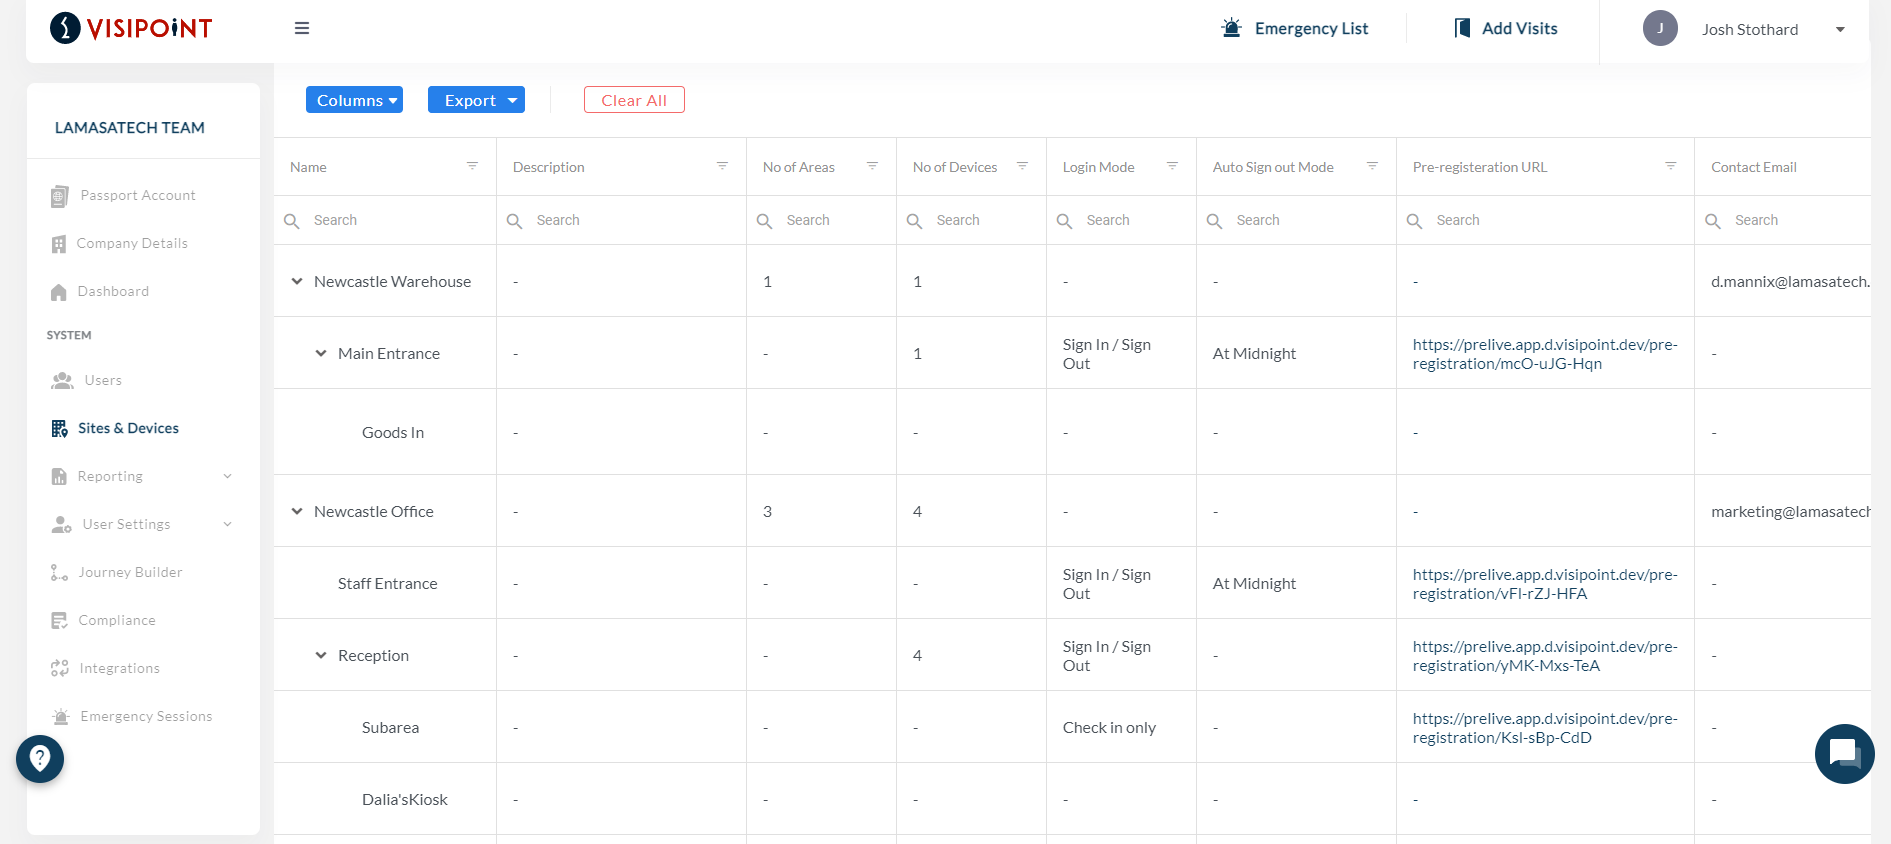
From here you will see the “Pre-registration URL” for each area.
Copy the link for the area your expected visitor will be arriving at and send it to them via email. They will be able to access the registration process from this URL and complete it before arriving.