About user types
User Type is the defining field that groups users together in the system. It categorizes users based on a user group. The 3 default user types are:
- Walk-in = New visitors that are not recognised as having a profile in the system
- Visitor = Visitors that are known already as they have a visitor user profile
- Staff = Employees
If you have a Professional or Enterprise level cloud license, you can create custom user types. These are bespoke to your needs. You have the top-level user types, known as your parent user types. You also have the ability to create child user types, which are nested within a parent user type.
For example, you could add a user type for Contractors or Volunteers. These would be parent user types. Or you could separate your staff using child user types, with one user type for Office Staff and one user type for Warehouse Staff, both nested within the parent user type of Staff.
Accessing user types
Click on the dropdown arrow next to User Settings from the left navigation and click on User Types.
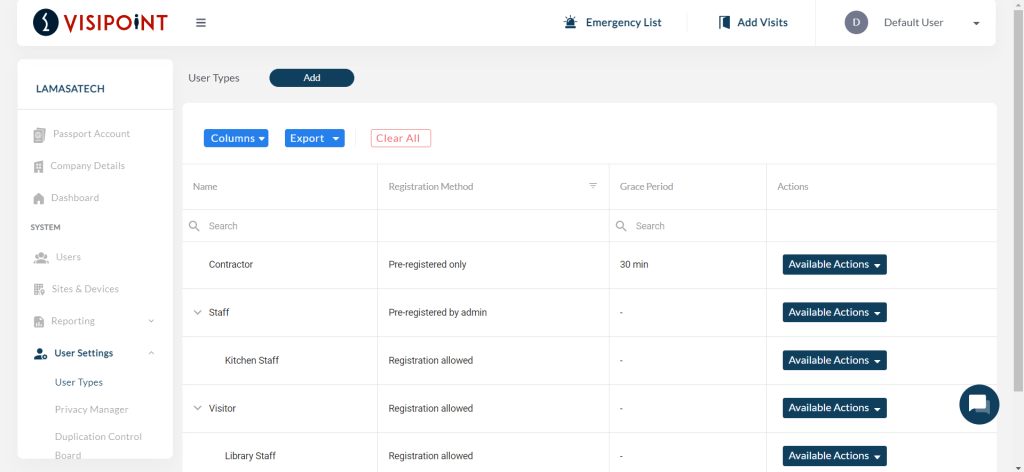
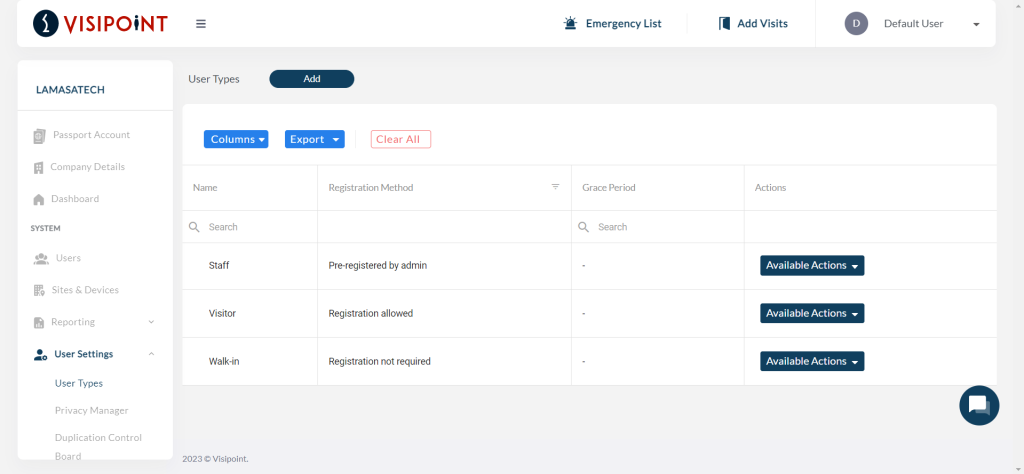
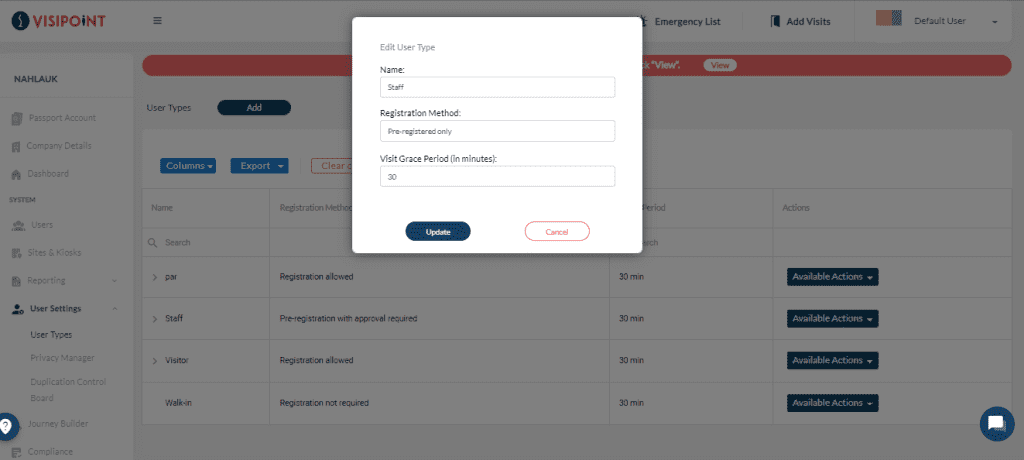
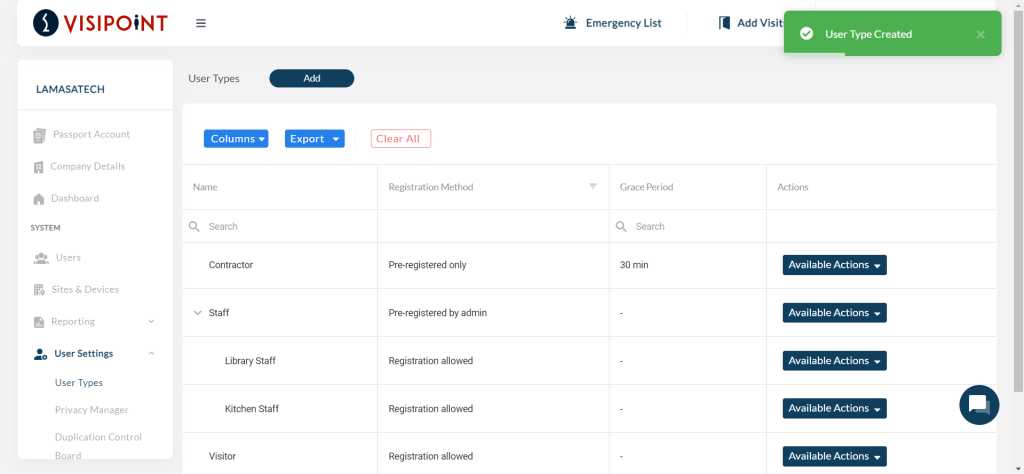
You will then see the User Types grid, shown below.
If you have any child user types created, you will see a dropdown arrow on the left of a user type. You can click this arrow to show the child user types.
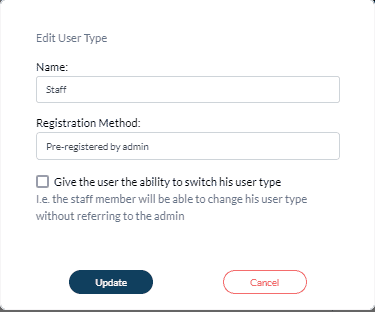
Edit user type
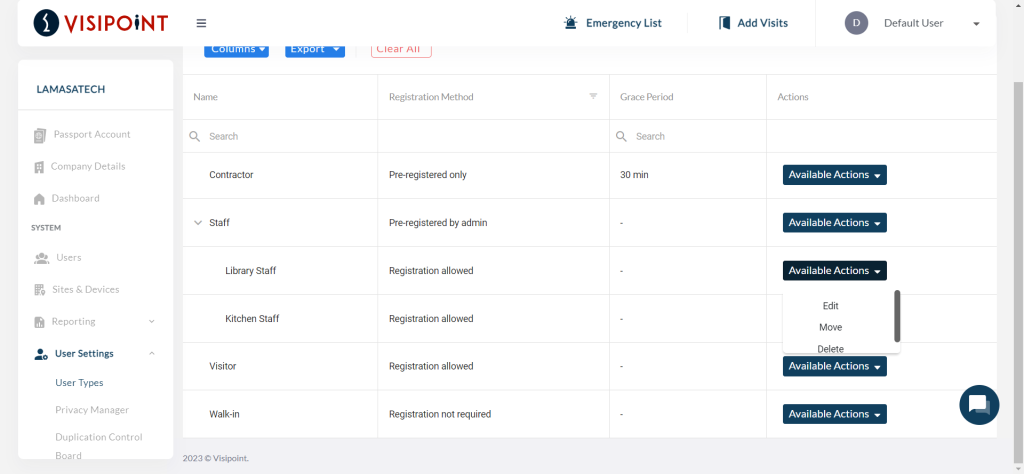
Click on Available Actions next to a user type and select edit.
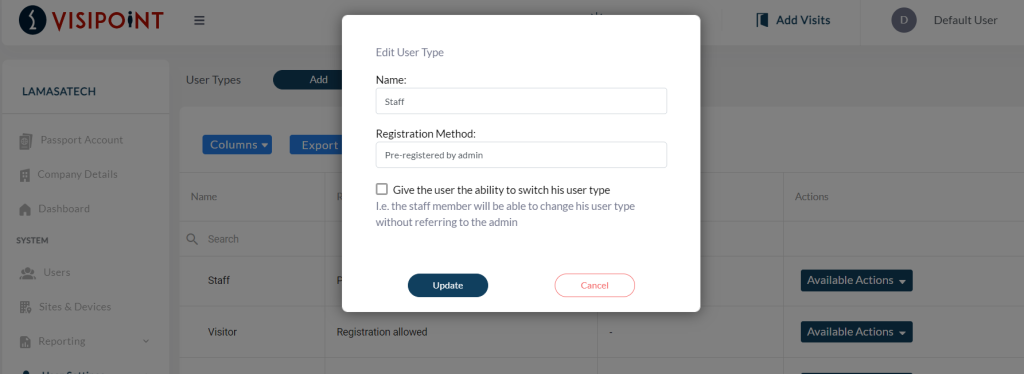
The pop-up window above will appear. You can edit the name of the user type and also change the registration method.
Pre-Registration Methods
Depending on which registration method you select for your user types, different rules around their sign-in process will be set.
Default user types will have the method “Registration allowed” as default.
There are five options to choose from when setting the registration method for your user types. These will be shown in a dropdown list when you click the “Registration Method” box while editing or creating a user type.
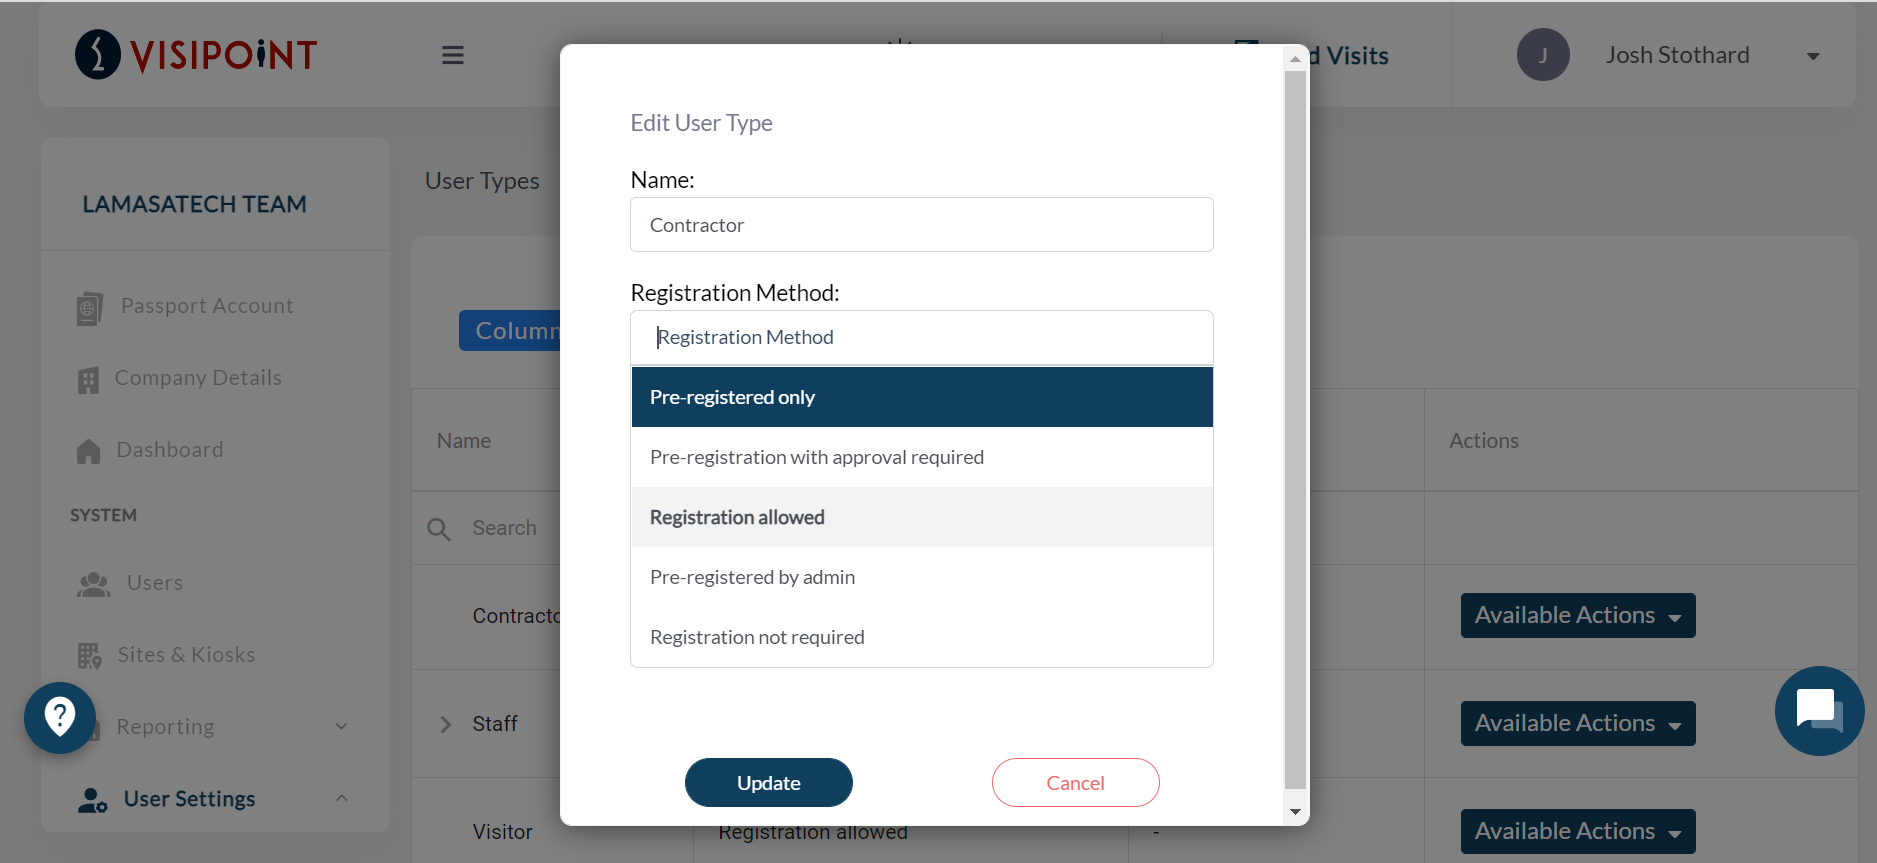
The available registration methods are:
- Pre-registered only:
User types with this registration method must have an expected visit and cannot sign in without one. They must also complete their registration before attempting to sign in.
A new field called Visit Grace Period will also appear. Here you can enter the amount of time, in minutes, that this user type can sign in before or after their expected visit time. For example, if their visit is booked for 10 am and the grace period is 30 mins, they can sign in from 9.30 am to 10.30 am but will be refused to enter if they attempt to sign in at 11 am.
The user’s status will be shown as Expected until the grace period has ended, if they have still not signed in their status will be changed to No show.

- Pre-registration with approval required:
User types with this registration method will have to complete their registration before their visit and the admin must accept it before the user can sign in. - Registration allowed:
Users types with this registration method can register on your kiosk when they arrive as they complete the sign-in process. However, they are also able to pre-register before their arrival if they would prefer. - Pre-registered by admin:
Users can only sign in if an admin has added them to the dashboard. When choosing this registration method you will see a checkbox called “Give the user the ability to switch their user type”. Ticking this gives users the option to change their user type. For example, if a user had signed in to your site as a visitor previously but they are now a contractor, they can switch their user type while completing the registration.
- Registration not required:
This registration method is designed for walk-in users only. These users do not need to provide any registration information upon signing in.
How to change the registration method for a user type
To change the registration method for your existing user types, select the “User Settings” option from the side menu. This will open a dropdown, from which you will click the “User Types” option.
You will then see a grid which lists the user types you have set up.

Here, you can choose to edit an existing user type by clicking the “Available Actions” button and selecting “Edit” from the dropdown. You can also create a new user type on this page by clicking “Add” at the top of the page.
Editing an existing user type
When editing an existing user type, after you have clicked “Edit” the menu below will open. You can then click in the “Registration method” box to open a dropdown menu.
Once you have selected your registration method for this user type, click “Update” and your change will be saved.
Creating a new user type
To create a custom user type you will need a Professional or Enterprise level cloud license.
When creating a new user type, after you have clicked “Add” you will be taken to the page below.
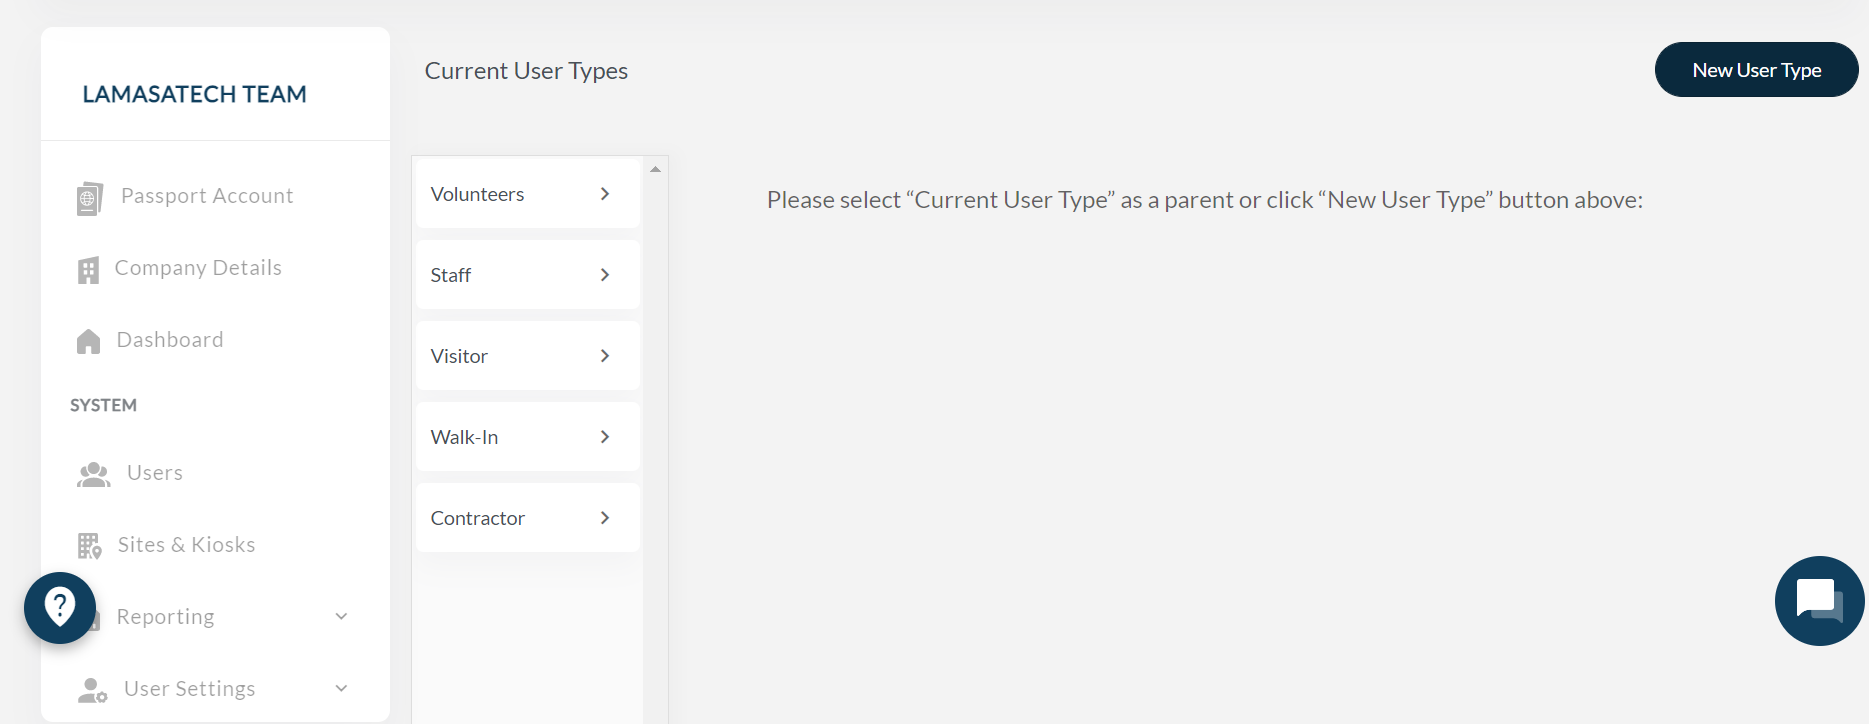
You will then need to click “New User Type” to bring up a form to fill in the details for your new user type.
Enter a name, then select the registration method by clicking into the box to open a dropdown menu.
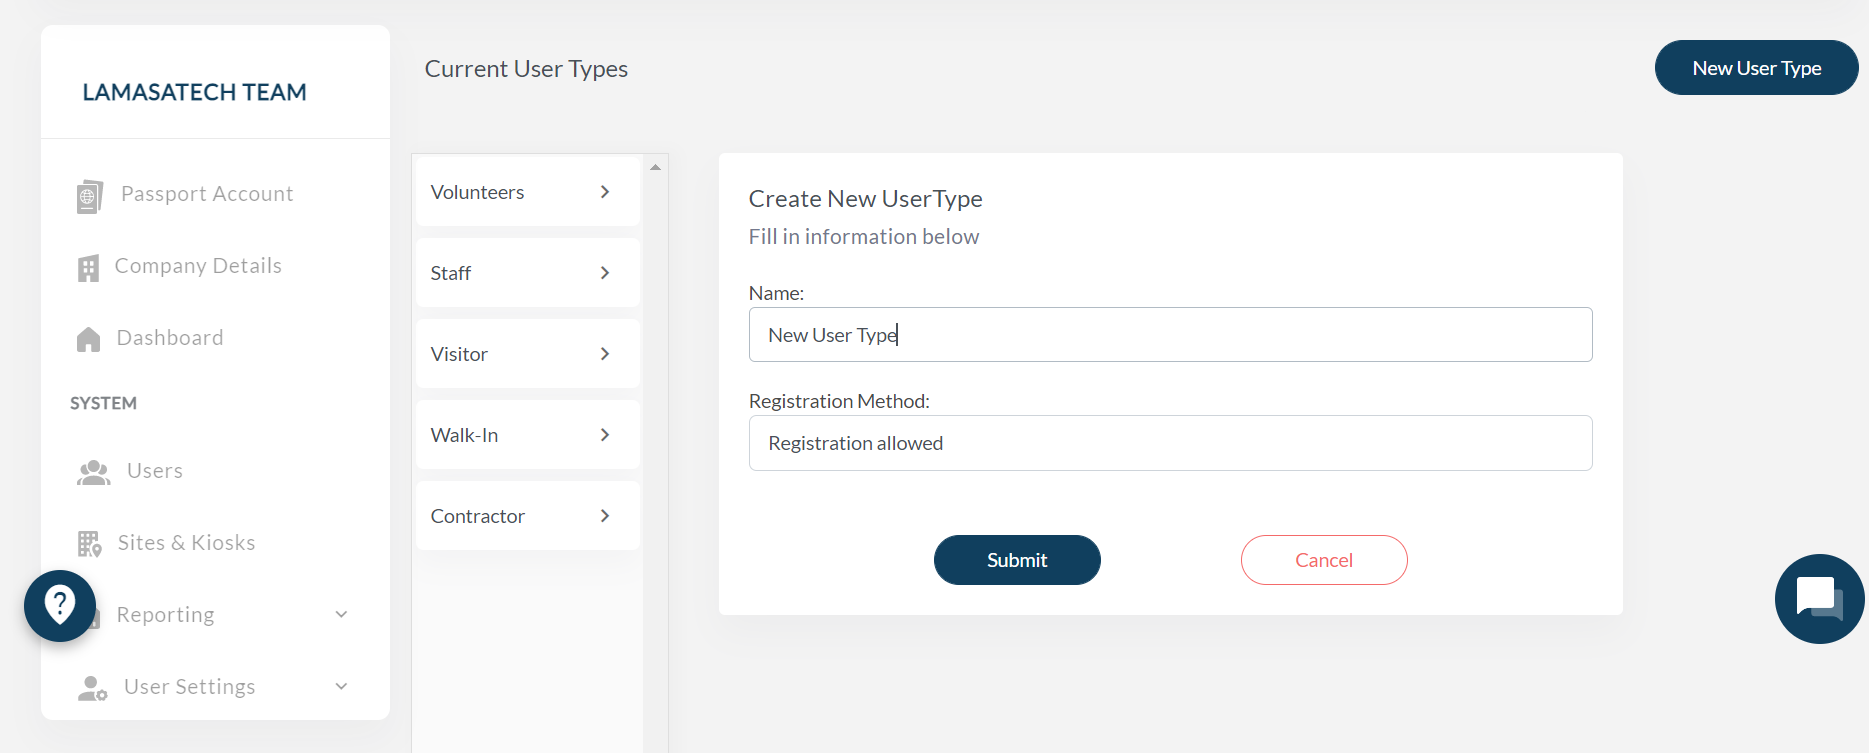
Once you have selected your registration method, click “Submit” and your new user type will be added to your list of current user types.
You can then add your new user type to your entry process by adding it to your journey flow in the “Journey Builder”.
Learn more about the online “Journey Builder” here.
Delete user type
You will only be able to delete user types that you have created as custom user types. You cannot delete the default user types. You don’t have to use them if you have created your own, but it will not give you the option to delete them.
To delete a user type, click on Available Actions next to the user type and select Delete.
You will also not be able to delete a user type if there are users with this user type assigned. You would need to change the user type for these users and then come back to this page to delete the user type.
Create a child user type
To create a child user type, click on the New User Type button on the top right.
Then click on one of the current user types from the list that you want to be the parent.
The following box will appear which confirms which user type is the parent and asks you to add the name of the new child user type. In this example, Staff is the parent user type – as you can tell because Staff is highlighted in blue on list and ‘Staff As Parent User Type’ appears in the box.
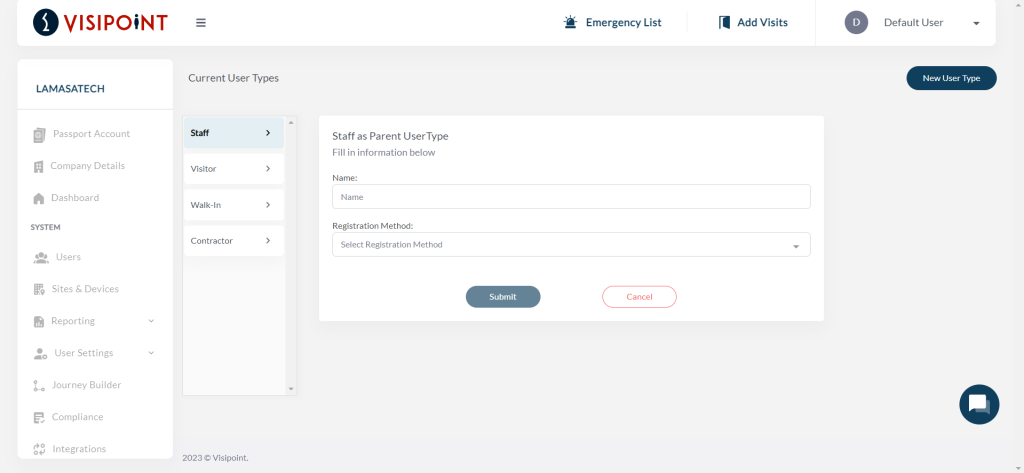
Once done click on submit and the new child user type will be added with a success message as below.
Moving child user types
You can move child user types so they move under a different parent user type.
You can access your child user types from the user types page by clicking on the drop-down arrow next to a parent user type. You will then see the child user types displayed with a checkbox on the left of each child user type.
Click on Available Actions next to a child user type and it will display a drop-down menu. Click on move.
This will show a pop-up window where you can choose a new parent user type and click the Confirm button.
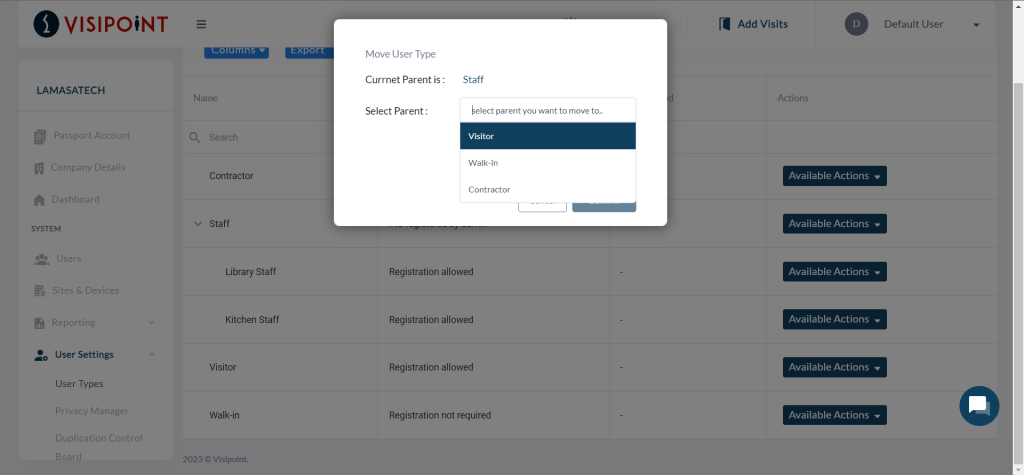
For example, you can see below that we have moved Library Staff child user type over to Visitor parent, instead of Staff parent.