Adding an RFID access card to your staff member’s accounts will allow them to quickly sign in on your kiosks by scanning their card or fob. With VisiPoint, you are able to enrol multiple users for a new RFID access card at the same time from the dashboard.
Selecting Users To Receive A New RFID Access Card
First, from the main dashboard navigate to the user’s page.
NOTE: You must have one kiosk that is appearing online within your Sites & Devices.
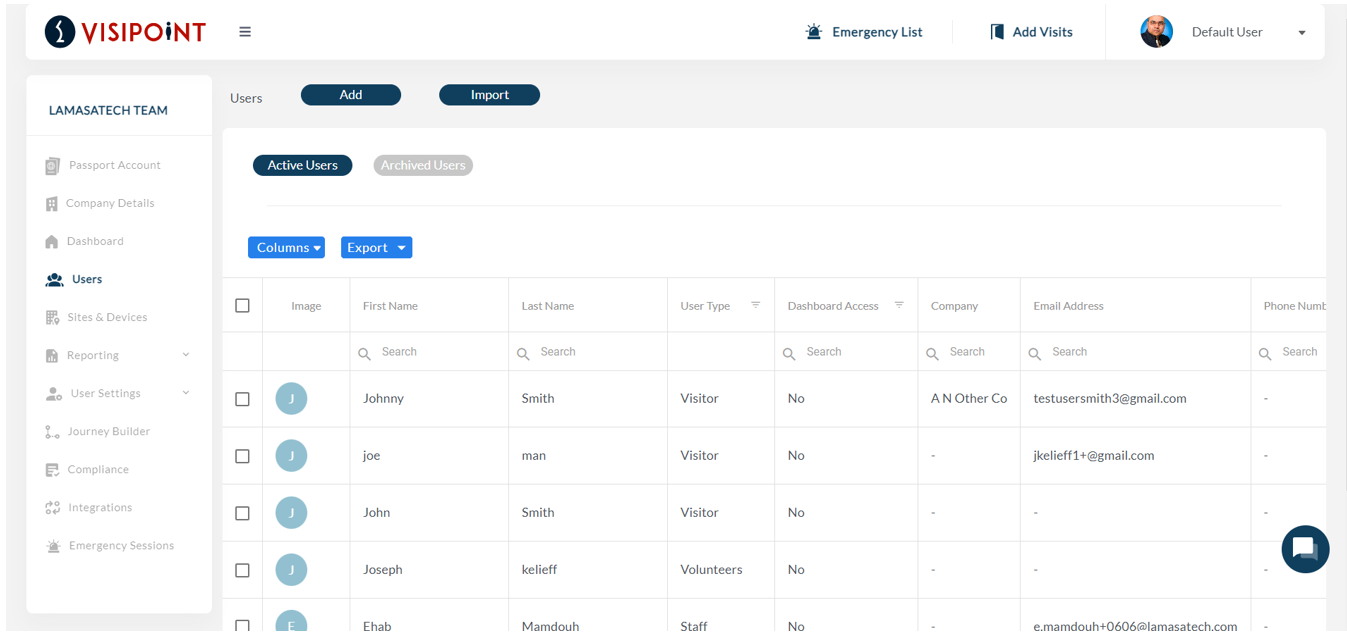
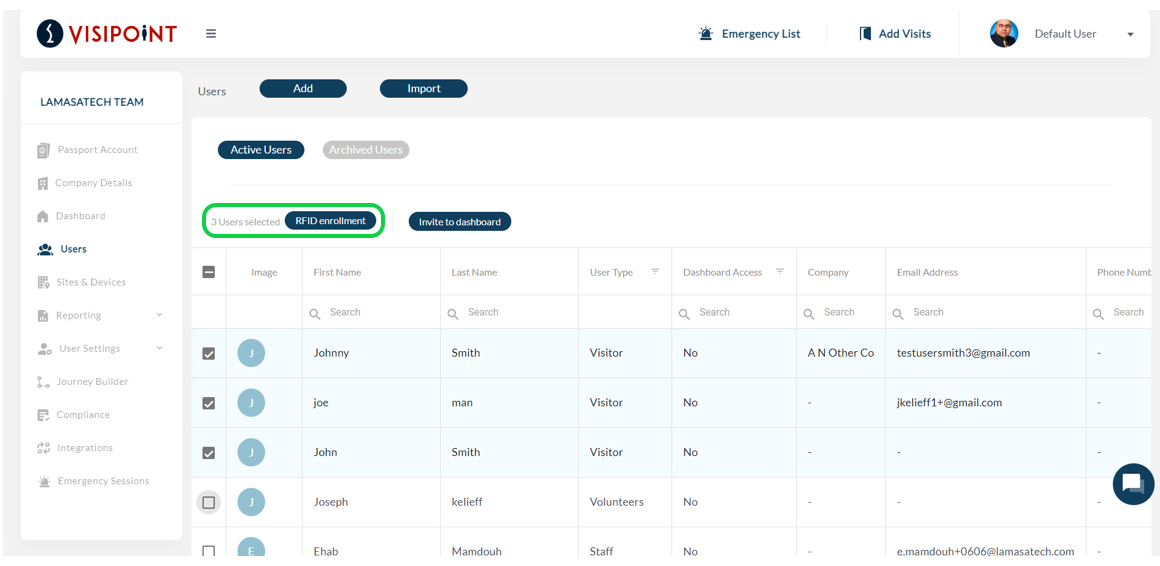
Here, you can see the full list of your users. To begin assigning your users RFID cards, you need to select them by ticking the box on the left of their profile. Once you have selected all the users you wish to, you will then see the RFID Enrollment button appear at the top of the grid. Click this to continue.
NOTE: If you are selecting profiles and the RFID Enrolment button does not appear, check:
- Is RFID selected as an input method within the flow?
- Is the User type of the chosen users within the flow where RFID is an input method?
- Is the user’s profile active and not archived?
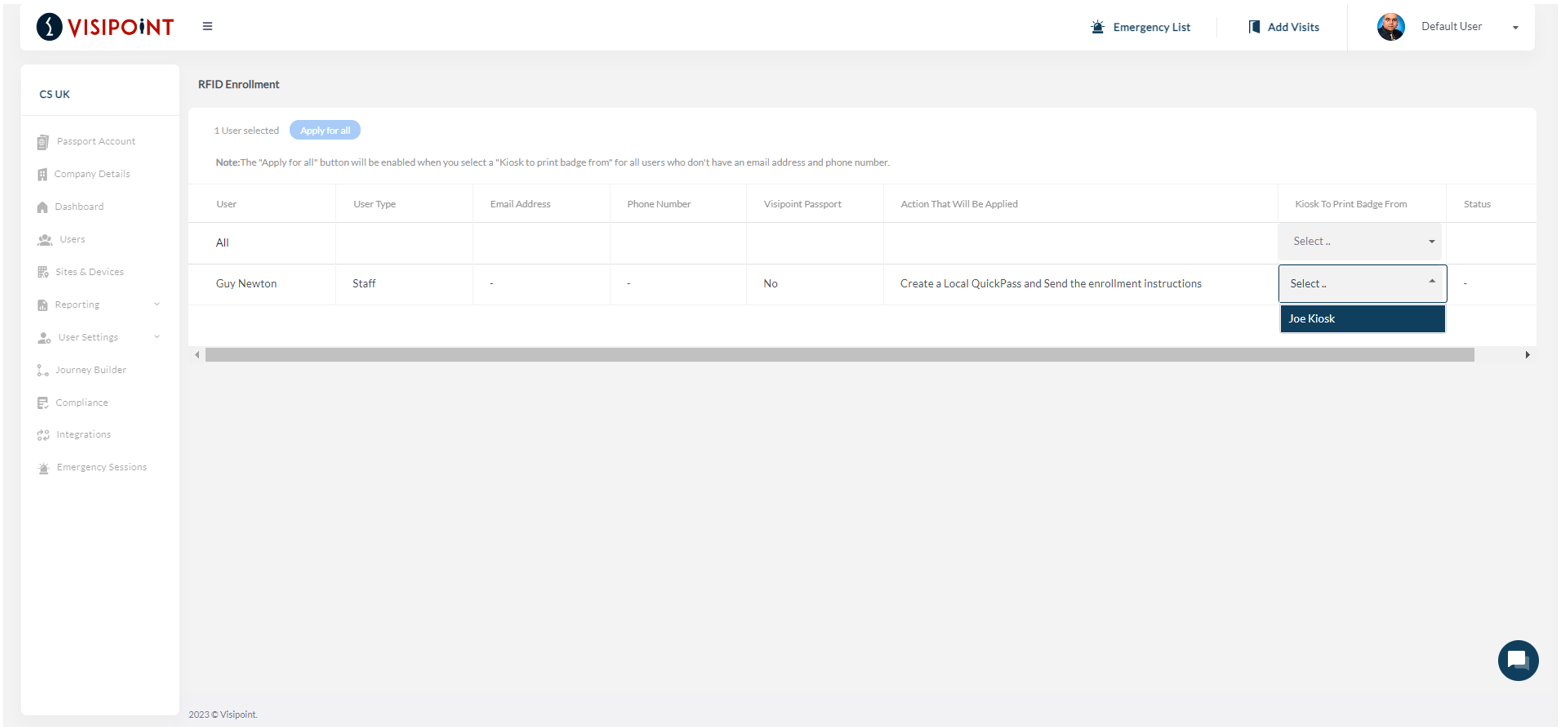
After clicking the RFID Enrolment button, you will be shown the screen below. First, you will see the status of your kiosks and if you will be able to print any required QR codes for your selected users.
You will then see any users who don’t have either a registered email or phone number, they will require a printed QR code that will allow them to link their profile and RFID card. This means for these users you will need a kiosk set up that can print.

Once you have clicked continue you will be brought to this screen.
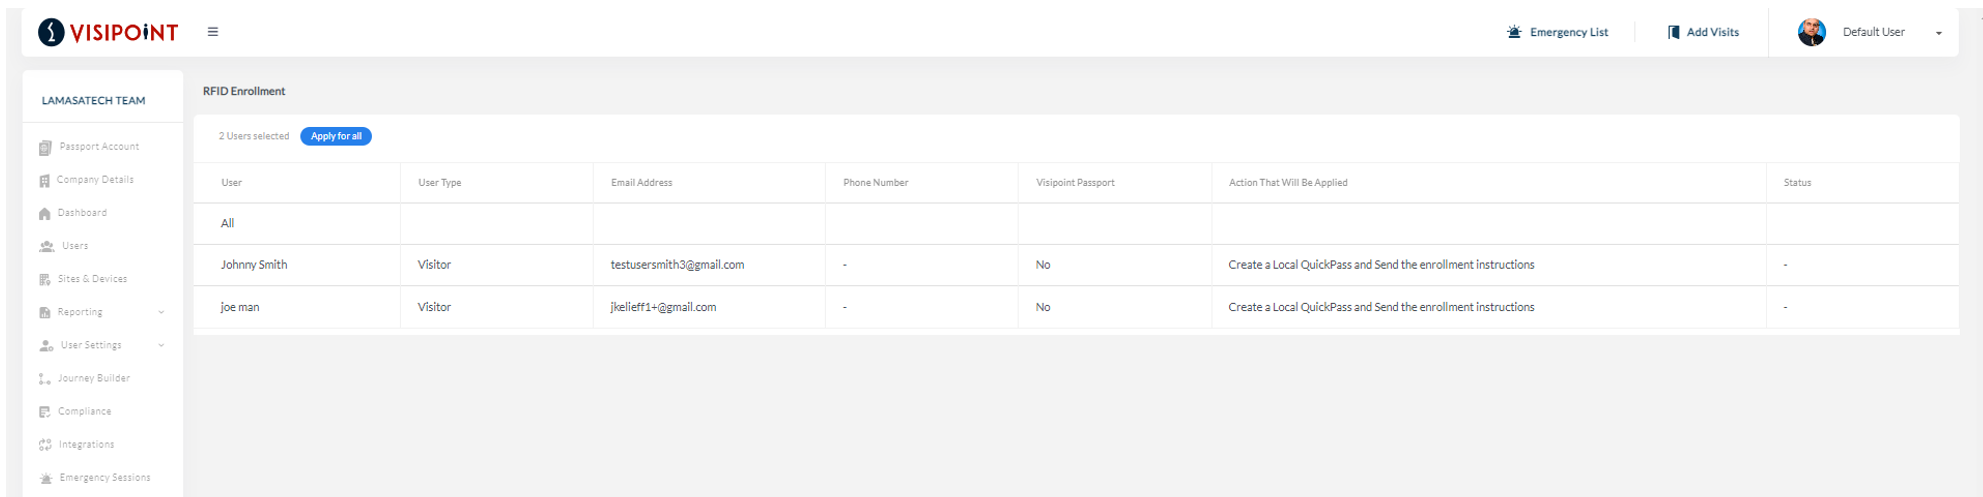
Here, you can make sure all the details are correct for each selected user.
When you are happy with the profile details, you will then need to select Apply for All. The status of each profile will then be displayed, as seen below.
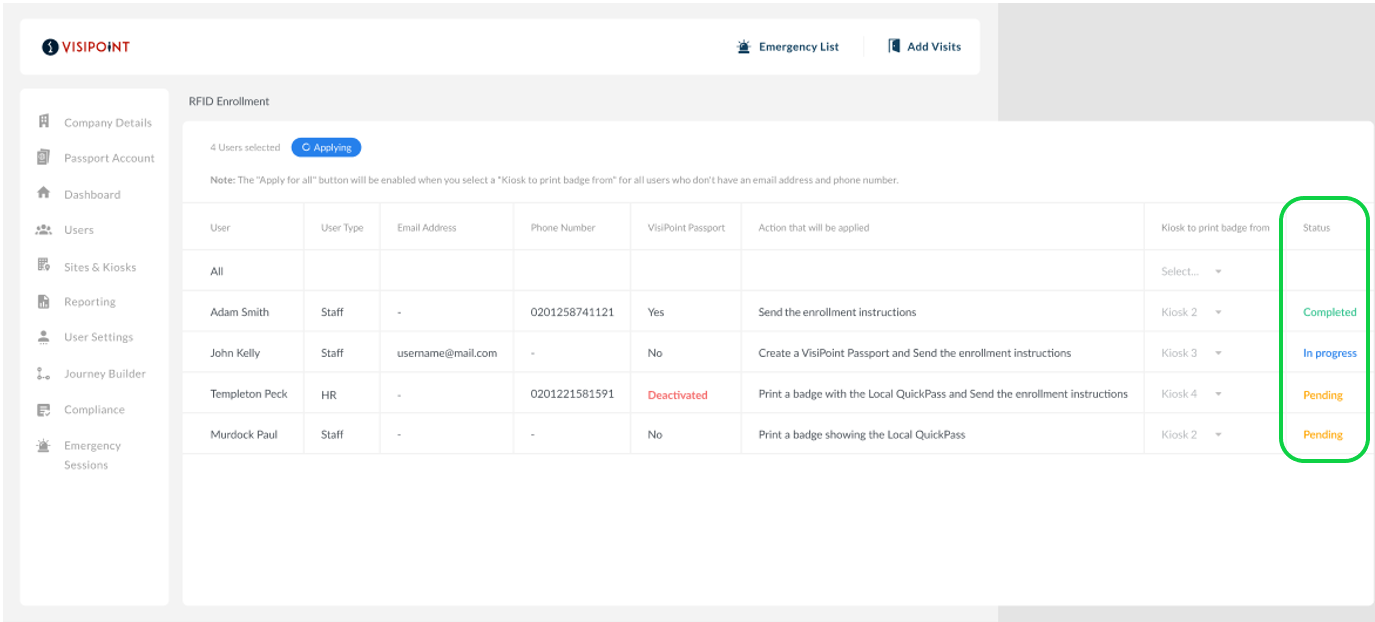
When the status is shown as Completed, the user will have received the instructions on how they can link their profile and RFID card. There are 3 methods of assigning RFIDs to a user’s profile:
- Text
- Printed directly from the kiosk
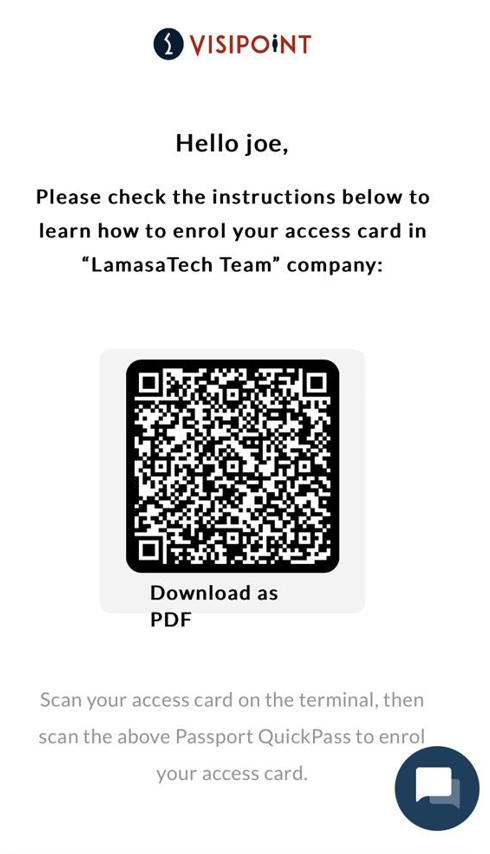
If the user has an email address attached to their profile, they will receive an email with instructions.
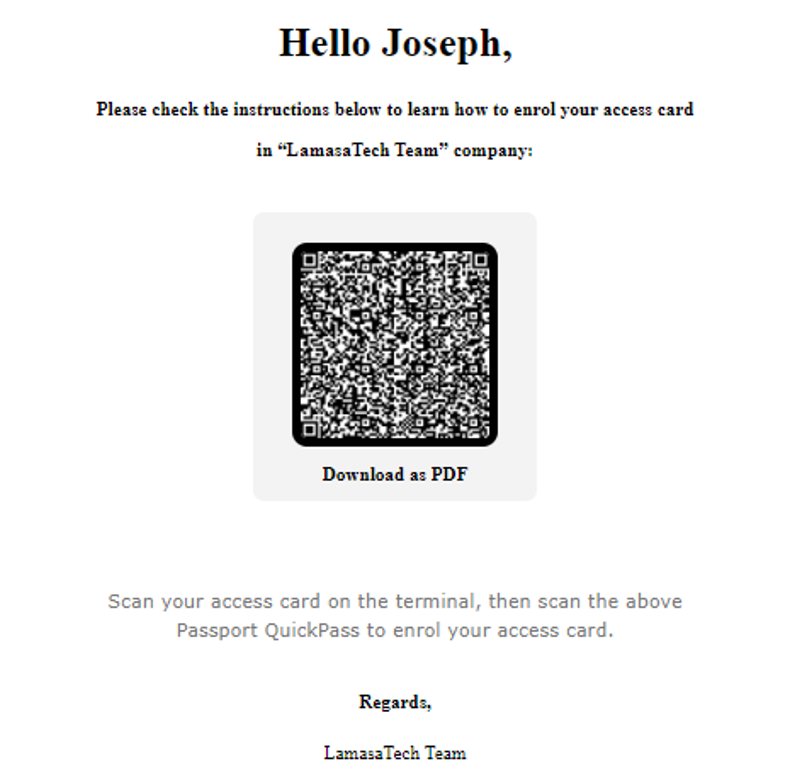
Once they have received the above email, they will then need an RFID card/fob.
The user will have two options, they can download and print off the QR code in the email to use at the kiosk or they can scan it directly from their mobile device.
Next, the user will need to scan their RFID card/fob on the kiosk, the screen will then display a message indicating that it is not recognised.
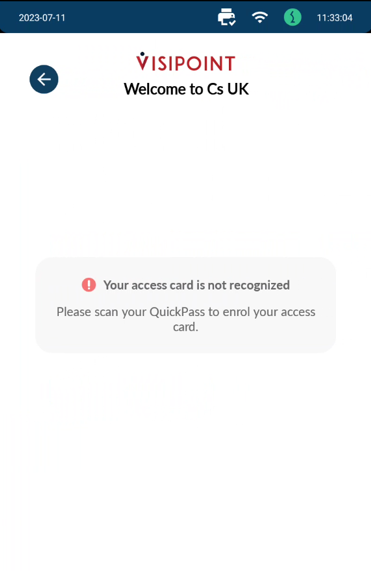
The user will then be asked to scan their QR code to enrol their RFID card/fob.
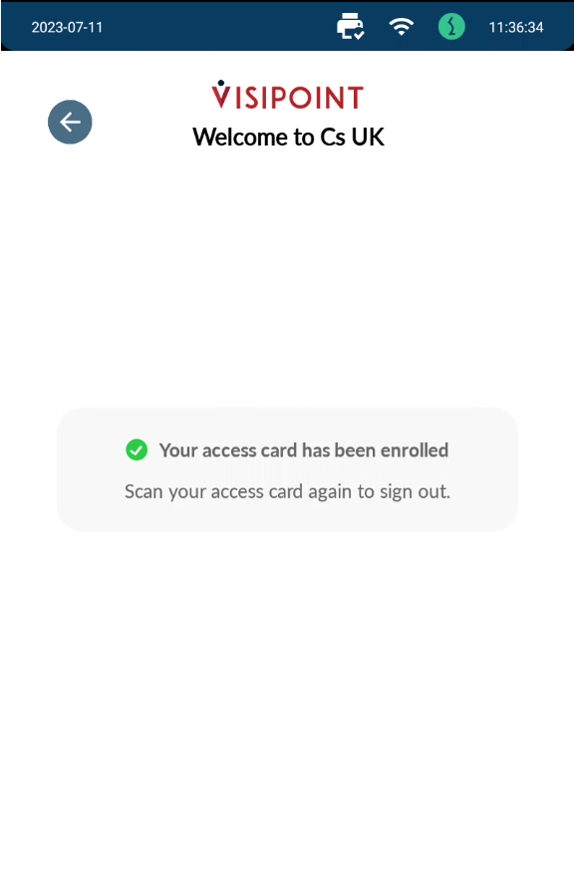
This RFID card/fob will then be linked to the user’s profile. This means they can continue to sign in and out using this RFID access device from this point forward.
NOTE: This can only be used for the site that you have done this for.
Text
If the User does not have an email address, an SMS message can be sent to the mobile number attached to the user’s profile.
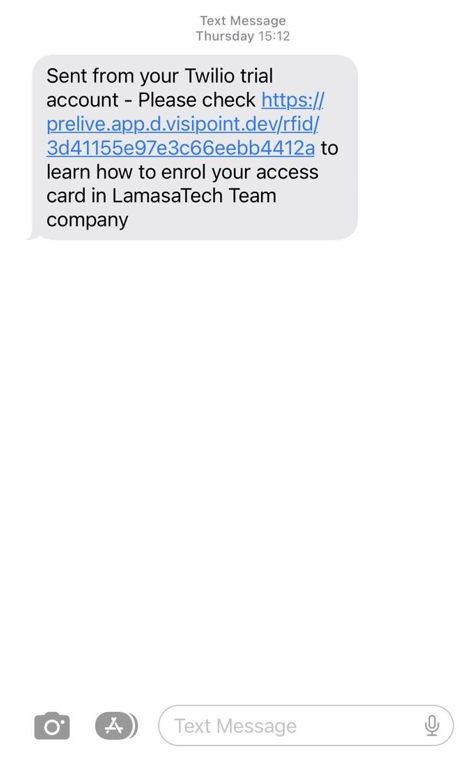
Once the user has tapped the link within the SMS, they will be taken to this screen that will provide them with the QR code.
The user will then need to scan their RFID card/fob on your kiosk. The following screen will then be displayed on the kiosk.
This will indicate that the RFID card/fob is not recognised by the kiosk and will ask the user to scan the QR code they received to register their RFID card/fob to their profile.
This RFID card/fob will then be linked to the user’s profile. This means they can continue to sign in and out using the RFID access device from this point forward.
NOTE: This can only be used for the site that you have done this for.
Direct Print
If the user does not have an email or phone number, you can print the QR code required from a kiosk with a connected printer.
Once you have selected the users who will be receiving an RFID fob/card you will then need to select which kiosk the QR code will be printed off at.
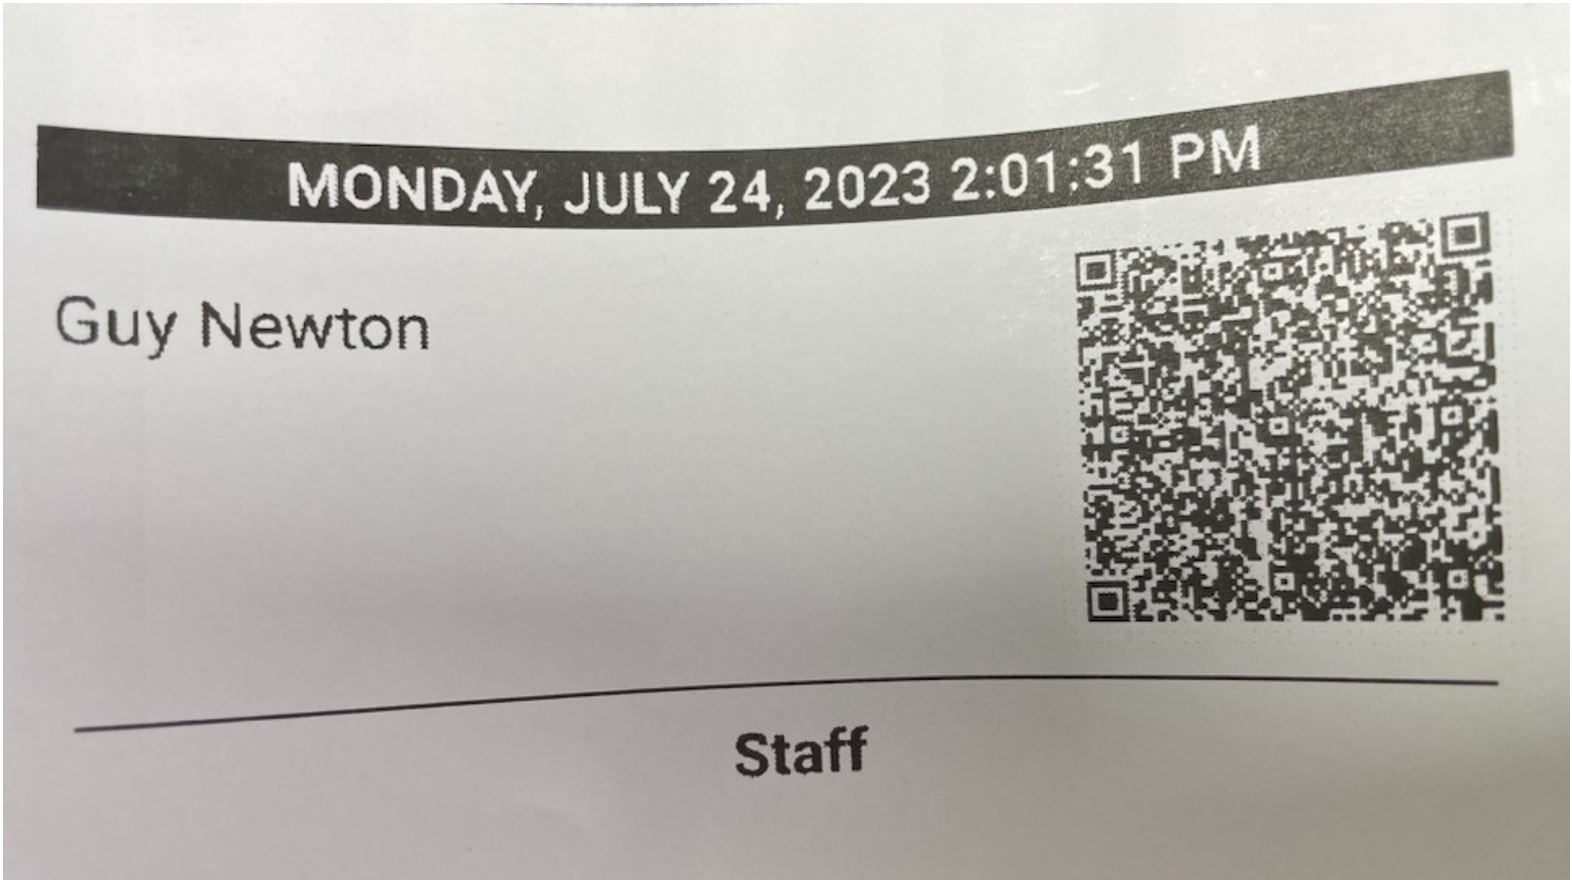
You’ll then be able to collect this from the selected kiosk printer. The printed QR code will appear as seen below.
Next, the user’s RFID card/fob will need to be scanned on the kiosk.
This screen will be displayed indicating that the RFID card/fob is not recognised by the kiosk. The user will be asked for the QR code that was printed off to be scanned to register the RFID card/fob to their profile.
This RFID card/fob will then be linked to the user’s profile. This means they can continue to sign in and out using this access device from this point forward.
NOTE: This can only be used for the site that you have done this for.
Manual Input
If you already know the number that is attached to the access card, you can add this number to the profile of the user.
From the Users section in the left side menu, find the user who has the access card.
You will then need to edit this user’s profile by clicking the Available Actions button and then selecting Edit.
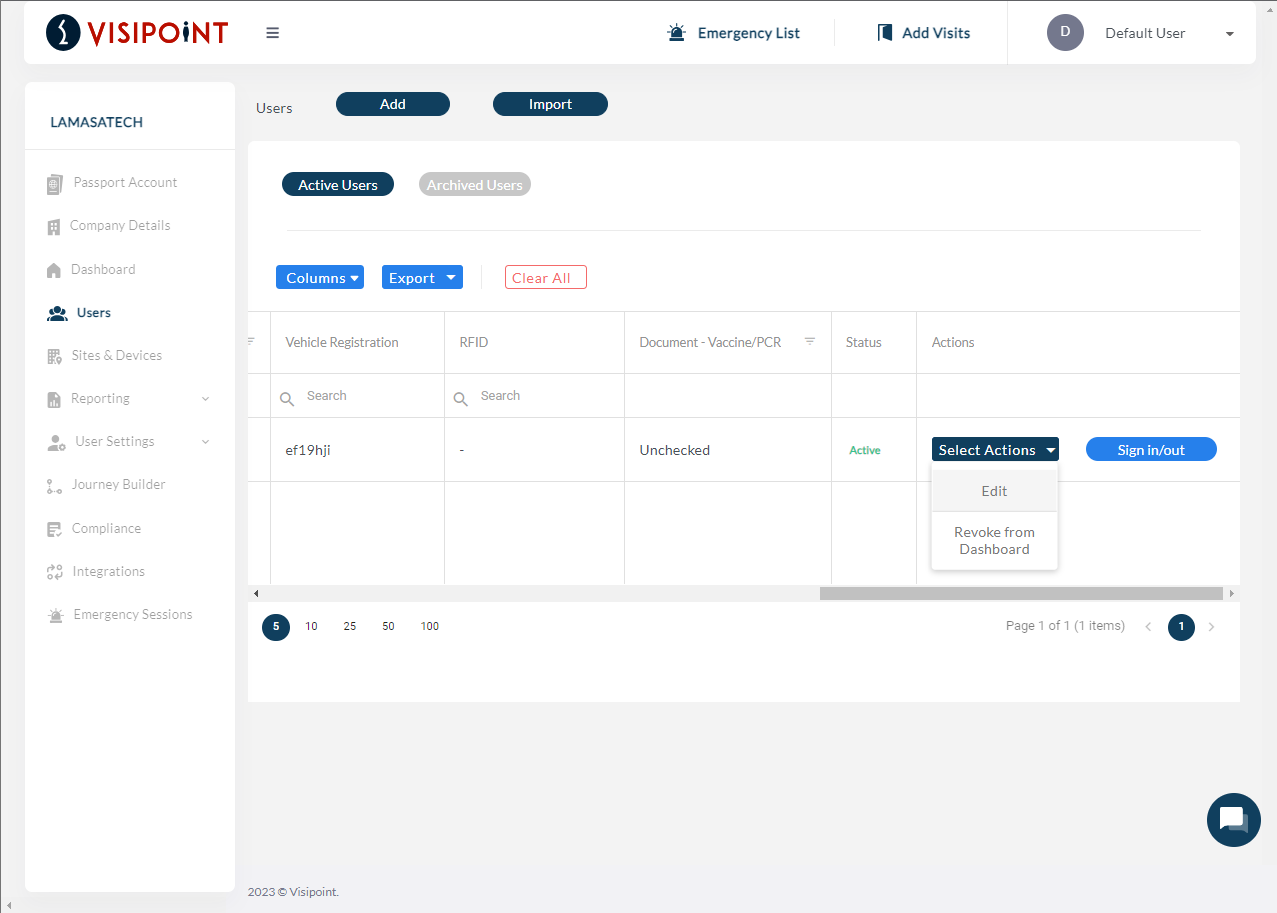
A pop-up screen will appear and you’ll need to locate the RFID box. This is where you will enter the number for the access card.
The number that is entered in this space must match the number associated with the access card for it to work.
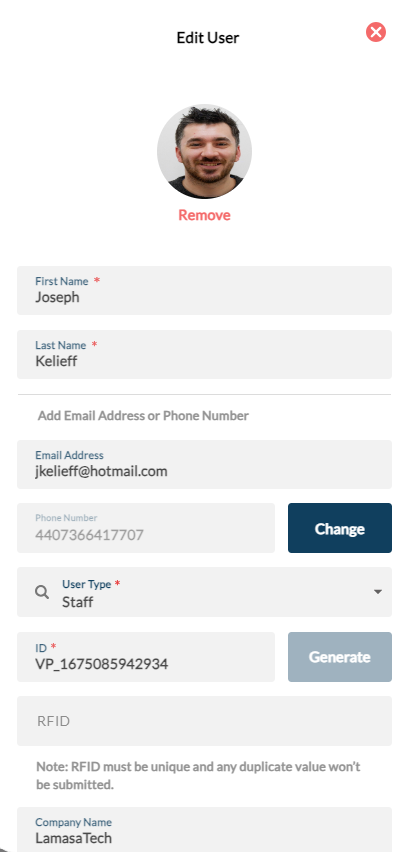
Once you have entered this number you simply need to click save changes at the bottom of this pop-up screen.
Once complete, the user can now use this access card to sign in/out on VisiPoint kiosks.