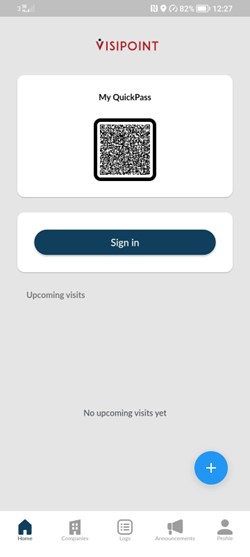
With Mobile and Remote Sign-in, your users can now sign in much more easily and quickly through their mobile devices.
Mobile sign-in allows users to sign in from their smartphone, when they are working on site, such as in one of your office buildings. This uses geofencing technology to detect when users are within your site zone.
Remote sign-in allows employees to sign in from their smartphone when working remotely, such as working from home.
Mobile Sign-In
Geofencing combines the awareness of the user’s current location and their proximity to your site. When the user visits your location, Geofencing will trigger a notification on their app to begin the sign-in process.
For Admins – How to Set Up Mobile Sign-In and Geofencing
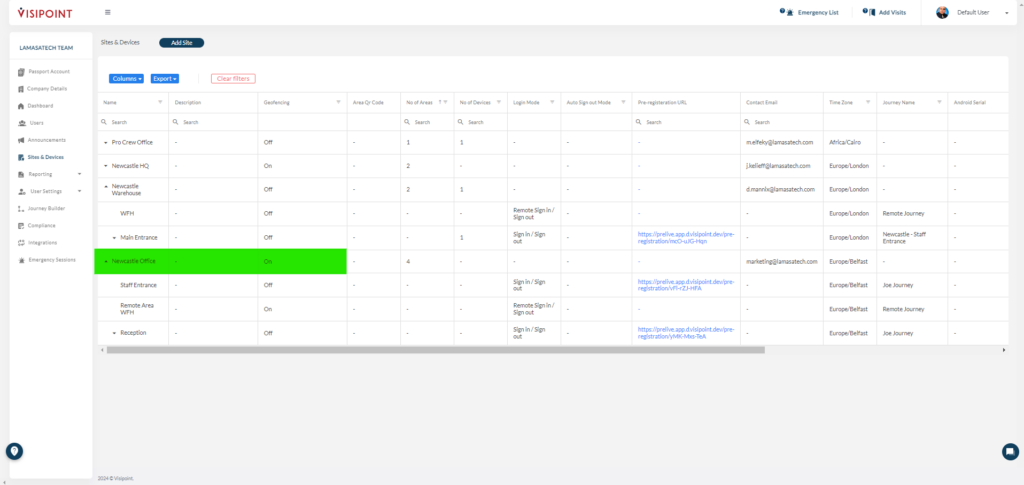
To begin setting up the Geofencing feature let’s start from your dashboard. From here we would select the Sites & Devices section.

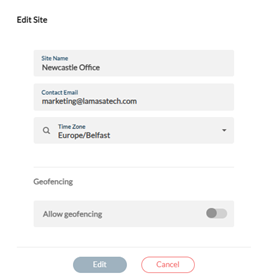
You will then need to select the site where the Geofencing will be established. Once you have decided, go to the far right and select to edit the Site. In the pop-up you will find the Geofencing feature and the option to allow Geofencing. Toggle this now.
You will then be shown some information to agree to, and once completed, you can then begin to set the location. Click on the location and you will be given access to the map. You can search for a specific location from the search bar on the left of the map or manually set the location.
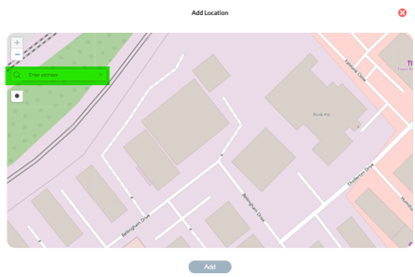
Once you have decided on the location you will then click the circle, which is found underneath the search bar.
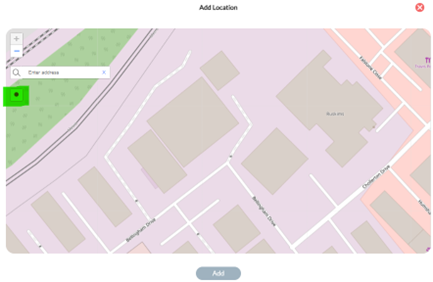
This will allow you to dictate the area that will be affected once a user crosses that threshold.
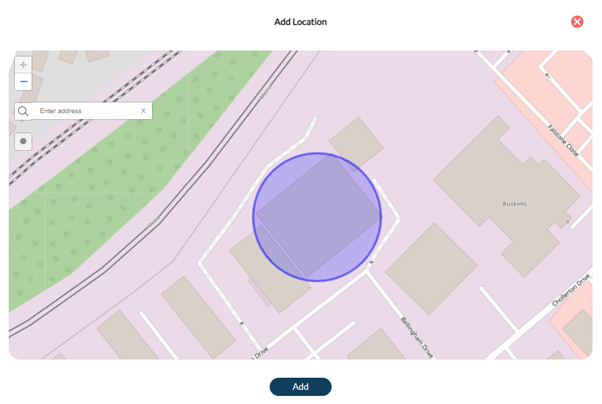
Once you have clicked add, you will see the location is saved, click edit to save the change.
Going back to the Sites & Devices section you will also see that for this site the Geofencing has been turned on.
For any users who wish to use this feature, they will need to toggle the settings in their app to allow this for them. This will be found in the profile at the bottom right of their app and then at the bottom of the page by scrolling down.

The final step will be adding the Geofencing as an input for a specific user group within the flow and journey that is in relation to the site.
For All Users – How to Use Mobile Sign-In
Once you have arrived at the site that has Geofencing enabled you will cross the threshold that has been assigned from the above steps. When this happens, you will receive a notification through the companion app on your mobile device.

When you tap on the notification it will take you to the app to begin the sign-in process.
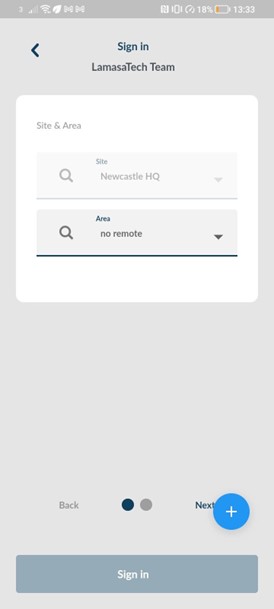
You can begin by tapping on Sign-In.

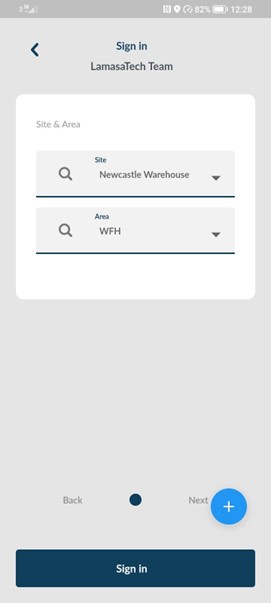
From here, the sign-in process will be the same as the kiosk. First, you would select the area you are signing into.
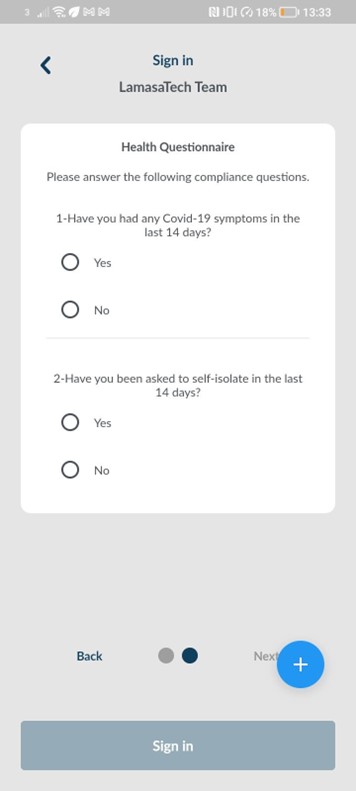
If you have specific requirements for users such as the compliance to be completed below, then this will also appear.
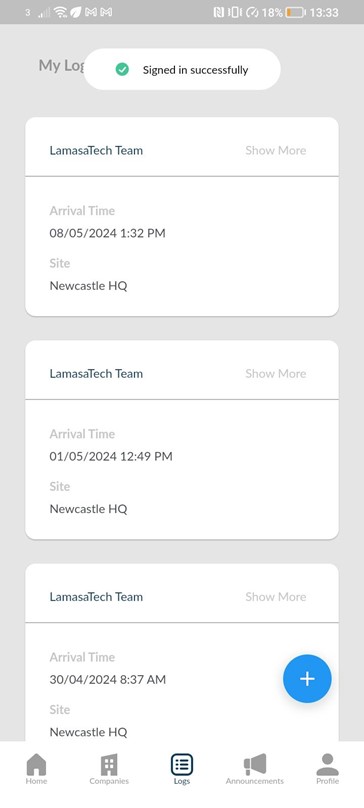
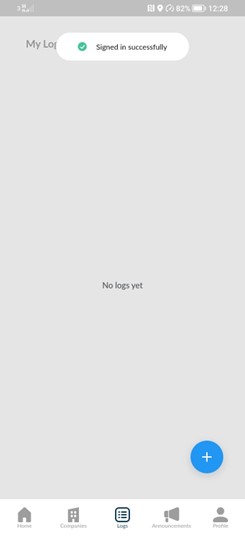
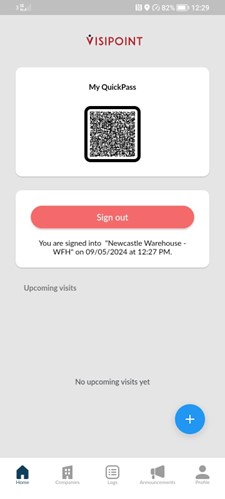
Once the user has completed this, you will be able to sign in and a notification will appear at the top of the screen.
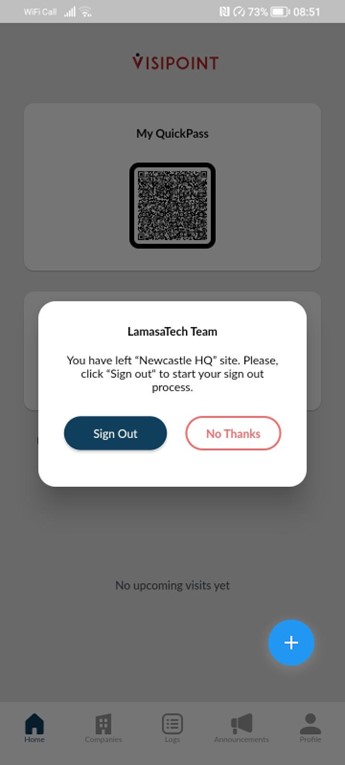
When you are finished work for the day or need to leave the site you will also get another notification. This will also reflect and give a more accurate emergency list.
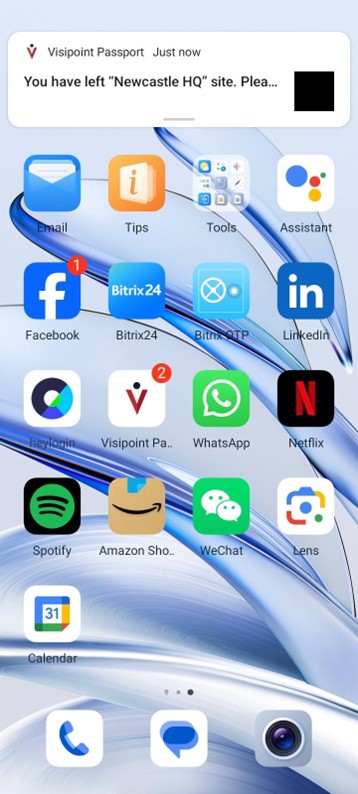
Once you have tapped on the notification you will get a prompt similar to when you have signed in. This time you will tap the sign out.
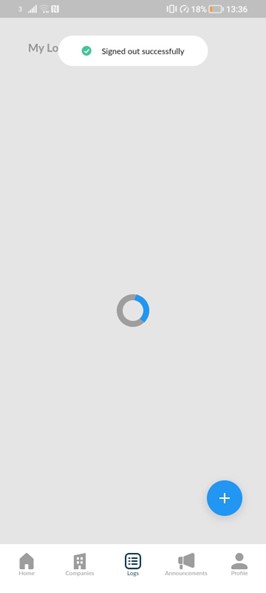
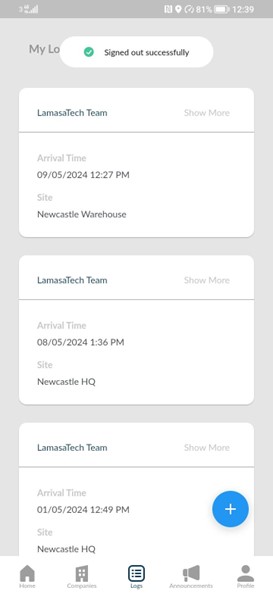
Once completed you will get a notification that you have successfully signed out.
Remote Sign In
Remote sign-in is helpful for your remote and home workers. This has a different set-up compared to the Geofencing as it focuses on an area whereas the Geofencing feature focuses on a site.
For Admins – How to Set Up Remote Sign-in
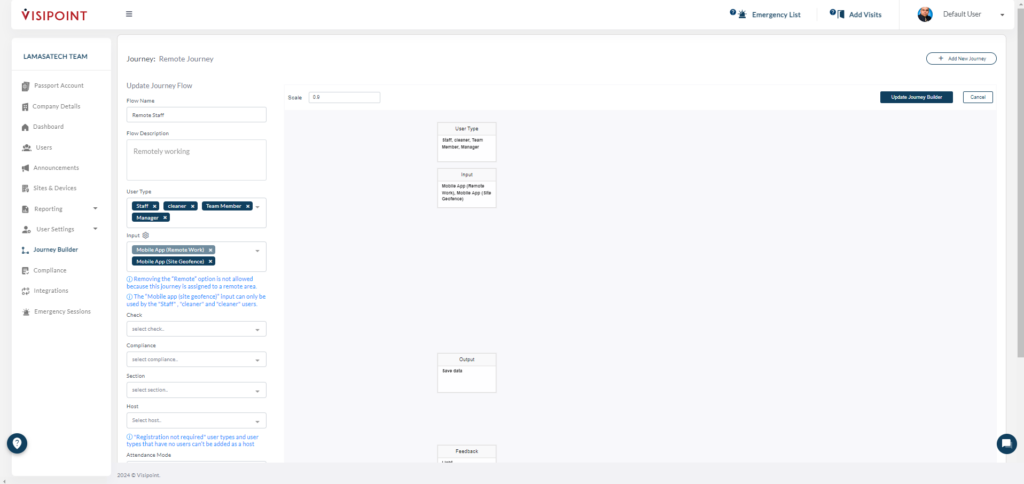
To begin setting up the Remote Sign-in feature let’s begin from your dashboard. From here we would select the Journey Builder section.
To make things clearer for you, it is best to create a separate journey for the remote sign ins. Once you have created this, we can now add in a remote flow. Now you will be assigning specific requirements for the users who are signing in remotely. Once complete save this updated flow.
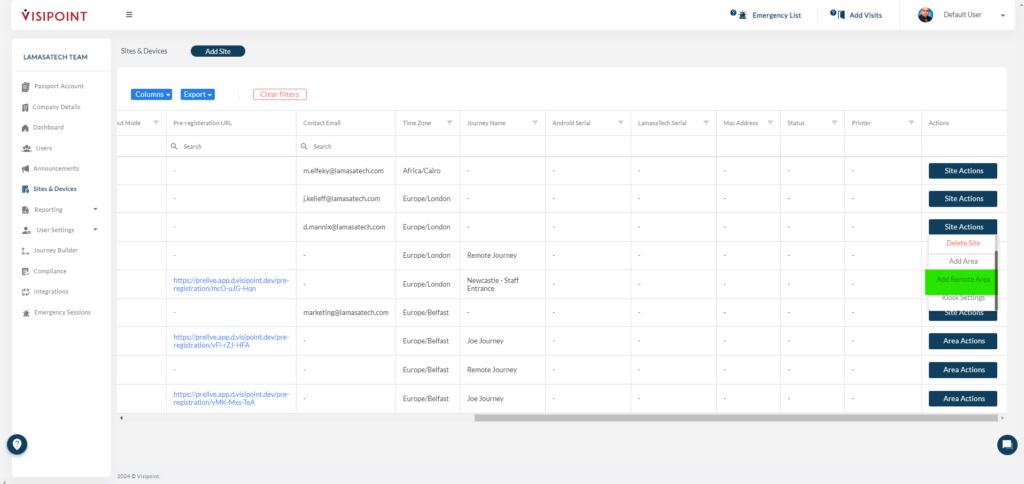
Next, we must assign this journey to an area specific for remote sign-ins. So let’s now create that area. From the dashboard, we would select the Sites & Devices section.

We will then need to determine the site that this is for and then create a remote area which can be found in the far right settings of the site.
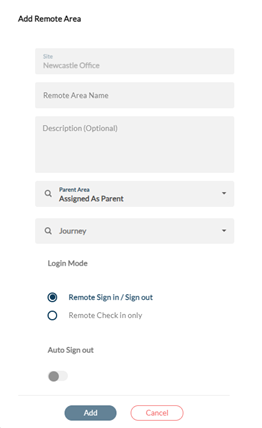
To set up this remote area, it is very similar to configuring a normal area on the dashboard, simply select how you would prefer this remote area to be. This is the time to assign the remote journey that we have created for this area specifically.
Once complete we are now ready for our remote and home workers to begin signing in to this remote area.
For All Users – How to Use Remote Sign-In
Now that we have prepared an area and set the requirements for signing in remotely, our users can now begin doing this.
When the user is ready to sign in, they will access the app and then tap the sign in button.
They will then need to select the remote area that is found within the site of choice.
Once complete they will then receive a notification upon successful sign in
NOTE: If there is compliance to be completed this will also appear.
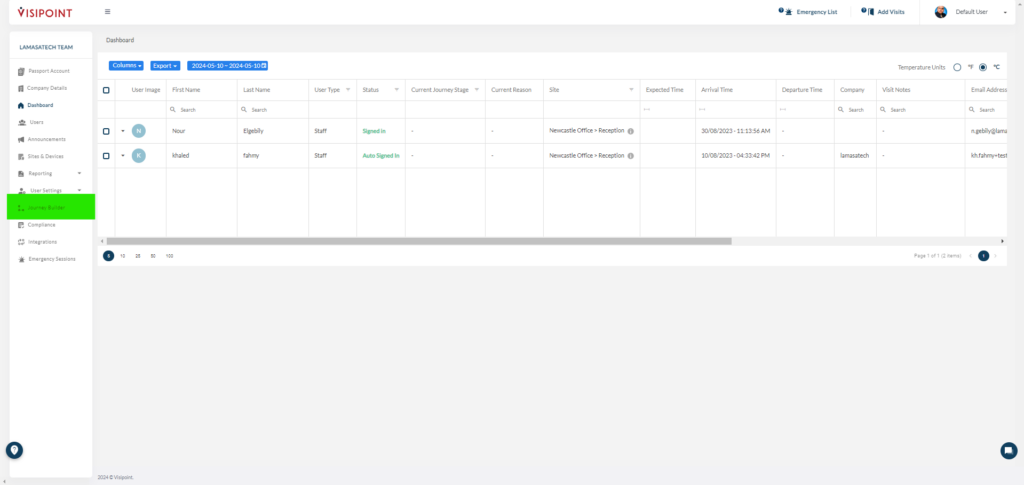
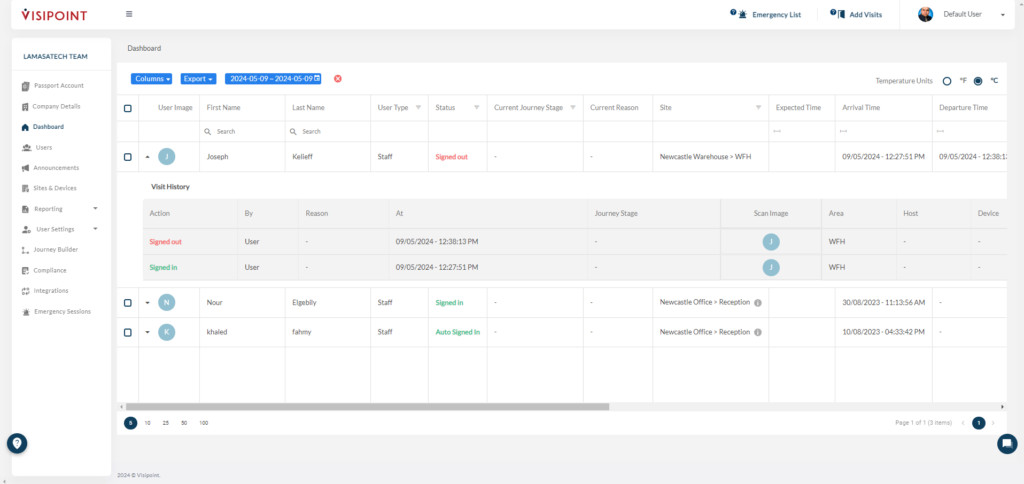
We can also see the sign in on the dashboard. If you notice the area, we can see that it matches the remote area that you would have created.
When the worker has completed their day they simply need to go back into the app and select sign out.
They will then receive a notification upon that successful sign out.
For remote sign in, we can also see where the user is when they have signed in. This will either be a pinpoint location or a generic location. Within the dashboard if you select the drop down arrow next to the person signing in remotely we can then click view in the location column.
This will give us a location on the map depending on the users GPS coordinates. This is very helpful in making sure that the staff who may be out on a call can get immediate assistance in an emergency.
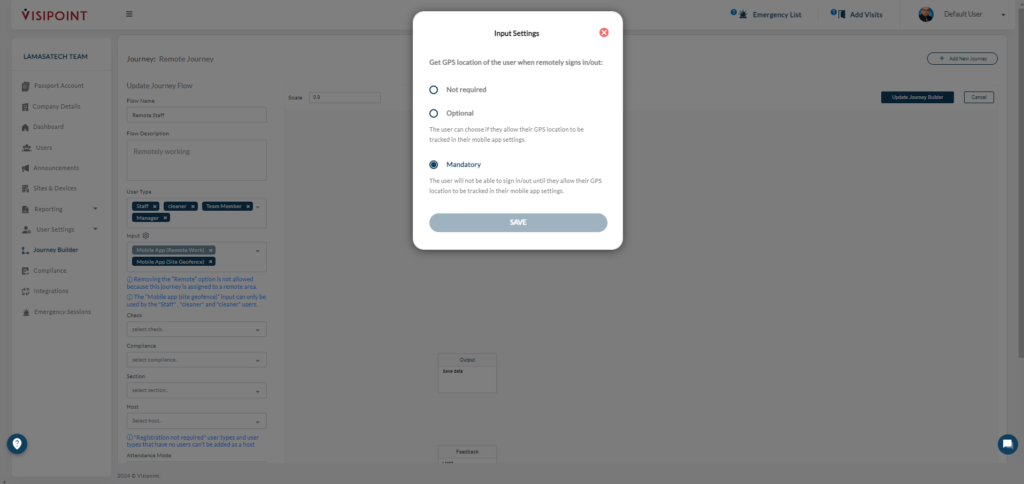
You can set this option from the Journey Builder by selecting the cog icon next to input when the remote sign-in has been selected.