There are 3 different kinds of permissions that you can give to the users who interact with your company dashboard.
- Admin – Who has full access to the dashboard, allowing them to see everything and act as an administrator of the system.
- Fire Warden – Who has limited access to the dashboard but can use emergency lists and pre-register visits.
- Employee – Who can arrange pre-registered visits for anyone that is coming to the Site on a specified date and time.
Admin
When you first set up your company dashboard, you will be the only admin for the system. You may want to add more Admins to help manage the dashboard or to cover in the event of your absence.
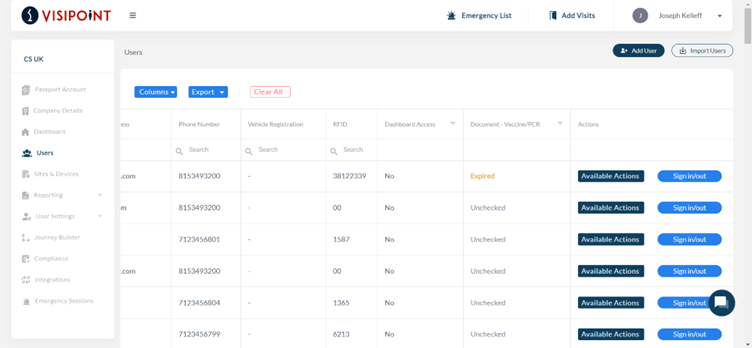
To give someone else Admin permissions, go to the Users section from the dashboard.

Within the grid, you will see all of your users. Go to the right of the grid and view the Dashboard Access column. If it shows No then that user does not have any permissions to operate the dashboard.
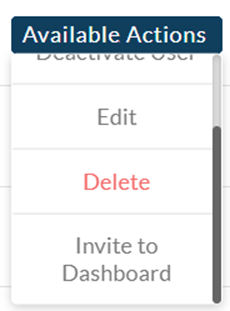
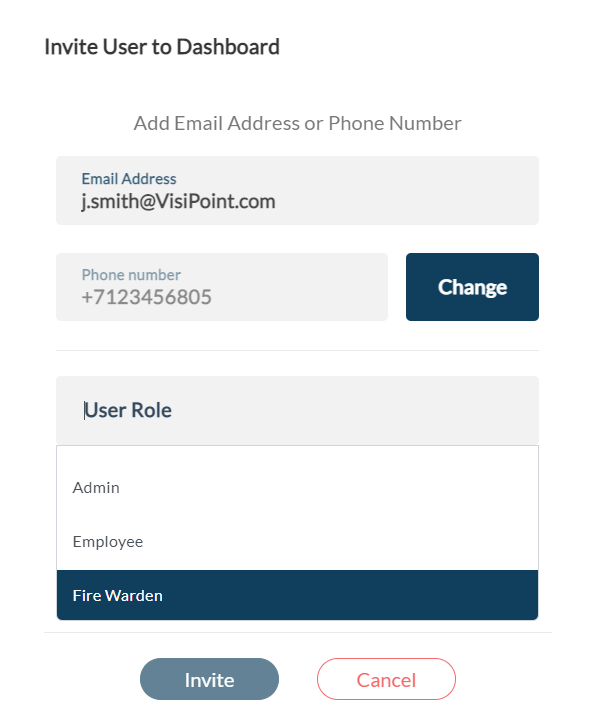
Clicking the Available Actions button will bring up a dropdown menu. Within this, you will see the Invite to Dashboard option. Select this to begin the process of adding them as an Admin.
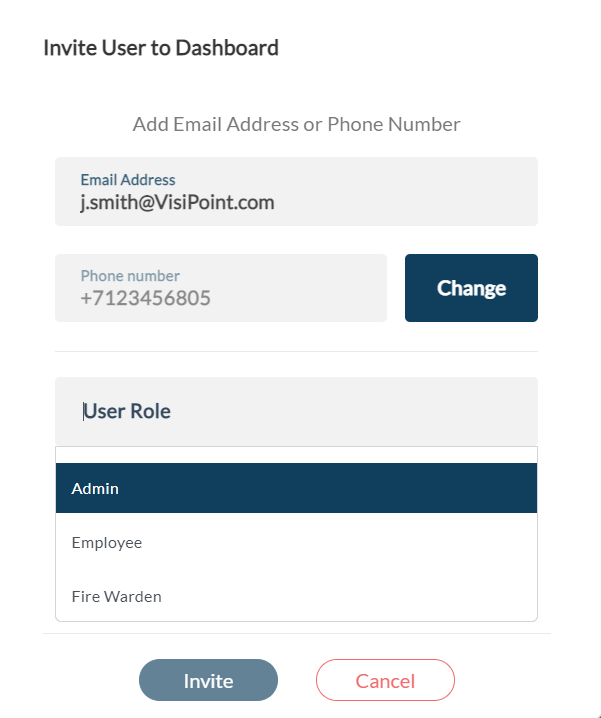
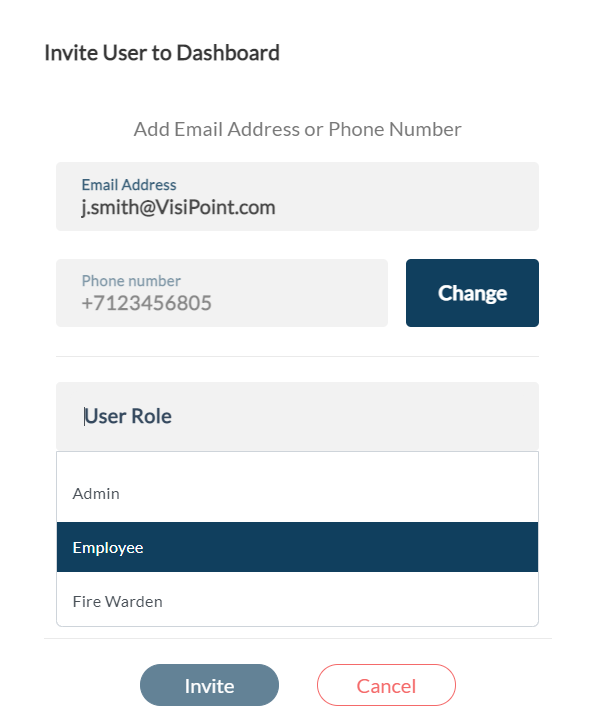
Here you need to input their details and then below you can select to have them as an Admin. They will then receive an email to accept this access once you click Invite.
They will receive an email that looks like this.
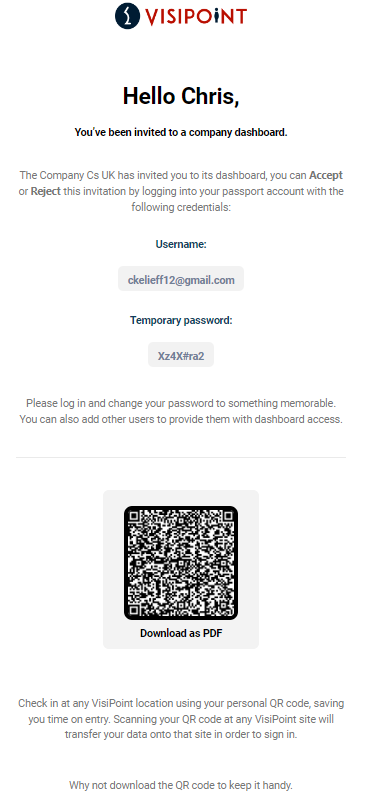
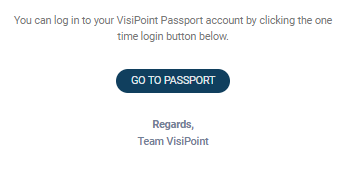
They will then need to click Go to Passport. Once complete, they will have access to the dashboard.
They will see everything you can see on the dashboard and be able to do the same actions as any system admin.
Fire Warden
You may want more people to help oversee any evacuations and ensure that everyone is safe. However, you may not want these users to have full access to the entire dashboard.
To give users Fire Warden permissions, click the Available Actions button and then Invite to the dashboard. You can then insert their details, just like the process for inviting someone to be an Admin. However, here you will select the Fire Warden user role instead. Then click invite.
This will send an invite to their email and allow them access to the dashboard, but they will have limited access to the Emergency list and to add visits only.
Employee
You may want to give some users the ability to pre-register visitors for future appointments, but again not allow full access.
Following the same process as the Admin and Fire Warden permissions, you’ll need to click the Available Actions button next to the chosen user and then select the Invite to dashboard option.
Fill in the user’s details, then select Employee as their user role.
The user will then receive an email to accept this role on the dashboard. Once they have done this, they will have limited access to the features of the system but will be able to organise any pre-registered appointments for visitors.