You can add new users to the system at any time. You’ll have the option to add users individually or import user lists in bulk.
To add new users, navigate to the Users section from the left navigation.
In the top right, you will find a button labelled Add User.
Add User
When you click the Add User button you will be presented with a pop-up.
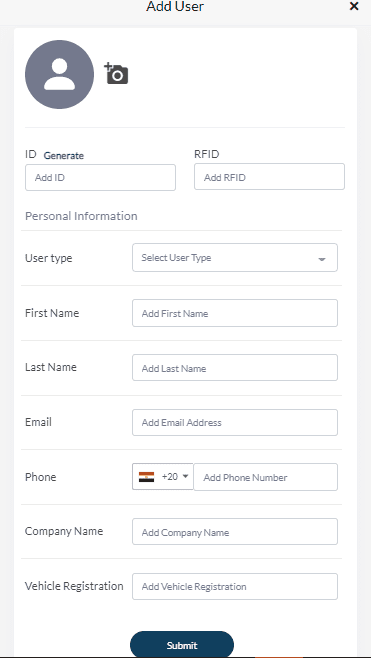
Please fill in all the user fields and then click the Submit button when finished.
Based on the entry method you use for the user type you assign this user to (e.g. staff or visitor), you will need to have the necessary requirements filled in here.
For example, if you use facial recognition for staff members to sign in at your kiosks, please make sure you add a picture to each user by clicking on the plus sign and adding a photo. If you use RFID cards/fobs, please make sure you fill in the RFID number section with the correct card number so your kiosks can read the card and match it to the user profile.
The entry/input method for your user types is set in your journey builder.
The ID is what identifies each user in your database so please make sure you either add a user ID or click on generate and this will automatically generate a user ID.
If you wish to make this user a system admin, you can then invite the user to your dashboard. Learn more in this article.
Import Users
Once you click on the Import User button, the system will take you to the user import page with instructions and steps.
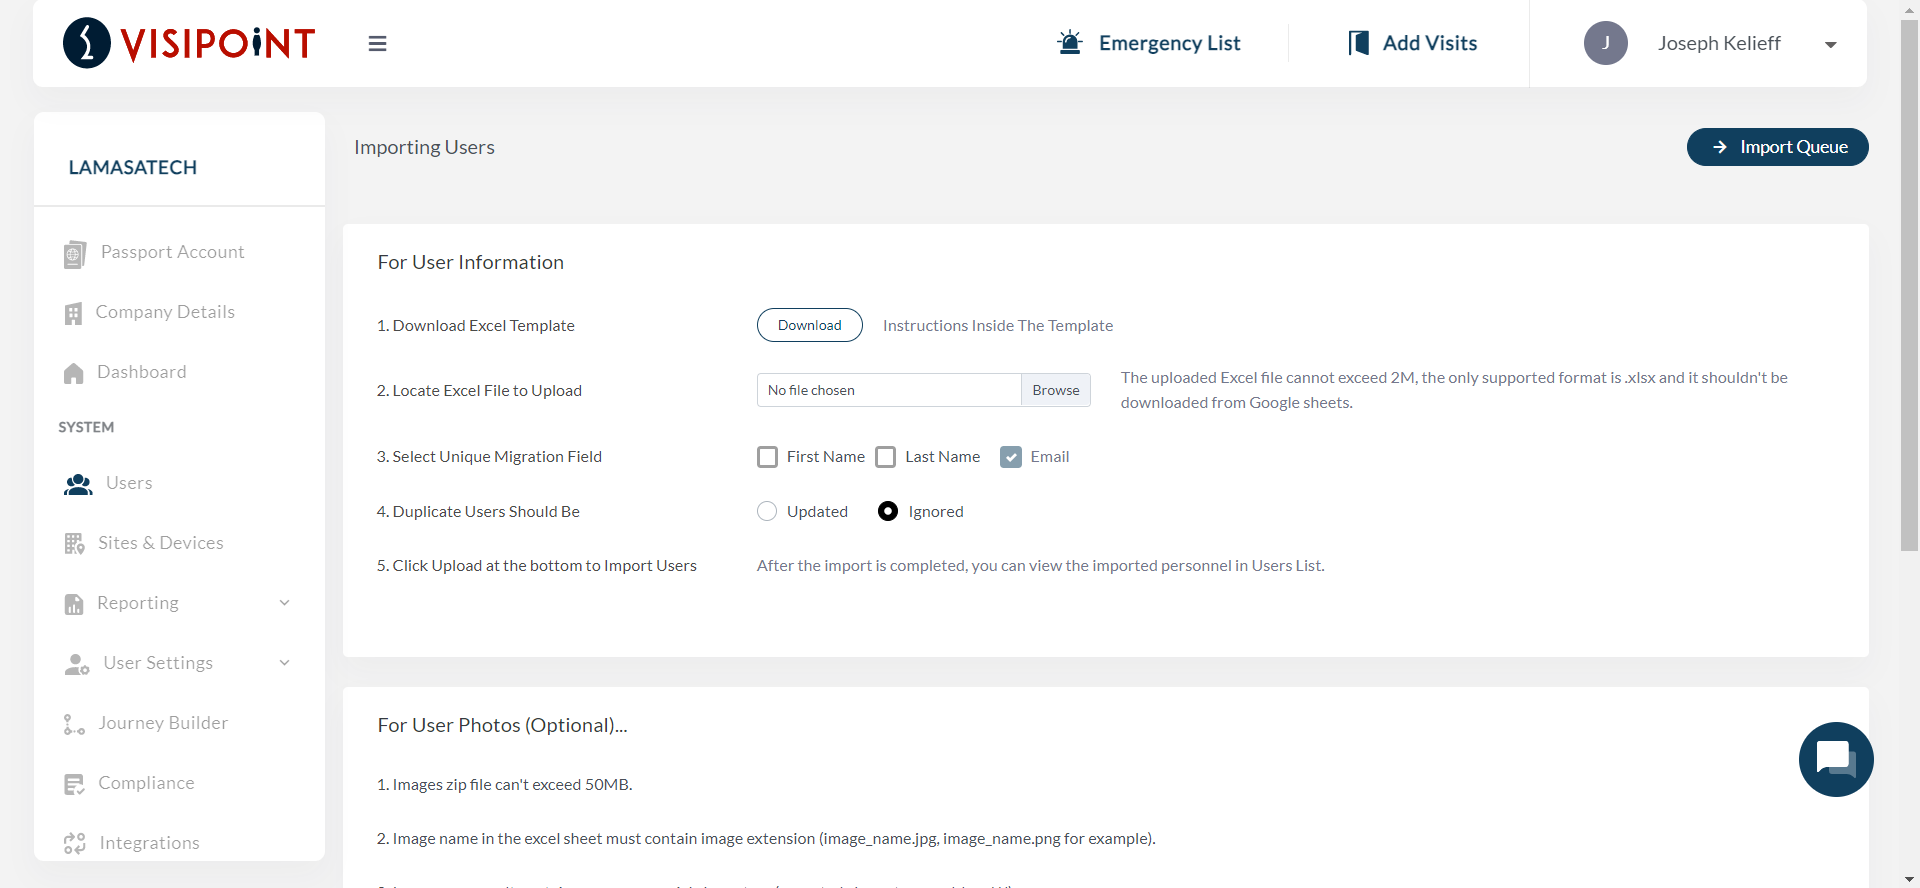
The first thing you will need to do is download the Excel template. Then you can follow the written instructions.
You can do the bulk upload without pictures but that will mean that the facial recognition must be deactivated from all flows.
If you are updating your existing user list, please make sure you choose the Updated option on point 4 so that you do not end up with duplicate users. If you are adding new users without any changes to the pre-existing users in the Excel sheet, please choose the Ignored option.
Once you are ready, please click the upload button.
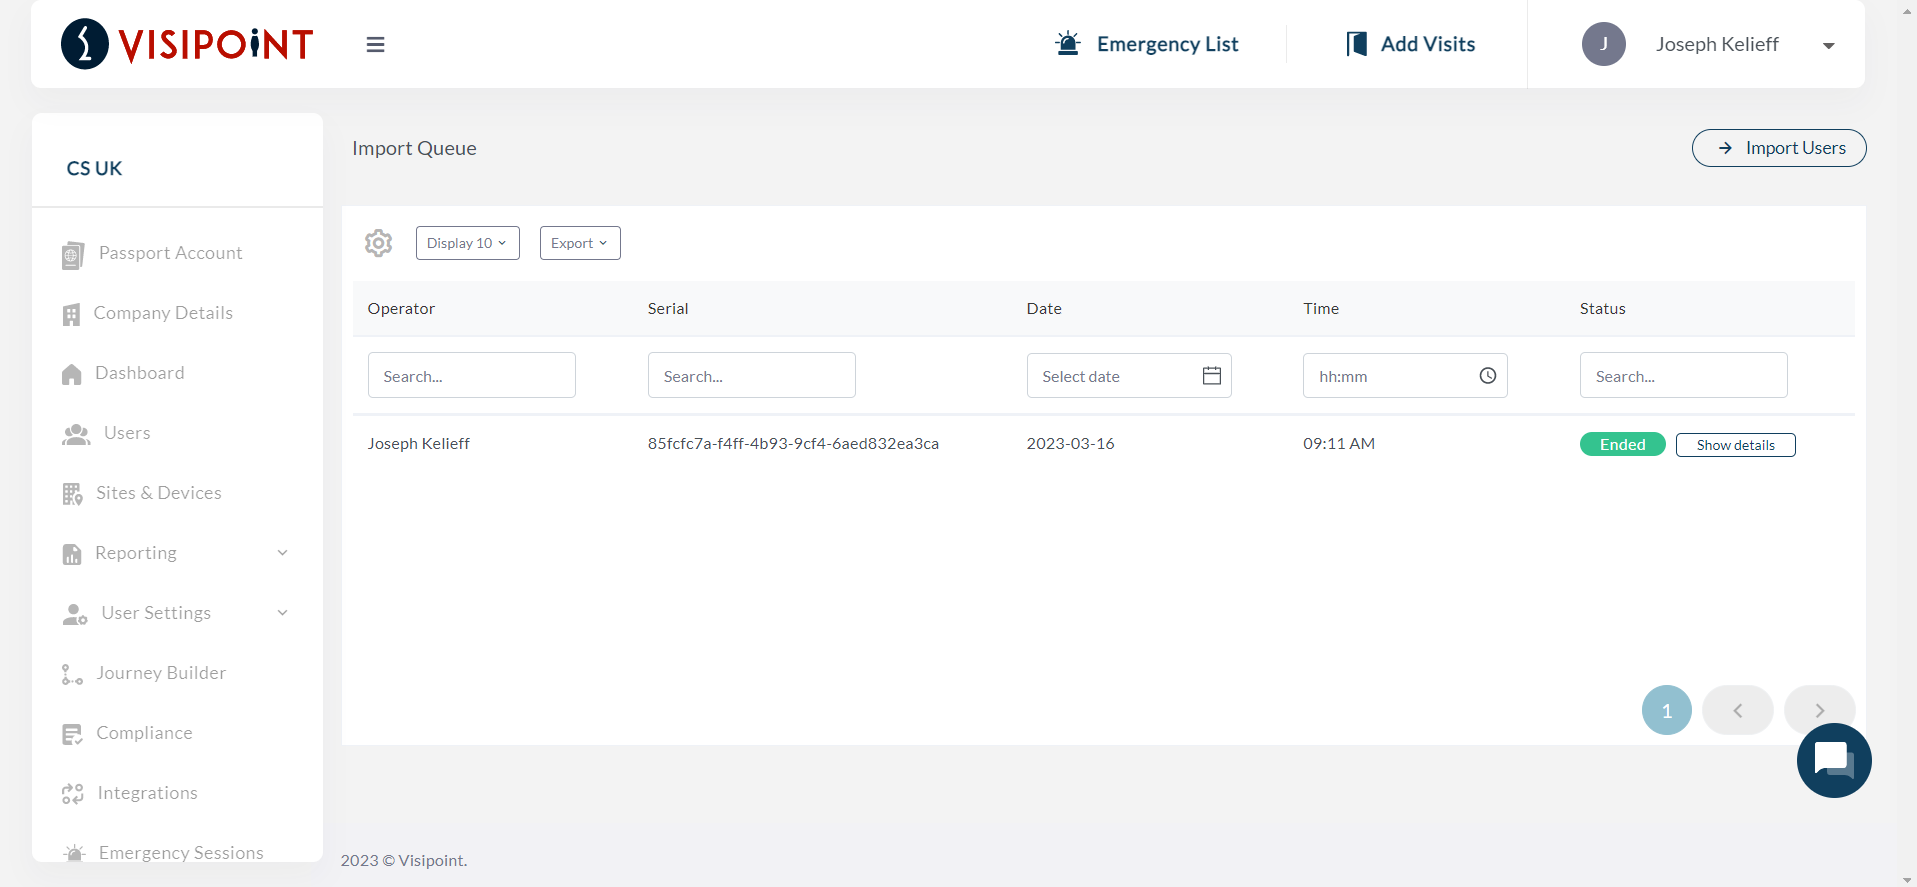
To view the import status, click on the Import Queue button at the top right of the screen.
Import Users with Pictures
The first thing you would do is follow the same steps as above, by downloading the Excel template with the specifications needed to import users.
Then fill in the Excel sheet with the information of your users, following the written instructions.
Once you have filled in the information of your users, following the first set of instructions titled “For User Information”, you would then follow the instructions titled “For User Photos”.
Within the Excel sheet is a column for each user’s picture. Here, you need to insert the file name of the picture that you want to add to a user’s profile. This could be image_name.jpg, image_name.png for example.
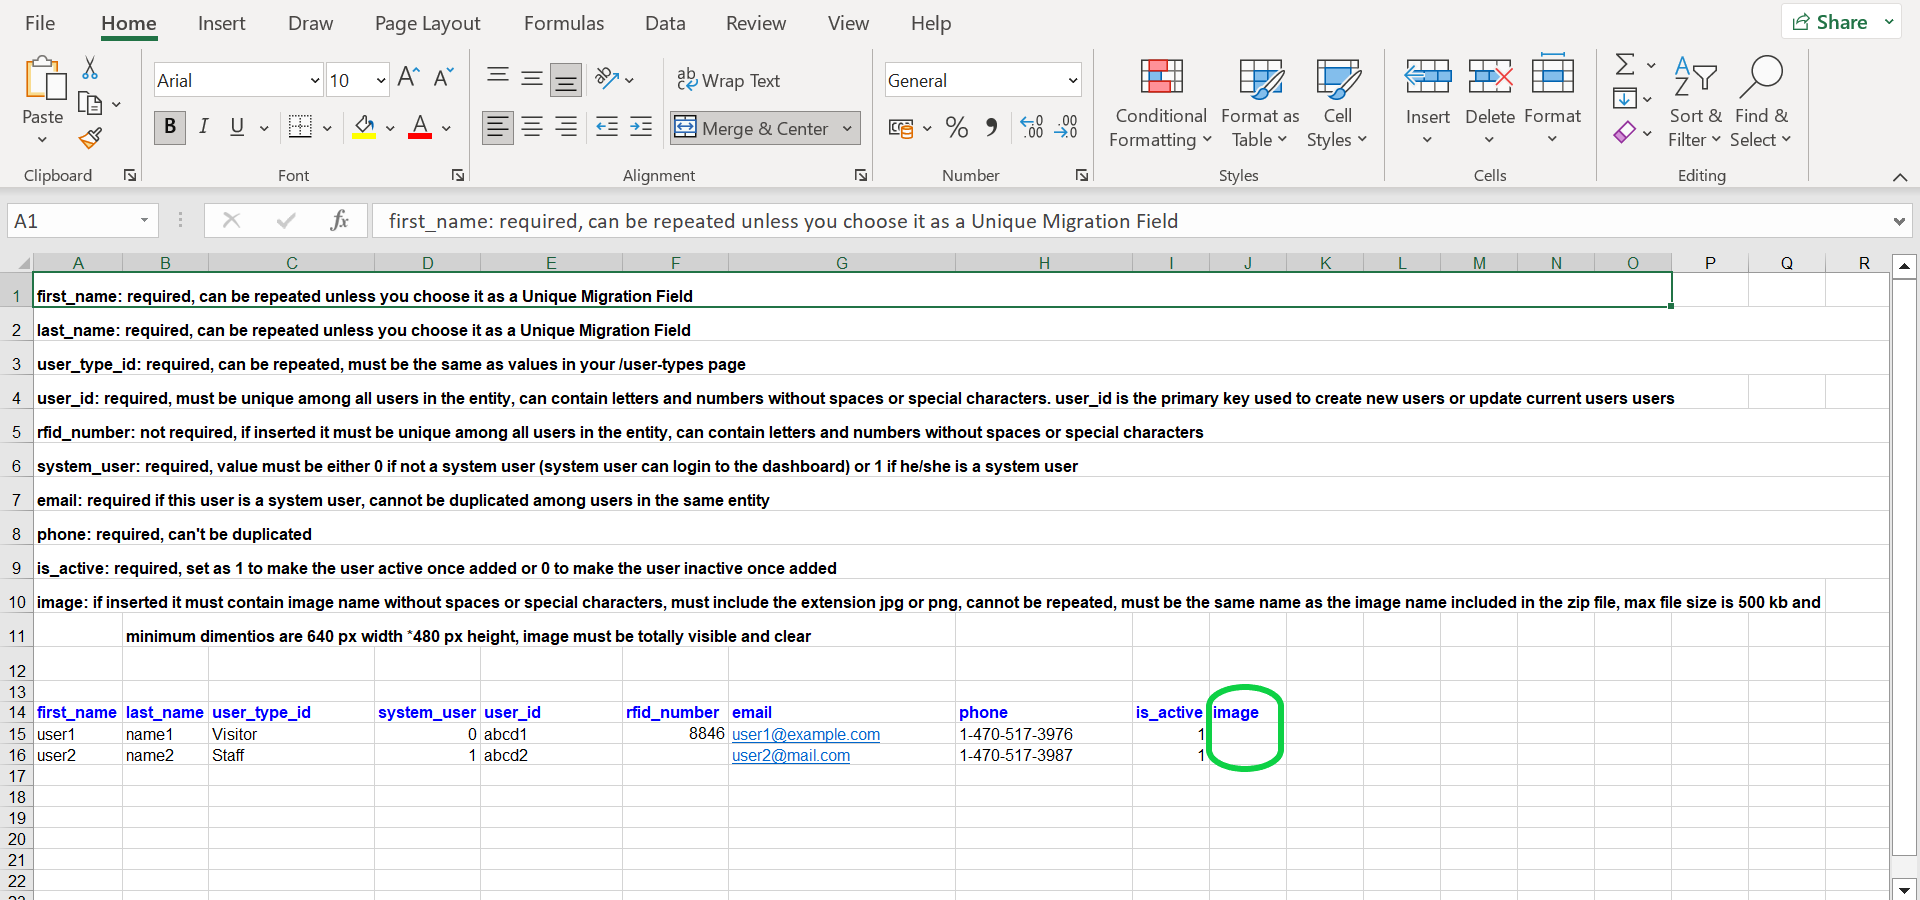
NOTE: When adding pictures to profile’s, a white background should be used than any other colour.
Next, you need a zipped folder that has all of the user’s photos. These need to have the same file names that you input on the Excel sheet for each user.
Once this has all been done, upload both the Excel sheet and the zipped folder to VisiPoint using the file selection boxes.

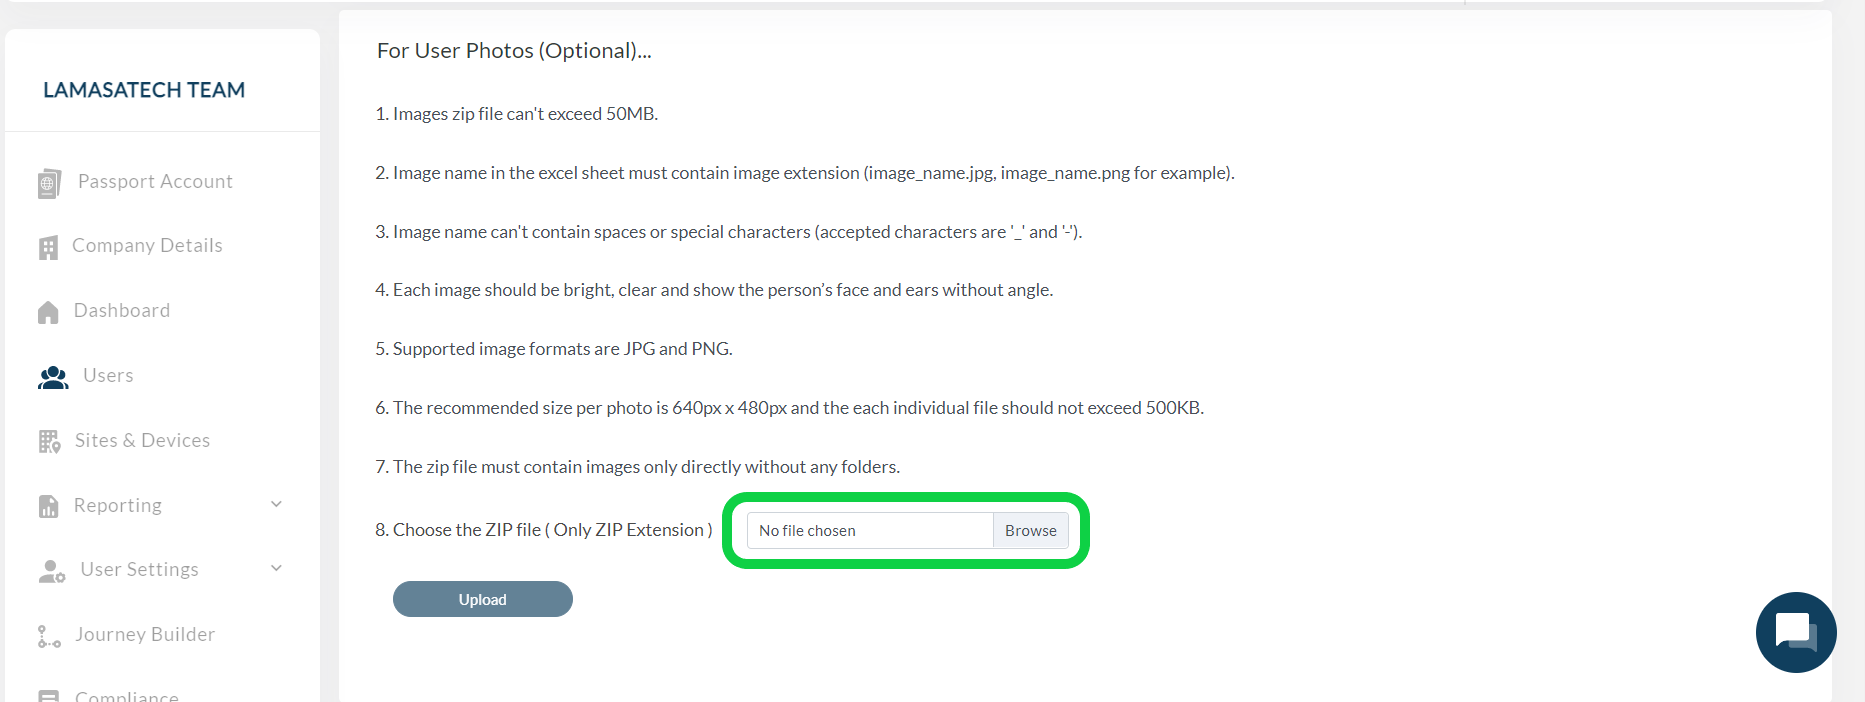
The system will then register which picture is to be added to which profile by matching the names of the images with the name you added to the Excel sheet.
Duplicate Profiles with Images Exceeding the Limit
If the system finds that the profiles you are trying to import include duplicates and images that exceed the accepted size limit, then you will be presented with a grid, like the one seen below.
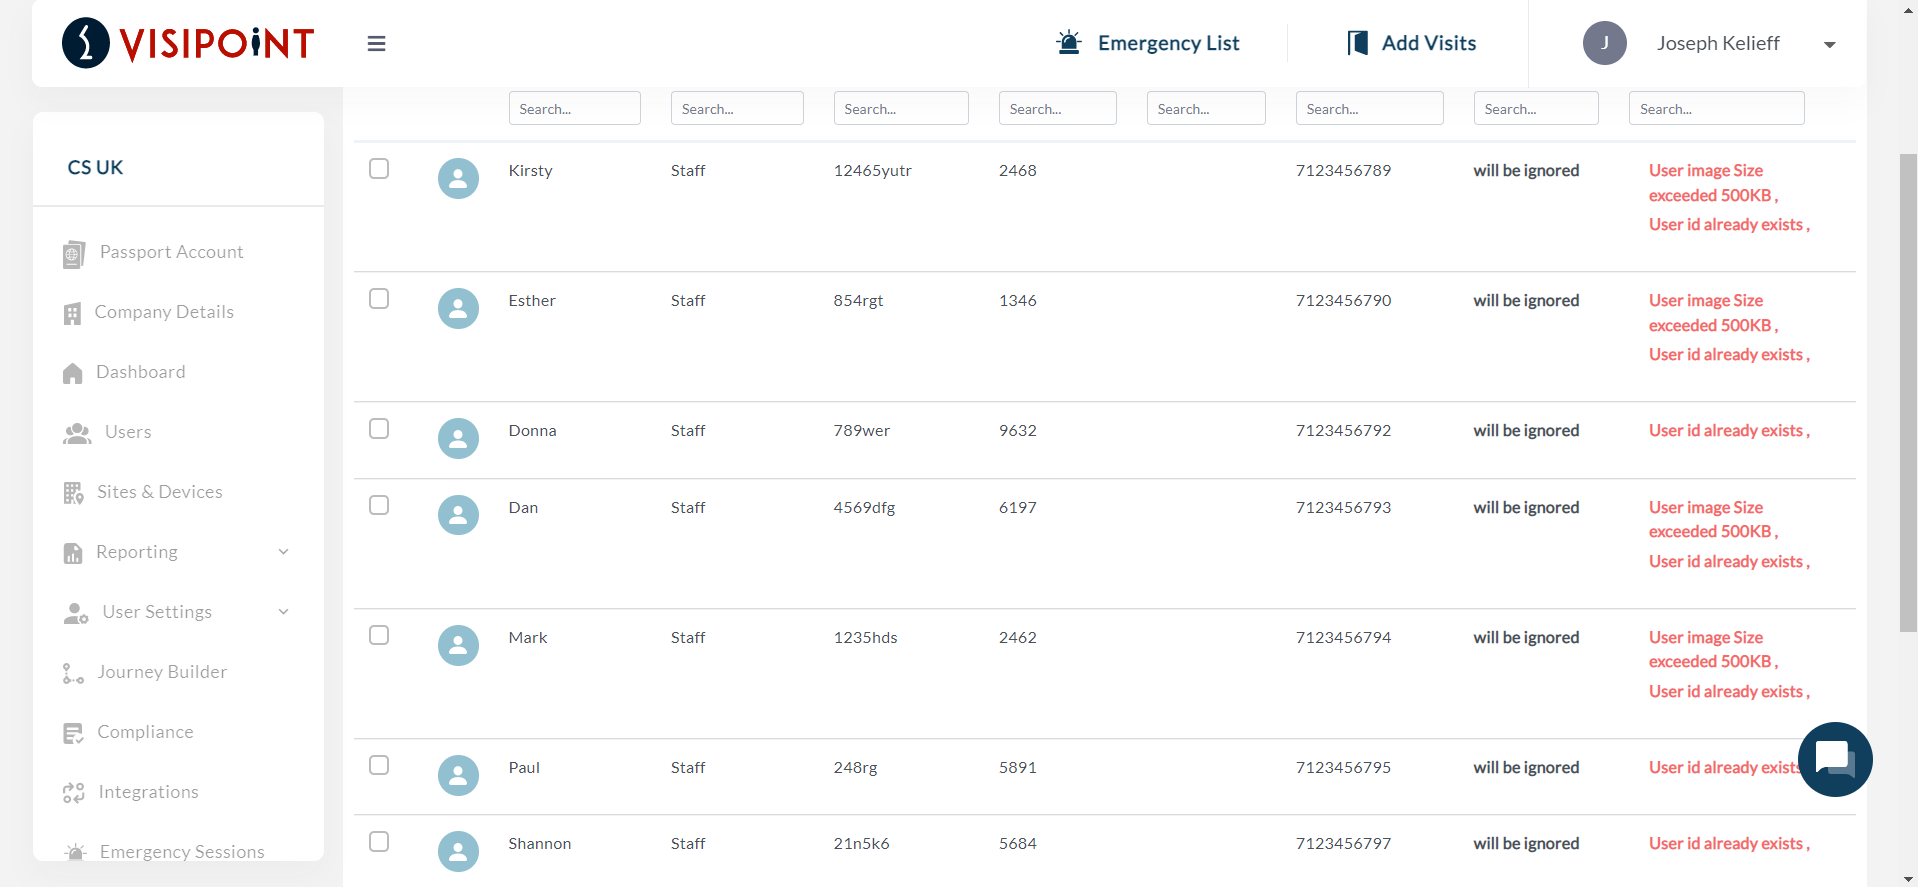
These profiles will not be imported as they are and will be ignored during the import process.
Error Occurred
If the system spots any errors with profiles you are attempting to import, such as the user’s image name not existing, then you will be shown an errors grid, like the one below.
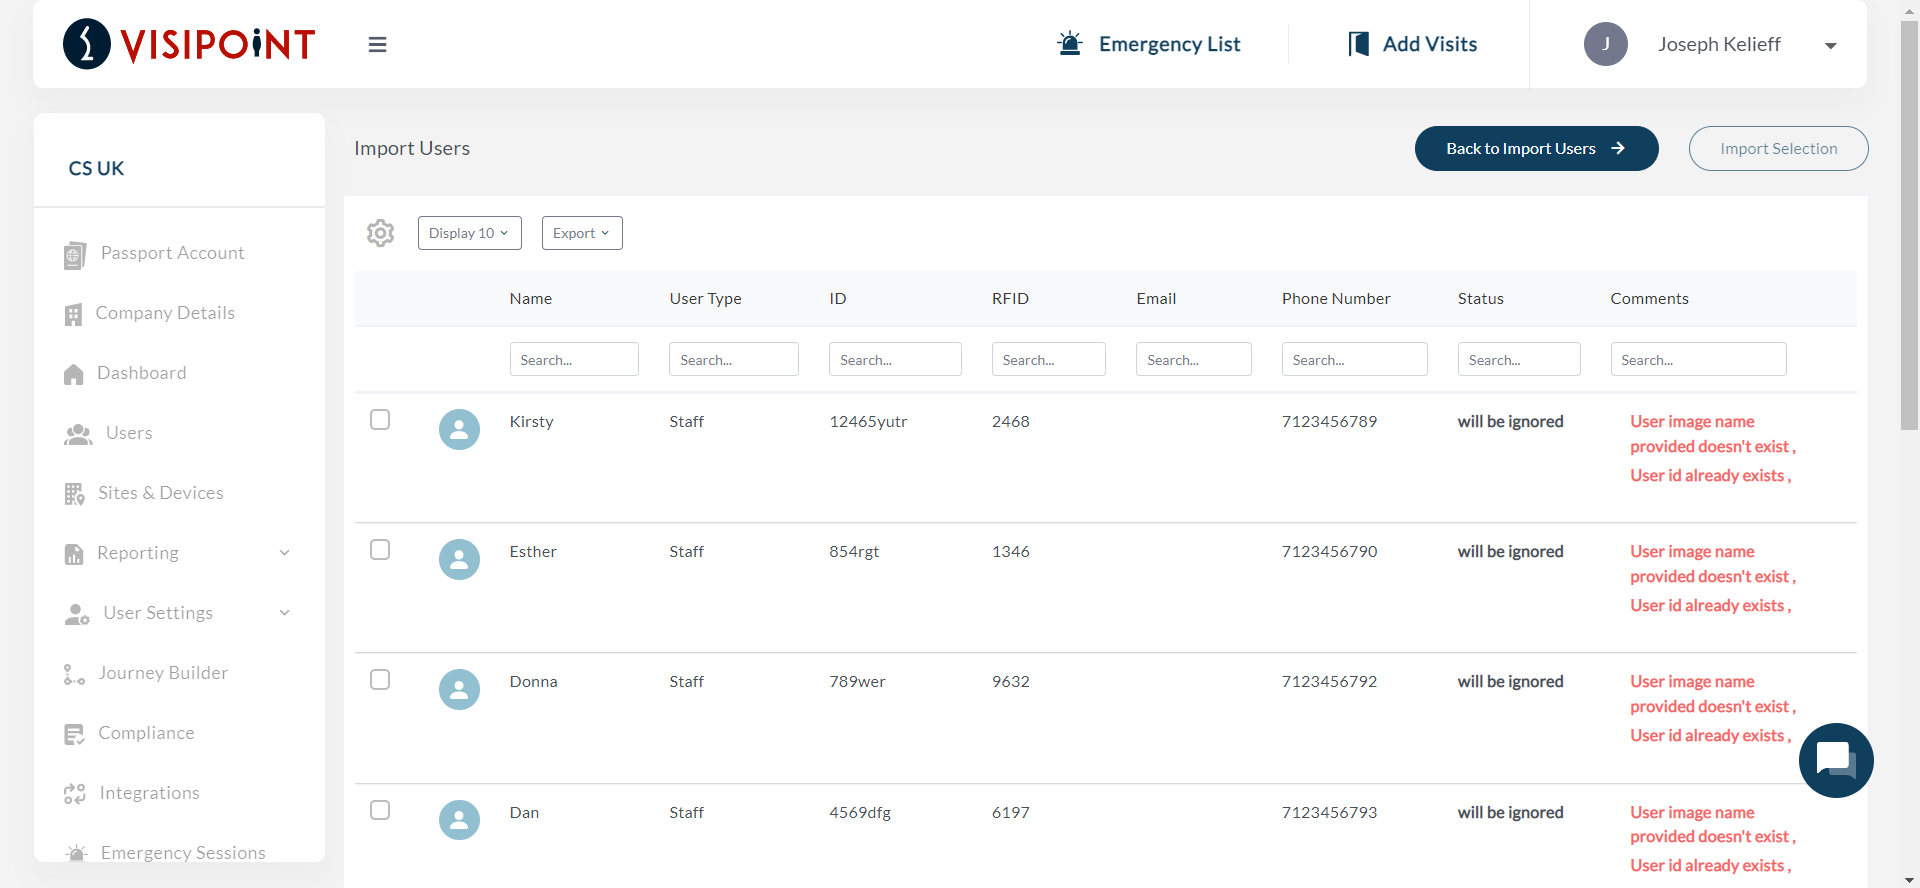
This is a list of the profiles with errors along with a reason for the error shown on the right-hand side of the grid. These profiles will need to be fixed or they will be ignored during the user list import.
Successful Import
If your user list has no issues you will be presented with the grid shown below, indicating that the profiles are ready to be imported.
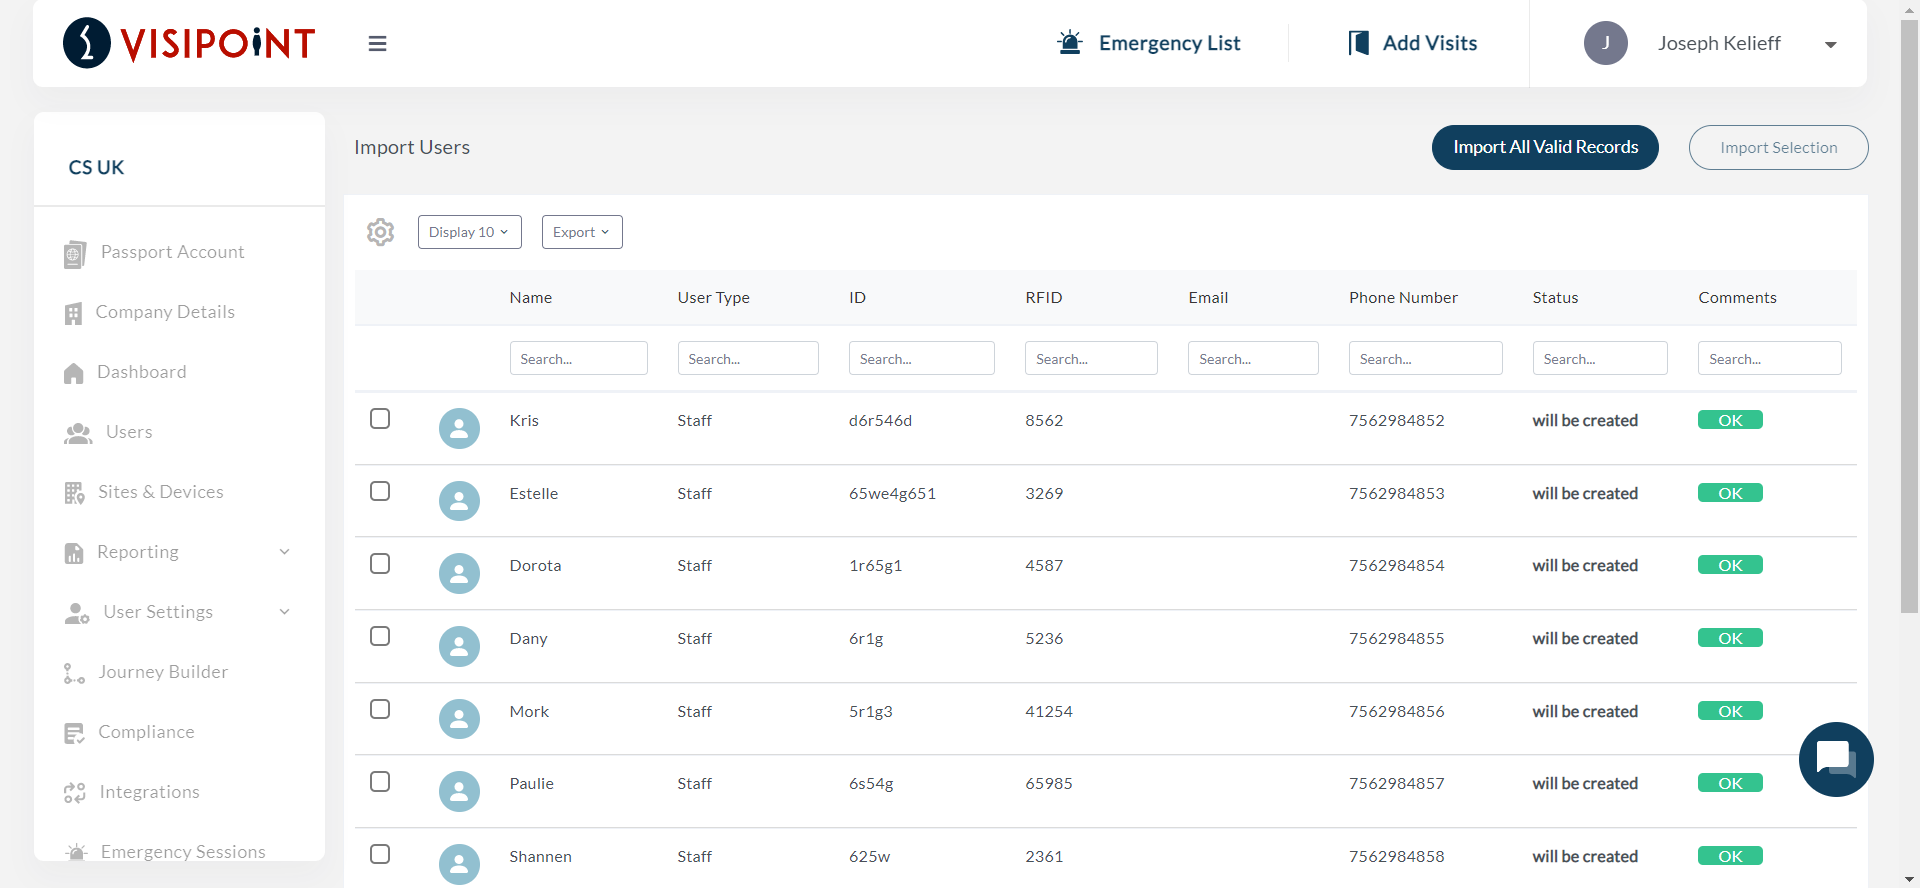
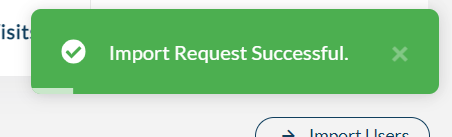
Clicking “Import All Valid Records” will begin the import process. You will then see a green box pop-up confirming that the import request was successful.
When this process has been completed, you’ll be able to view the users you have imported along with their photo in the Users List.

Once this has been done, the users will be able to sign in on your kiosks using the facial recognition entry method, if this was selected within the Journey Builder. You can learn how to do this in this help article.