View the user list
The User List contains all Staff and Visitors profiles with their picture, email address and user type. User Records can be edited by tapping any user record. User records can be permanently deleted from this screen by clicking the bin icon.
You can access the User List from the Administration Screen – double-click or tap on the blue taskbar along the top of the screen and enter the password (the default is 123456) to be taken to the Administration Screen.
You can also add additional users by clicking the + Add User button.
Add a user
Staff and Visitors can be added from this screen.
First name, Last name and User ID are mandatory fields. Photo, email, contact number and RFID card number can also be added.
Please note – In order to facial recognition as the input method in your user entry journey, a photo must be added to user profiles.
Import user list
The User Import option allows you to complete a bulk import of user data to your device from an .xls file using a USB stick.
To prepare your import file on your PC:
- Download an example .xls file here and complete all fields with your user data. All cells must be in text format.
- Create a folder called ‘Export’ and move the completed .xls file into this folder.
- In the ‘Export’ folder, create another folder called ‘Images’ and move individual .jpeg images of your users into this folder. The Face ID field of each user in the .xls sheet (text format only) must match the name of each user’s image added in the images folder.
- Save the folder onto a USB stick.
Please note – there must be only one .xls file in the ‘Export’ folder.
To import the ‘Export’ folder on the kiosk:
- Connect the USB flash drive to the kiosk
- Navigate to the settings administration screen on the VisiPoint application
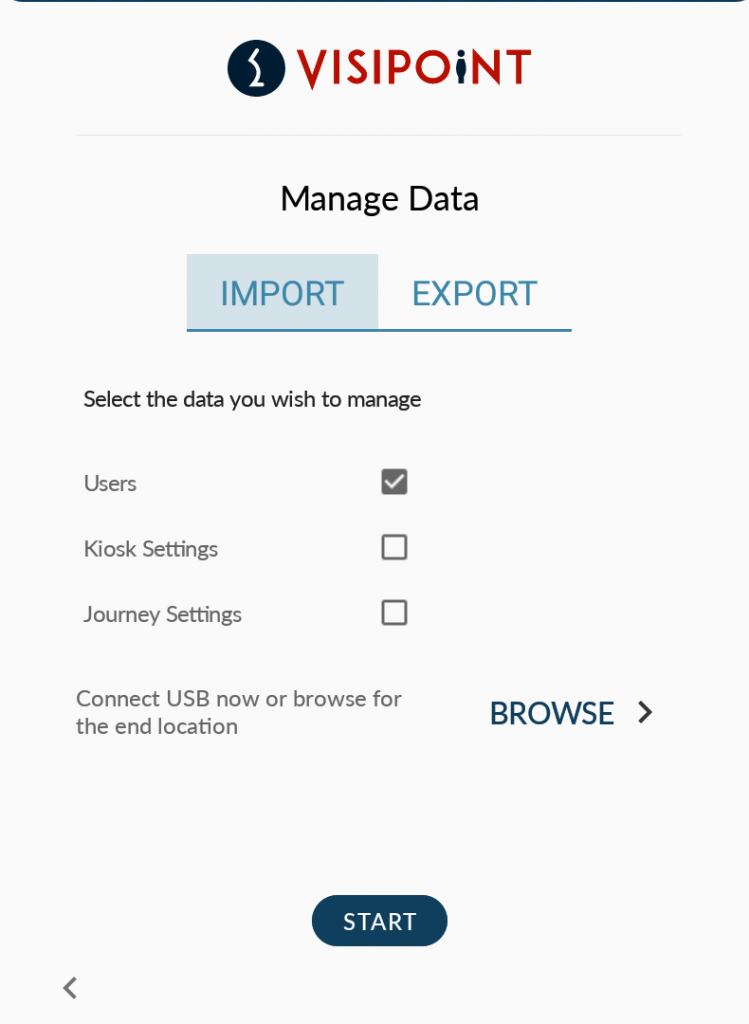
- Click on ‘Manage Data’
- Select ‘Import’ and then check ‘Users’
- Click on ‘Browse’ and then click on the menu shortcut (three lines on the top left of the browse screen)
- Select the USB stick, open the ‘Export’ Folder, then tap on ‘Select’ on the bottom right of the screen.
- Hit ‘Start’ and then wait until the data is imported.
The import will then begin to process the .xls file and images. This may take a few minutes, please do not power off the kiosk, remove the USB or close the window while the import is processing.
If successful, the screen below will be displayed with the total number of records processed and a summary of the pass/fail amount. If there are any failures a file will be created on the usb flash drive detailing the failures, please correct these in the .xls file and try again.
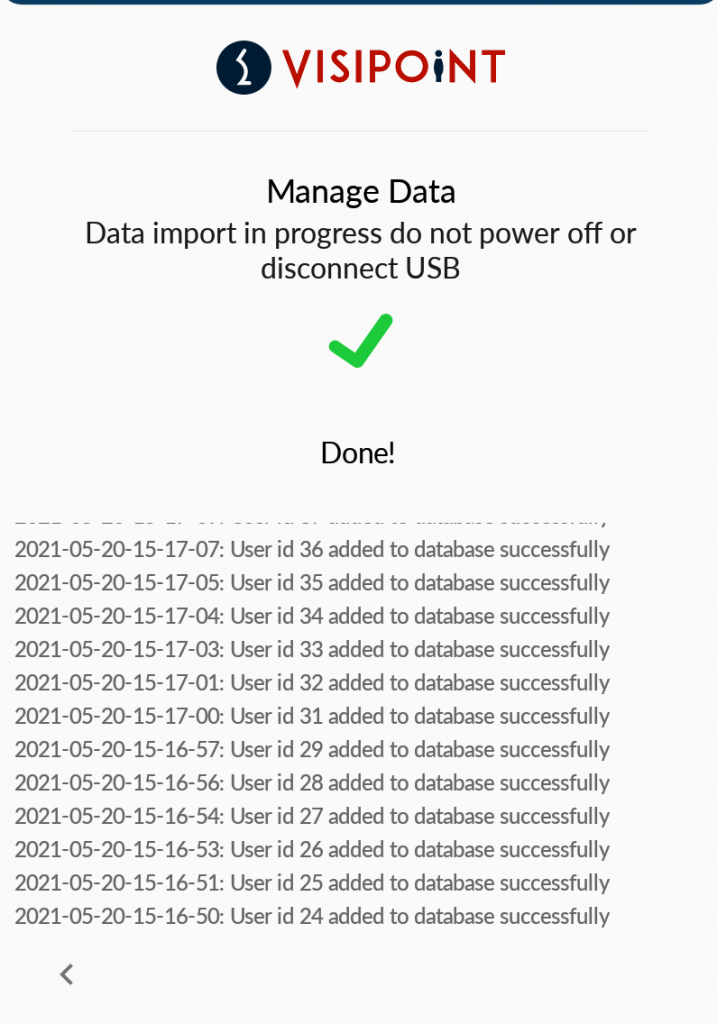
Once all user data has been imported successfully, you can view these users in the User List screen.
Errors – If you see this error ‘Sorry, file not found in path. Please make sure the file is downloaded on the correct path.’ after selecting ‘Update from usb’, then please check the instructions above and make sure all folders are named correctly and are in the correct location on the USB flash drive. Then try again.