This guide explains how to track vaccination status and/or PCR test results using your standalone kiosk (without a cloud license). If you have a cloud subscription, please refer to this article instead.
A user’s vaccine or PCR status can be gathered by:
1. Users scan the QR code from their digital COVID pass on the kiosk as they enter.
Please note that your kiosk must have a built-in QR code scanner to use vaccination status tracking. Zentron 8 and Zentron 15 models have a QR code scanner, whereas the LD-AITemp (Gen 1) model does not. For customers with a Gen 1 model, you can upgrade your kiosk or subscribe to VisiPoint Cloud to track status from the online dashboard. Please contact us for more information.
Create a vaccine status/PCR compliance check
Navigate to Compliance from the administration screen on the kiosk.
Click on the Create Compliance button and you will see the compliance builder screen below.
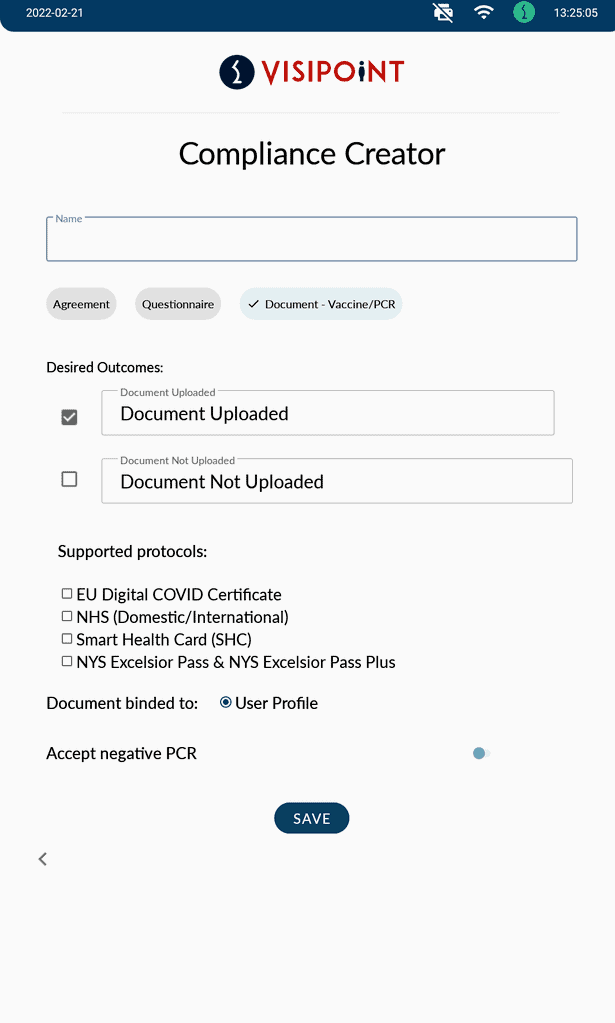
In the first box, please name your compliance as appropriate e.g. COVID-19 Vaccine Check.
From the compliance types below Name, click on “Document – Vaccine/PCR” to select it.
Desired outcome:
Please select the desired outcome for the compliance check.
- Document uploaded: This means the kiosk will permit entry to those who scanned their certificate.
- Document not uploaded: This means the kiosk will permit entry to those who have not scanned their certificate.
You can tick and untick the ‘Document not uploaded’ option based on your preference. Both boxes can be ticked if your vaccine/pcr check is not mandatory for entry. The ‘Document uploaded’ option will always be ticked.
Protocols:
Please select the protocols which you’d like to use.
This list will allow you to choose between 4 protocols based on your preference and what would you accept. You can select more than one protocol.
Accept Negative PCR:
If you wish to allow negative PCR test codes to be submitted to gain entry., please use the toggle to switch this setting on.
If you select this option, a question section will appear below asking “PCR valid for how many days?” with a box so that you can set how many days you wish this negative PCR test to be valid for. For example, you may require that users submit a negative test every week so you could set validity to 6 days.
Click the Save button once you are finished with the settings.
Once you have created the vaccine/PCR check itself, you need to add it to the relevant entry flow so that the check appears when a user proceeds through the entry process.
Add the vaccine/PCR check to your entry process
- Go to Journey Builder from the administration menu
- Locate the relevant flow and click the edit button
- In the compliance box, tick the compliance check you created
- Click the save button
For more information on building user flows from your kiosk, please refer to this article.
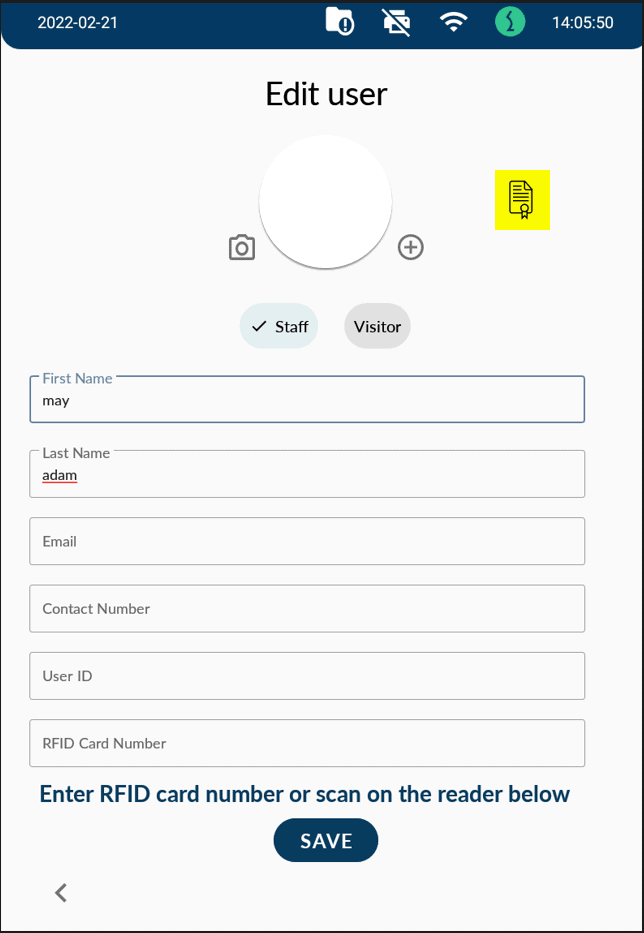
Check a user’s vaccine/PCR documents from their profile
- Navigate to Users List in Users section, from the administration menu
- Find the desired user and click on the user profile
- This will show you all user information along with the Certificate symbol beside the user picture as below
- Click on it to view uploaded Vaccine/PCR certificate
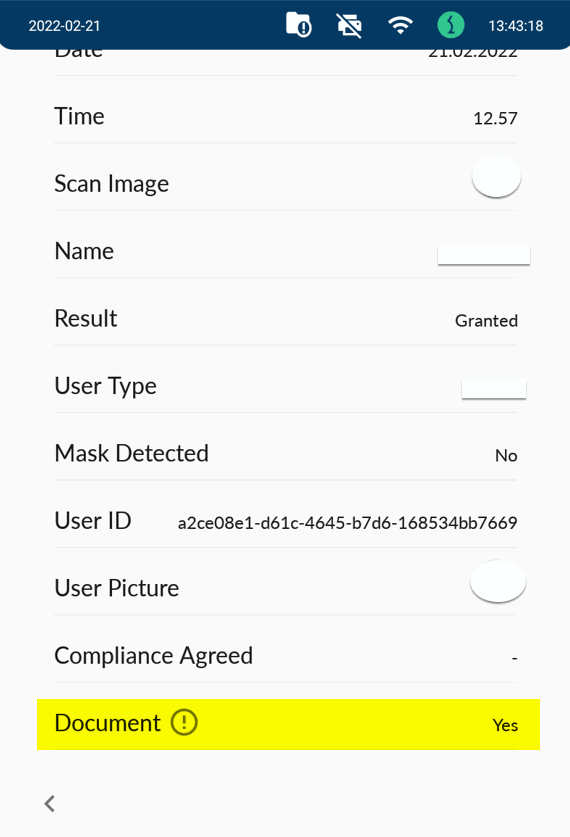
Check vaccine/PCR documents from your entry logs
If you selected the Vaccine/PCR check in all user flows including all user types, you can view the scanned certificates from the scans list as below.
- From the Settings section in administration screen, click on Scans.
- Click on the desired scan you want to check the uploaded certificates for
- Scroll to the bottom and you will find “Documents”, click on the (!) icon highlighted below to view the uploaded certificate information