What is the Privacy Manager?
The VisiPoint Privacy Manager feature is designed to help you control your data retention practices easily from the dashboard. You can schedule the auto-deletion of data, for example, the deletion of walk-in visitor data after X number of days.
Switching the Privacy Manager on/off
To access the Privacy Manager, go to User Settings and then select Privacy Manager.
The Privacy Manager function can be switched on and off. If the Privacy Manager feature is switched off, all data and scans will be retained and saved on the cloud. If you are new to VisiPoint, the Privacy Manager will be switched off until you activate it.
To do this, click on the blue Privacy Manager button with a power icon at the top right of your screen. You will be asked to enter your password and then click the Confirm button.
Editing your data retention rules
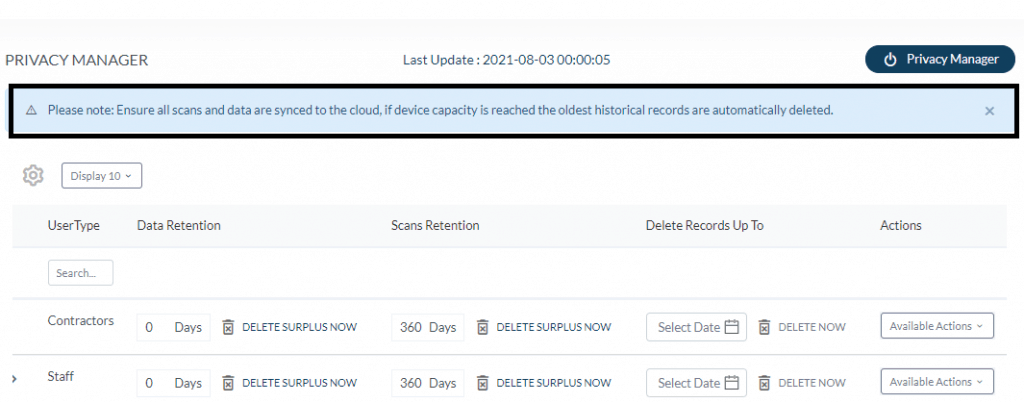
Once in the Privacy Manager, you will see the grid which displays the retention periods for each user type.
Data refers to the user information added to the cloud dashboard such as first name, last name etc. Scan refers to the data gathered via scans on your kiosks, such as picture and temperature reading.
Please note – scan data storage is controlled by the Journey Builder. The save data option must be added in the output step in the journey builder in order to save scan data.
If save data is not activated in a user flow in the journey builder, you will still see the scan retention option in the Privacy Manager grid. However, setting scan retention to X number of days won’t have any effect as save data is off for scans.
Zero days means data is retained indefinitely.
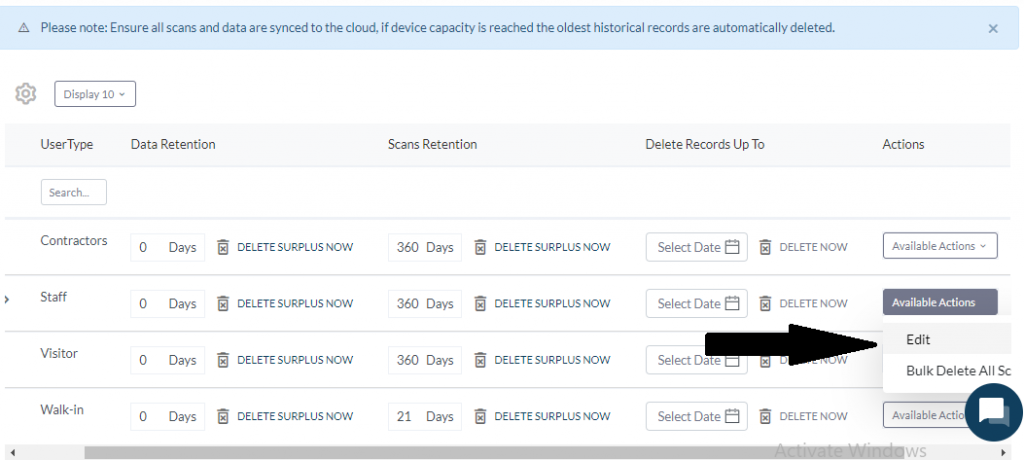
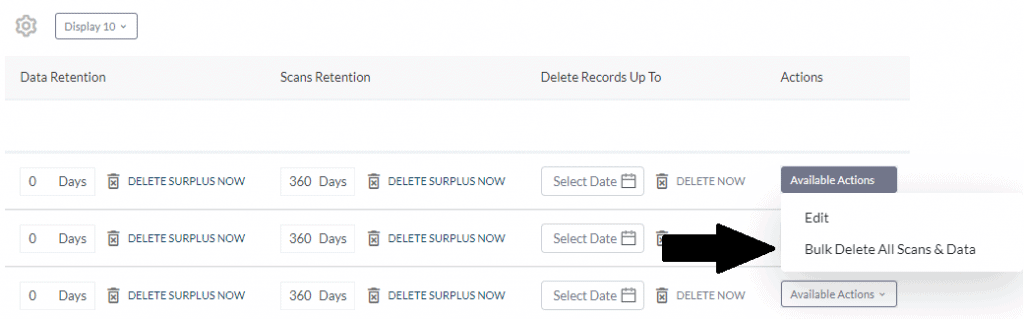
If you wish to change any of the retention rules, you can click on Available Options and then Edit from the drop-down list.
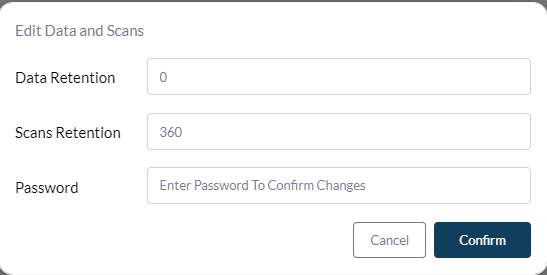
A pop-up window will appear. Here we can update the number of days for data retention and the number of days for scan retention.
Then you must enter the system password and click on the Confirm button to save the update.
The system will scan your settings daily and if any data needs to be removed, it will perform a clean-up based on your rules. You can see a timestamp at the top of the screen which shows the last time the system ran the scan.
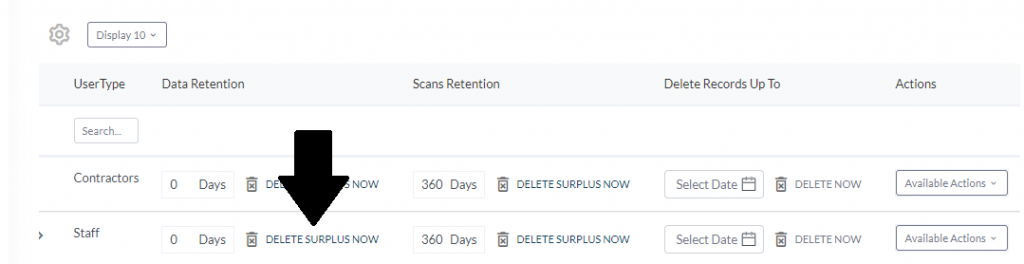
If you don’t want to wait for the daily clean-up, you can simply click on DELETE SURPLUS NOW next to the data which you want to remove, enter your password and hit Confirm. This will remove the data or scans depending on the number of days in your settings.
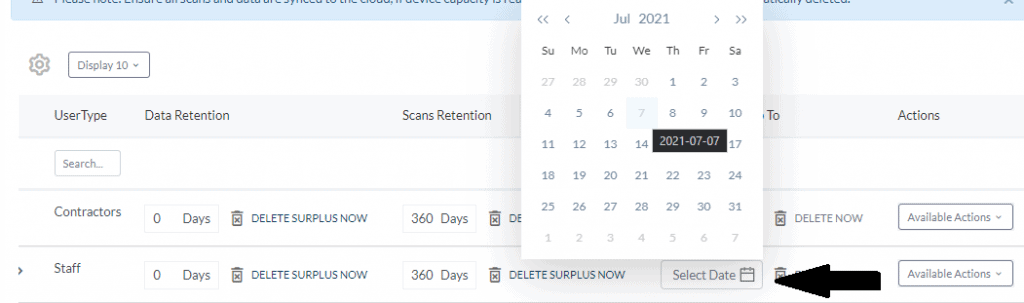
You can also select a day in the past that you want to run the clean-up. For example, under Delete Records Up to, we could click on Select Date and choose the 7th of July from the calendar, then select DELETE NOW. This would delete all scans and data up to the 7th of July.
Bulk delete all scans and data
If you want to delete all scans and data at once for a user type, you can click on Available Actions and select the Bulk Delete All Scans & Data option from the drop-down menu. Again, you will need to enter your password and click Confirm, for data security reasons.
At the top here, there’s a blue banner that warns you to make sure your devices are connected to the cloud because if your kiosks reach maximum storage capacity, the oldest scans will be deleted automatically to free up space and keep the device functional.