Introduction to questionnaires and agreements
The Compliance Creator is used to create compliance checks which users must review and complete during the check-in process on your kiosks.
There are three types of compliance that can be created and used on the kiosk, Agreement, Questionnaire or Document.
- An Agreement is a single body of text that can have a positive and a negative answer.
- A Questionnaire can have multiple questions with positive and negative answers.
- A Document to help manage the Vaccine status and upload of PCR tests.
The process for users to answer compliance checks on your kiosk can be non-touch or touch.
Non-touch mode is completely contactless – users answer yes or no by showing a thumbs up or thumbs down to the camera when prompted.
If using touch mode, users will click the desired answer on the screen. You can activate touch mode for your user journeys in the journey builder. Learn more about touch mode in this article.
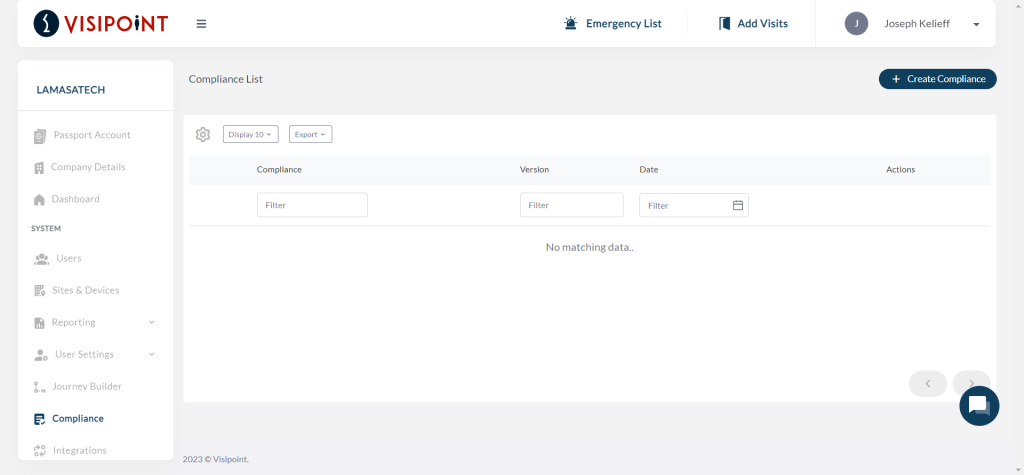
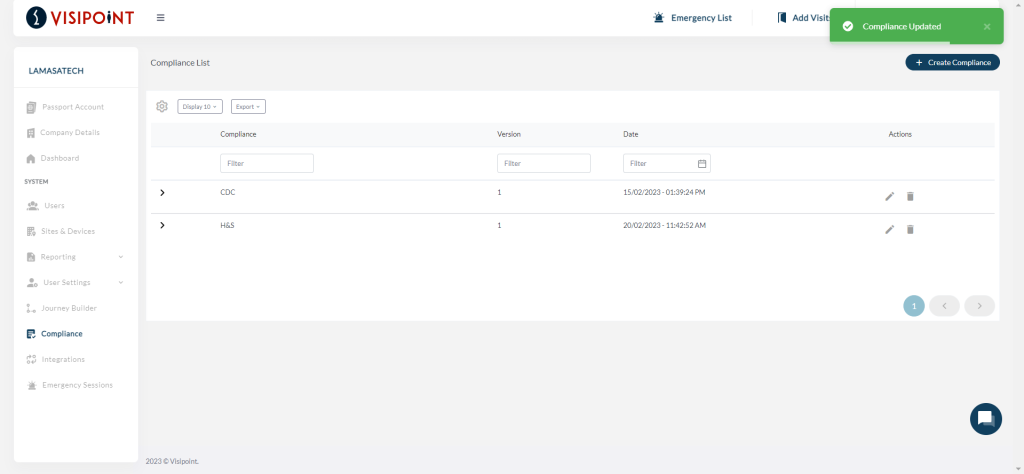
Accessing the compliance builder
Please note – this is the process for creating compliance checks from your dashboard for VisiPoint cloud users. If you have a VisiPoint standalone license, please see this article instead.
To create a compliance check, we go to the compliance screen from the left navigation menu and then click on Create compliance on the top right.
Creating a questionnaire
Once you click on the Create Compliance button you can then enter the name of your compliance and select questionnaire from the dropdown menu.

You should enter your question text. Then for each question, you can define the text you would like displayed as the positive answer text and negative answer text e.g. Yes and No.
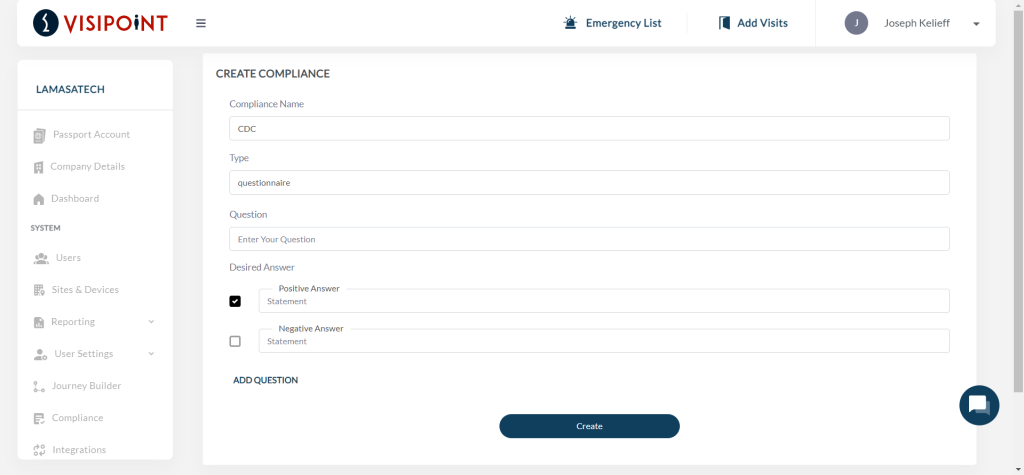
For each question, you must also select the Desired Answer by checking the tickbox next to your answers. This is the answer you want an individual to give. If a user does not give the desired answer, they will be denied entry on the kiosk. In some cases, you may not want to deny entry, if you are simply gathering information. In which case you can tick both answers as the desired answer.
For example, you could ask ‘Have you had a cough in the last 24 hours?’. In this example, the desired answer would be the negative answer and we would add No as the Negative answer text. If an individual answers yes on the kiosk, the user would then be denied entry.
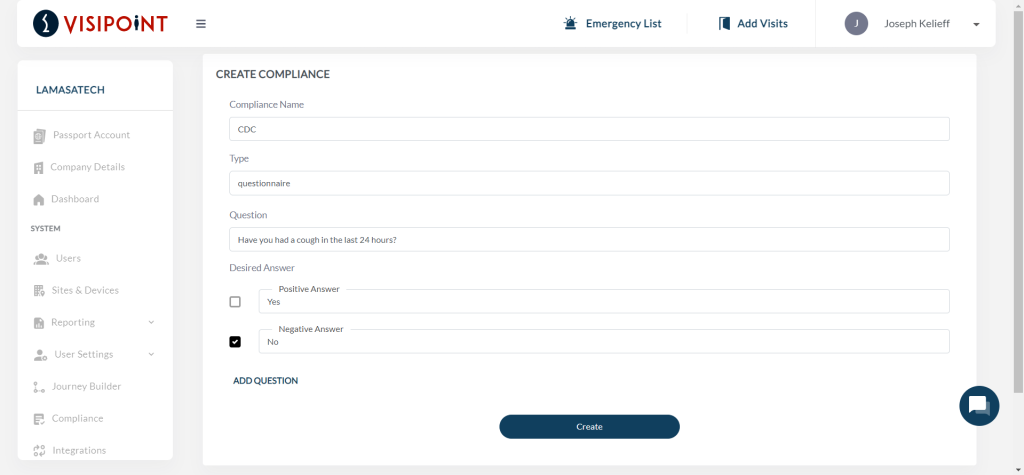
You can then click on the Create button to save your questionnaire.
You can add more than one question by clicking the Add Question text in blue (under the existing question).
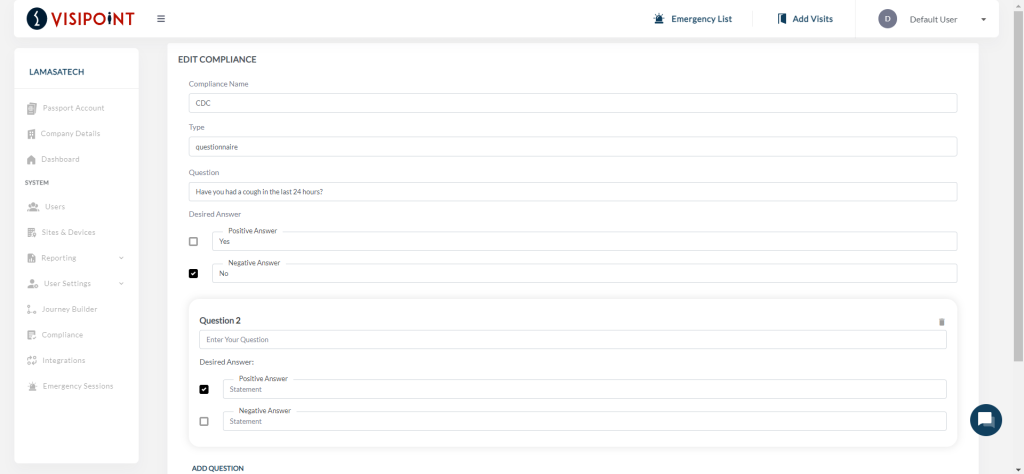
Once you are finished, click the Create button and you will see a success message and be taken back to the Compliance List.
Creating an agreement
Once you click on the Create Compliance button you can then enter the name of your compliance and select agreement from the dropdown menu.
An agreement consists of a body of text and is often used for NDAs or Terms & Conditions.
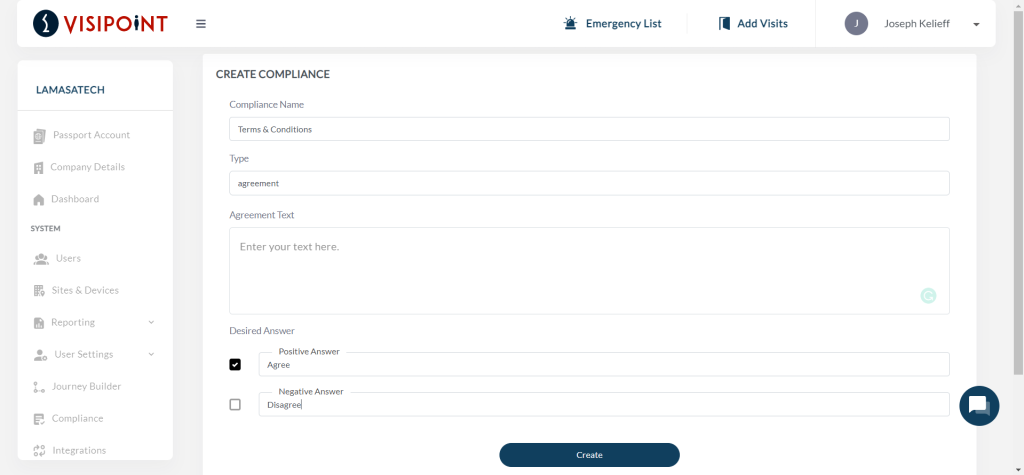
You should add your body of text. Then enter the text you would like displayed as the positive answer text and negative answer text e.g. Yes and No.
Finally, you can select the Desired Answer by checking the tickbox next to your answers. This is the answer you want an individual to give. If a user does not give the desired answer, they will be denied entry on the kiosk.
If you are using this for terms and conditions or an NDA for example, you may want your positive answer to be Agree and your negative answer to be Disagree, with the positive answer as your desired answer.
Creating a Document to Upload
Once you have clicked the create compliance button you can enter the name of the compliance and then select Document – Vaccine/PCR.
This will now allow you to select the parameters to set for the users to upload their vaccine status and any PCR tests.

Having the user upload their status this will then bind it to their individual profile.
If you wish to, you can also select specific protocols that are usable with the system.
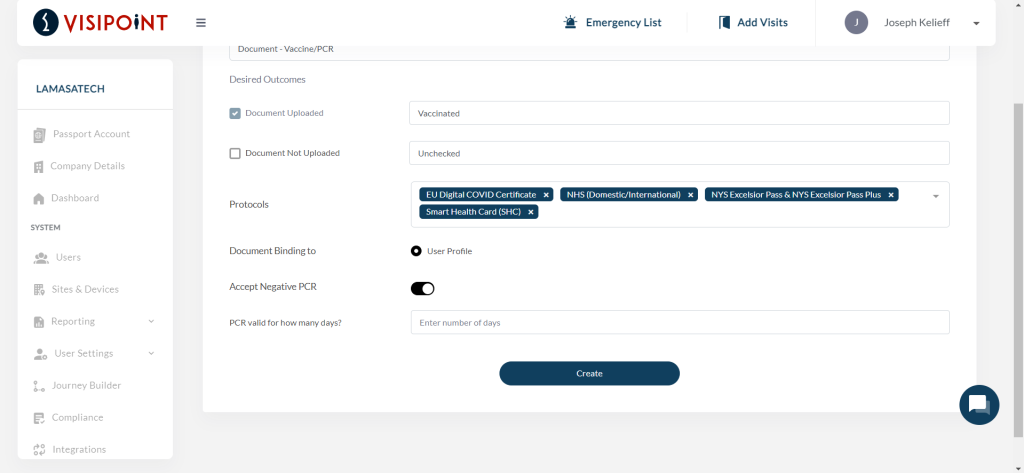
You can also select to accept a negative PCR. Once done you can set a time scale by days to which the user must supply another PCR test if required.