Attendance Modes will help you to display reasons your staff have signed in or out, outside of their expected working hours.
For example, this will help you mark down when and why a user arrived late or left early.
Creating an Attendance Mode
To create Attendance Modes, you will need to access your dashboard, then click on User Settings and select Attendance Modes.
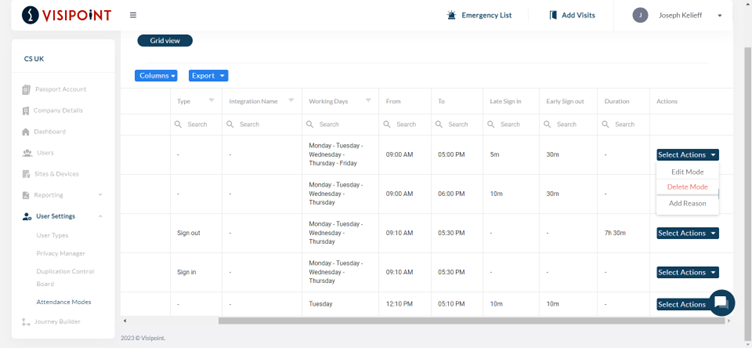
You will then be taken to this screen.
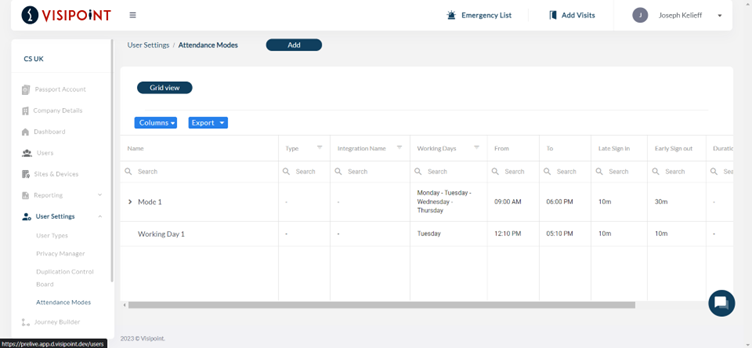
Here you can see a grid with all your modes and their details, such as the Working Days the mode will affect. You’ll also see the time your users should have signed in and what time they should sign out.
To create a new mode, click Add at the top of the screen and you will be taken to a new page to create a mode.
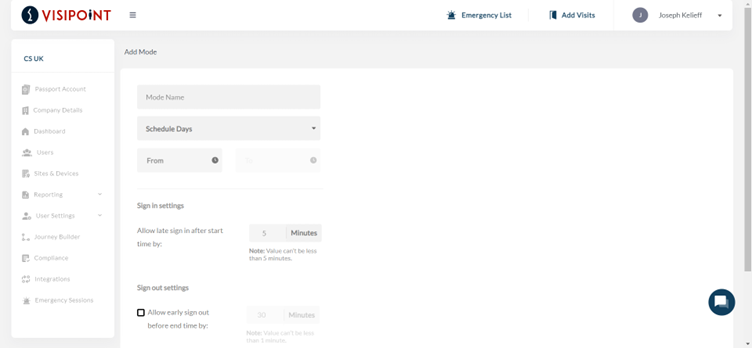
It is recommended that you give the mode a meaningful name whether it be a shift type or even a reason for late arrival and early departure.
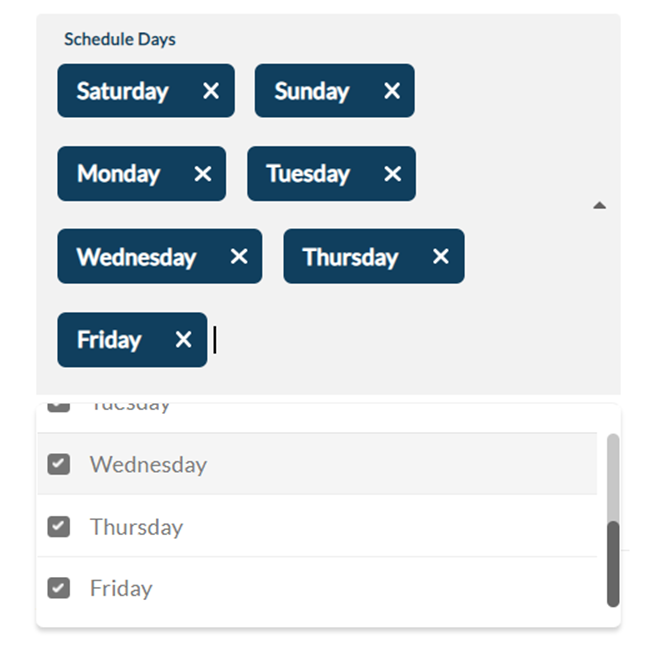
Next, you will select which days this mode will apply to and the time you expect your users to arrive and sign in.
In the Sign in settings, you can set how long after the start time you want the system to register a sign-in as a late arrival. This cannot be set to less than 1 minute.

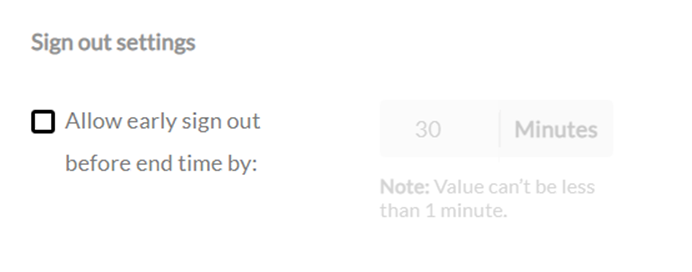
Next, you have the option to also register early sign-outs from the system. This is done by ticking the box and selecting the time frame for the system to register a sign-out. This value cannot be less than 1 minute.
Once you have filled in these details, click Add Mode to add this to the Attendance Modes grid where you can develop it further.
In the grid, you’ll be able to see your new Attendance Mode. You’ll now be able to add Reasons. These will appear for users who sign in or out during the designated timeframe, allowing them to register the appropriate reason for not arriving or leaving at the expected time.
Add a Reason to Your Attendance Mode
If you go to the far right of the Attendance Mode grid you can click on Select Actions and then select Add Reason.
You will then be taken to this screen which will allow you to create a reason for your Attendance Mode.
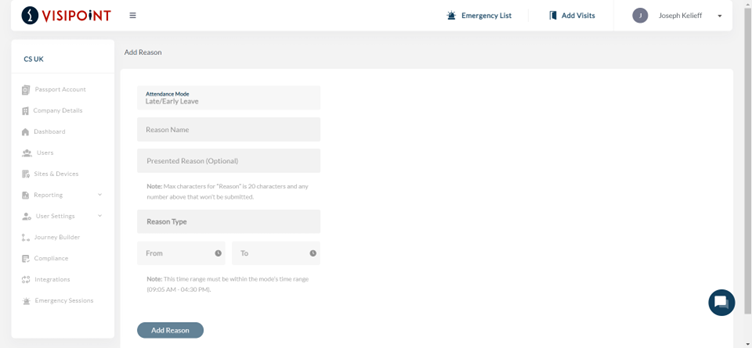
You will need to name this reason, for example, Public Transport. There is also the option to add more detail in the Presented Reason box however this is not a mandatory field.
Then you must select the Reason Type, either sign in or sign out. This informs the system when to present this Reason to your users. You then need to choose the timeframe that this Reason will be active for users signing in or out.
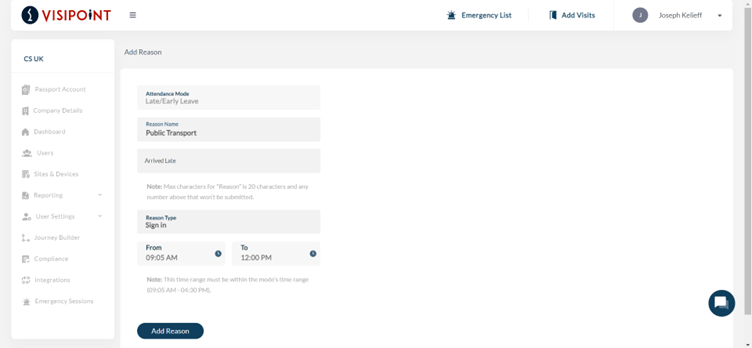
Once you have completed these details, click Add Reason. You will then see this within your Attendance Mode as well as the parameters you set.

With this set, when a user signs in late or leaves early at your kiosk, as per the timeframe you set, the system would bring up the reasons you have set for this action at this time. The user will then select the appropriate reason to register their entry or exit.
Assigning Your Attendance Mode to a Journey
Once you have created your Attendance Mode and assigned Reasons, you will need to add it to your Journey’s Flows for it to take effect.
To do this, go to the Journey Builder section on the left-hand side of the dashboard. Then you will need to find the Journey that is assigned to your kiosks.
Next, click on Available Actions and select Edit Flow from the dropdown menu.
You will then be taken into the Journey Flow editor.

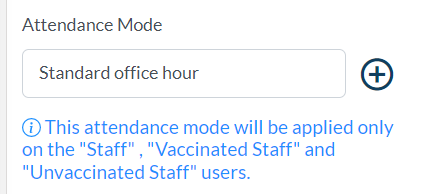
On the left-hand side, you will see that Attendance Mode is an option.
Note: Your Flow must have User Types which are ” Pre-Registered by Admin” assigned for the Attendance Mode to appear.
To learn how to Create and Edit User Types please see this page
Click into the Attendance Mode selection box and choose the Attendance Mode you wish to add to this Journey Flow.
Once you have selected your Attendance Mode, click the plus button to the right of it which will then add it to your Flow. Now click Update Journey Builder at the top of the page to save this change to the Flow and have your Attendance Mode take effect.
You can learn more about how to use the Journey Builder in this help article.
Using Attendance Modes
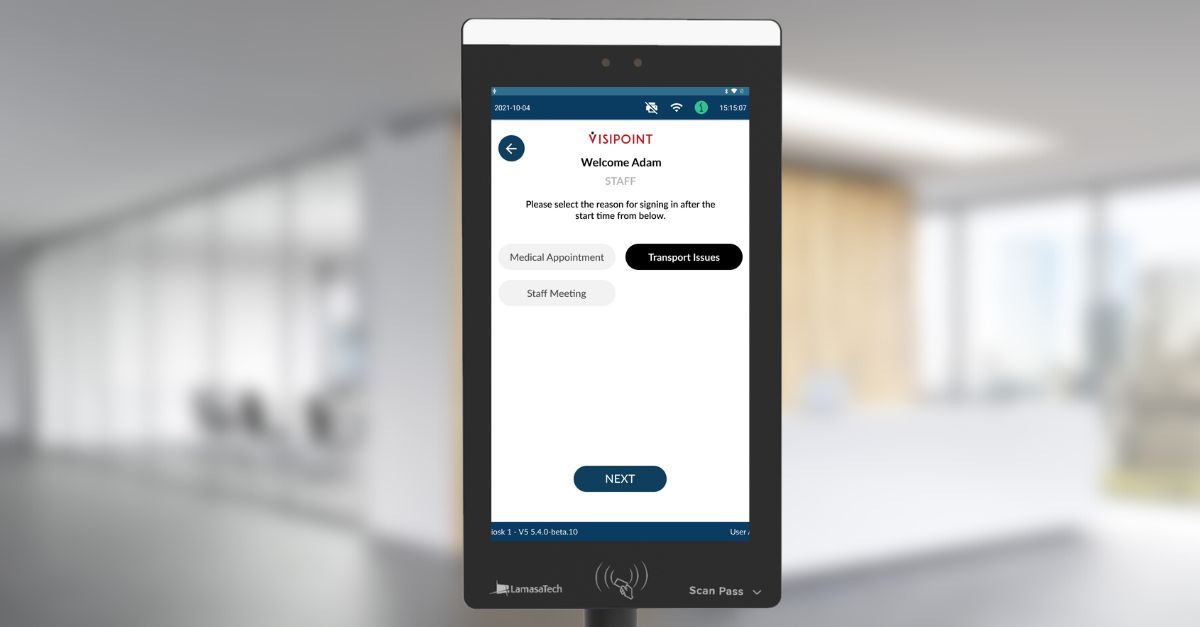
Now that you have created your Attendance Modes, your staff will need to select a reason you have provided when they attempt to sign in or out outside of their expected hours.
Attendance Modes On The Kiosk
Your staff will just need to tap the relevant reason for their late sign-in or early sign-out when presented with the options on the kiosk screen.
Once a reason has been selected the user will be signed in/out.
Attendance Modes On The Dashboard
If a user forgets to sign in or out using the kiosk, your admins can access the dashboard to adjust the status of the user manually.
Sign In
To sign a user in, you will start by selecting their profile and clicking the Sign In/Out button. You will then see this screen.
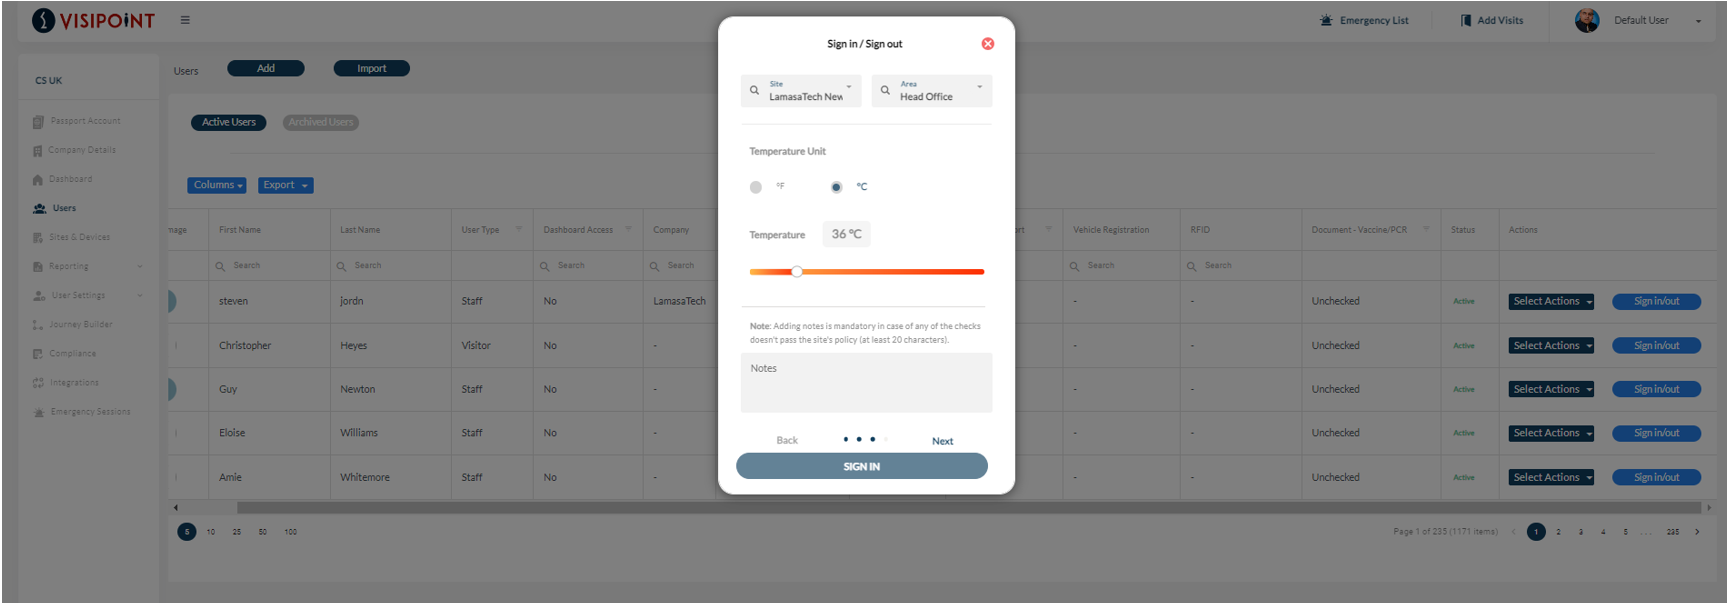
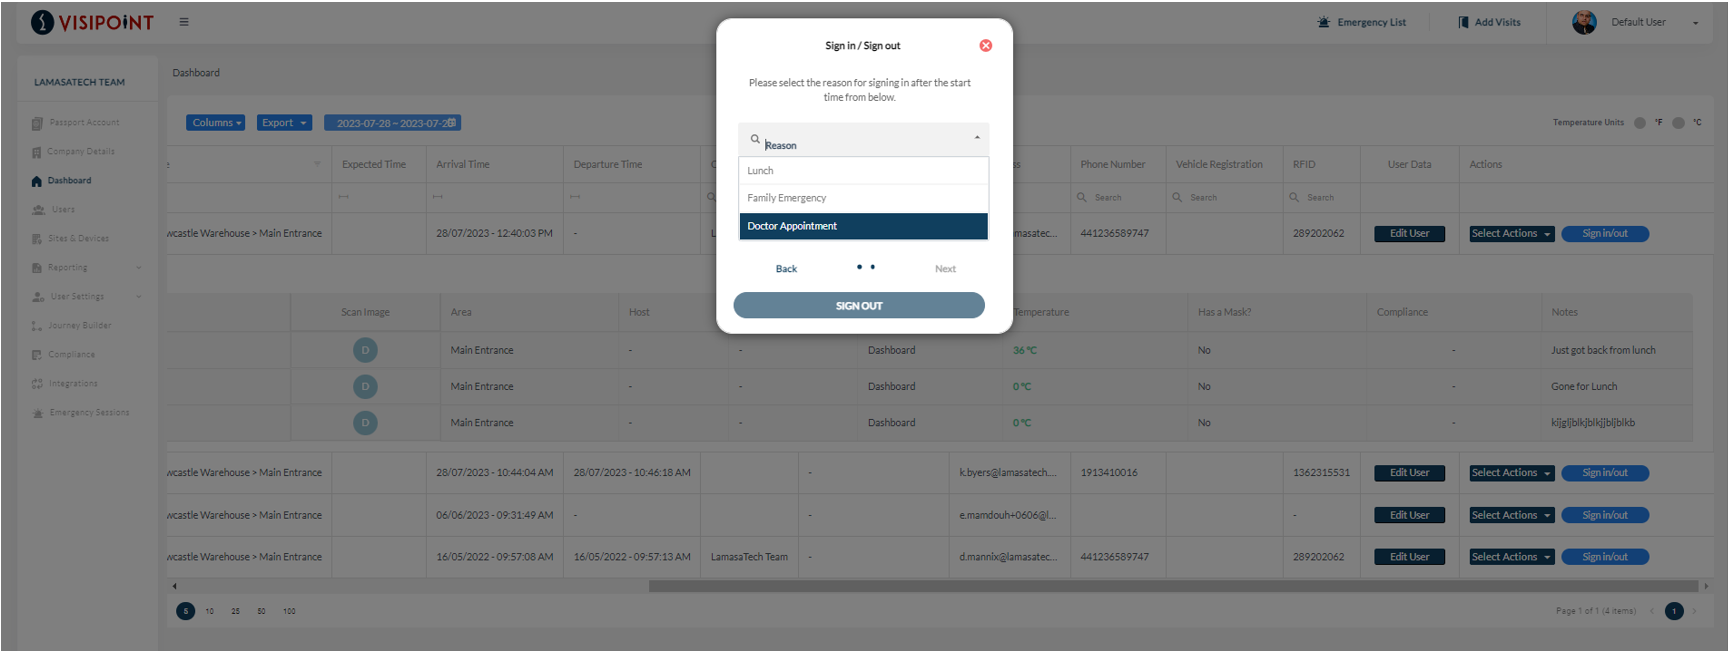
Select the Sites and Area the user is signing into and complete any compliance checks the location requires when prompted. You will then come to the below screen to assign a reason for the user signing in late.
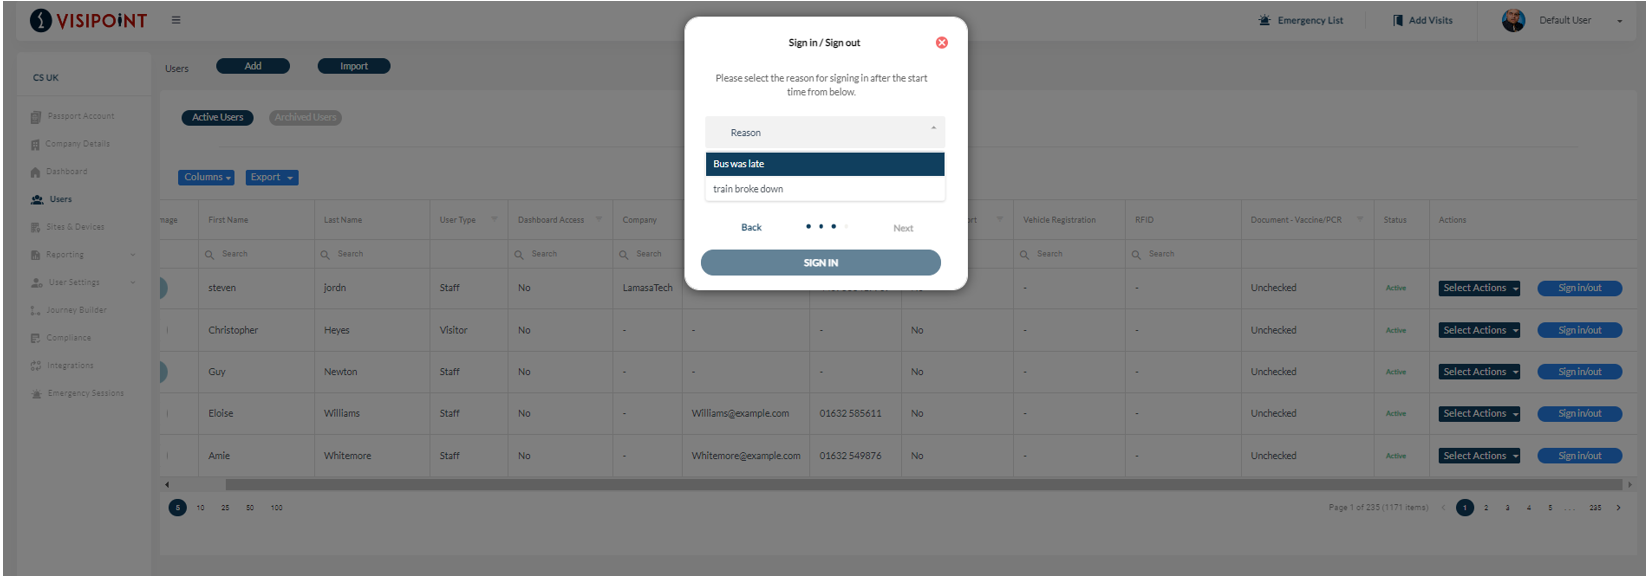
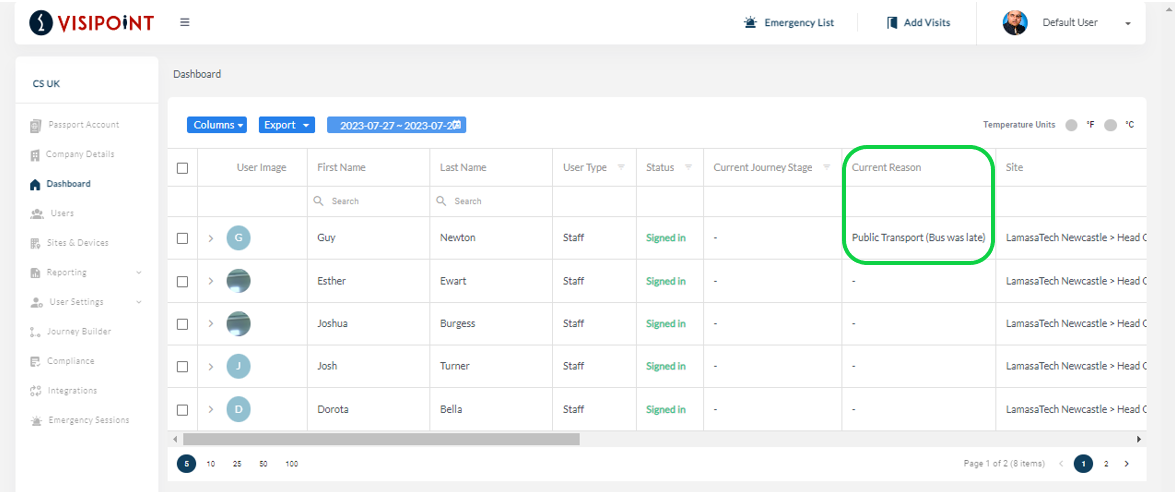
Once completed, you’ll see that the user has been signed in and there is a record of the reason that was given for their late sign-in.
Temporary signing-out
You can also sign users out who have gone to lunch or appointments that may be off-site. You can set the duration for how long they will be away as any amount of time.

To do this, locate the user on the dashboard and click the Sign-in/out button.
You will then see the below screen. Here, you will select the Site and Area that the user is in and add any notes.
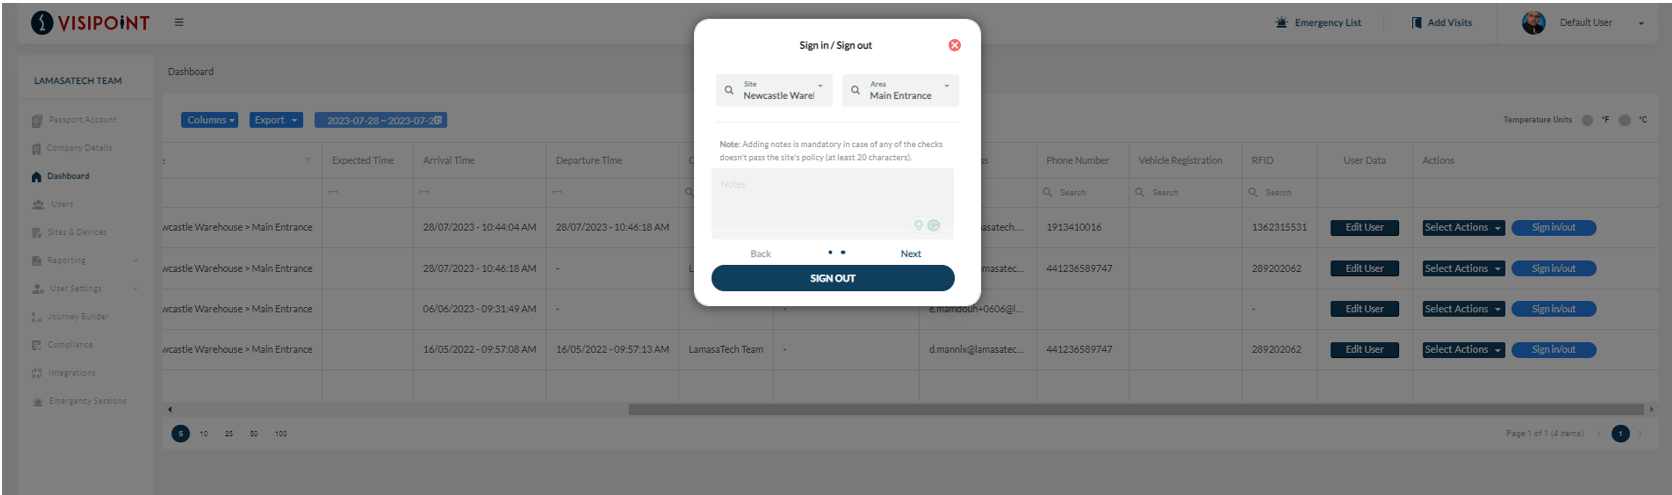
Next, you will select the appropriate reason for signing out, in this scenario the user is going for lunch.

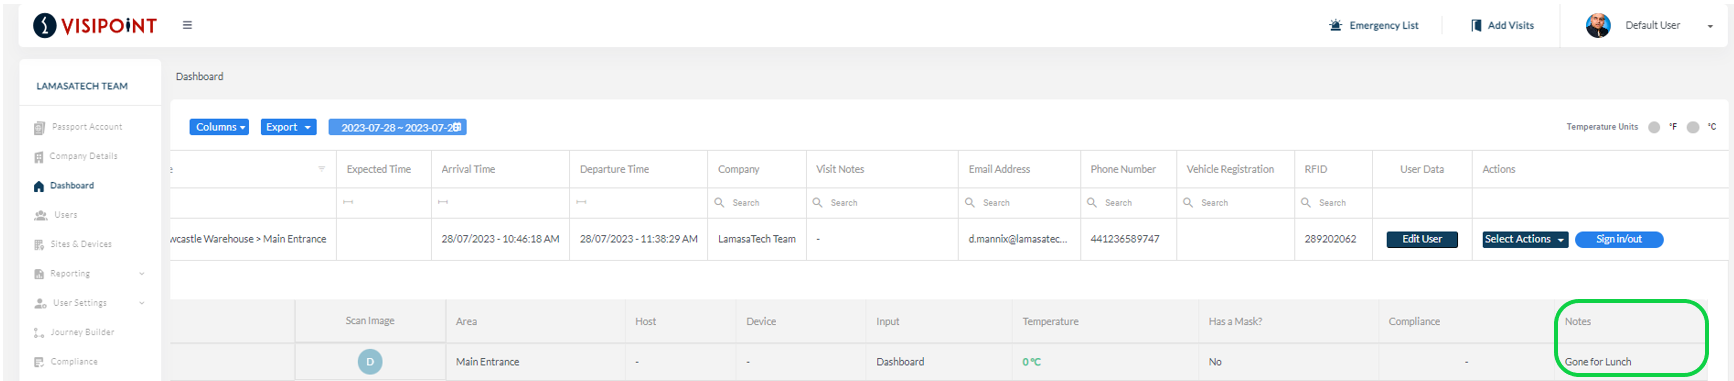
Once the reason has been selected, click Sign Out and the user will be signed out. If you opted for a duration when signing the user out, then a timer will start behind the scenes. For this scenario, there is a 30-minute duration.
You will now see that the user has been signed out on the dashboard, with the note you included.
Once the user has returned to the building, you can sign them back in. To do this you will click the Sign In/Out button.
A red notification will be displayed if the user has taken longer than the set time duration for their lunch.
You’ll then need to follow the sign-in process that is required for the selected Site and Area to sign this user in. You can also add any necessary notes.

Below you’ll see that the user has successfully signed back in from their lunch break.

Sign Out
To sign your users out you will need to click the Sign In/Out button for the chosen user.
Next, you will have to select the Site and Area that the user is currently in. If you select a different area, you will instead sign them into that area.
You will then need to assign a reason for them signing out early. This will be marked in the Visit History.
You can now see that the user has been signed out from the site that they were in.
