[blank_space height=’3em’]
VisiPoint have just released some awesome new features this month:
- Custom User Types
- Areas, Destinations and Locations
- Intelligent Insights Report
We’ll take you through why we’ve developed each of these unique features and how to use them to further enhance your visitor sign-in process.
[blank_space height=’3em’]
Custom User Types
[blank_space height=’3em’]
[thrive_highlight highlight=’#b90e00′ text=’light’] The bottom line: [/thrive_highlight]
Custom User Types enables you to create your own sign-in buttons for your device home screen.
 With Custom User Types you can create new User Types to use on top of the default VisiPoint User Types – Staff, Visitor, Contractor, Student, Delivery.
The default Kiosk Layout for the VisiPoint sign-in process uses these User Types – with the addition of Student for our education customers.
With Custom User Types you can add to these buttons, or change them to be completely bespoke to your organisation. You can also create different layouts for different entrances, buildings or sites.
To find out more about using this feature, visit our Knowledge Base article here.
There’s a few different ways in which you could use this feature, click here to scroll to the bottom of this post for our example scenarios.
[blank_space height=’3em’]
[divider style=’full’]
Areas, Destinations and Locations
[blank_space height=’3em’]
[thrive_highlight highlight=’#b90e00′ text=’light’] The bottom line:[/thrive_highlight] With Areas, Destinations and Locations Areas and Destinations you have more advanced control over multiple devices across different entrances, buildings and sites.
Using these tools, you can:
- decide which sign-in buttons display on each of your devices
- direct users to specific locations
- track use of specific facilities
- assign groups and clubs to locations
- create memberships for facilities
Areas, Destinations and Locations are linked to Custom User Types and Kiosk layout to provide this powerful functionality.
To find out more about using this feature, visit our Knowledge Base article here.
There’s a few different ways in which you could use this feature, click here to scroll to the bottom of this post for our example scenarios.
[blank_space height=’3em’]
[divider style=’full’]
Intelligent Insights Report
[blank_space height=’3em’]
[thrive_highlight highlight=’#b90e00′ text=’light’] The bottom line: [/thrive_highlight]
Intelligent Insights is an awesome new reporting which gives you even more real-time information about your organisation.
Here’s a quick look at some example stats:
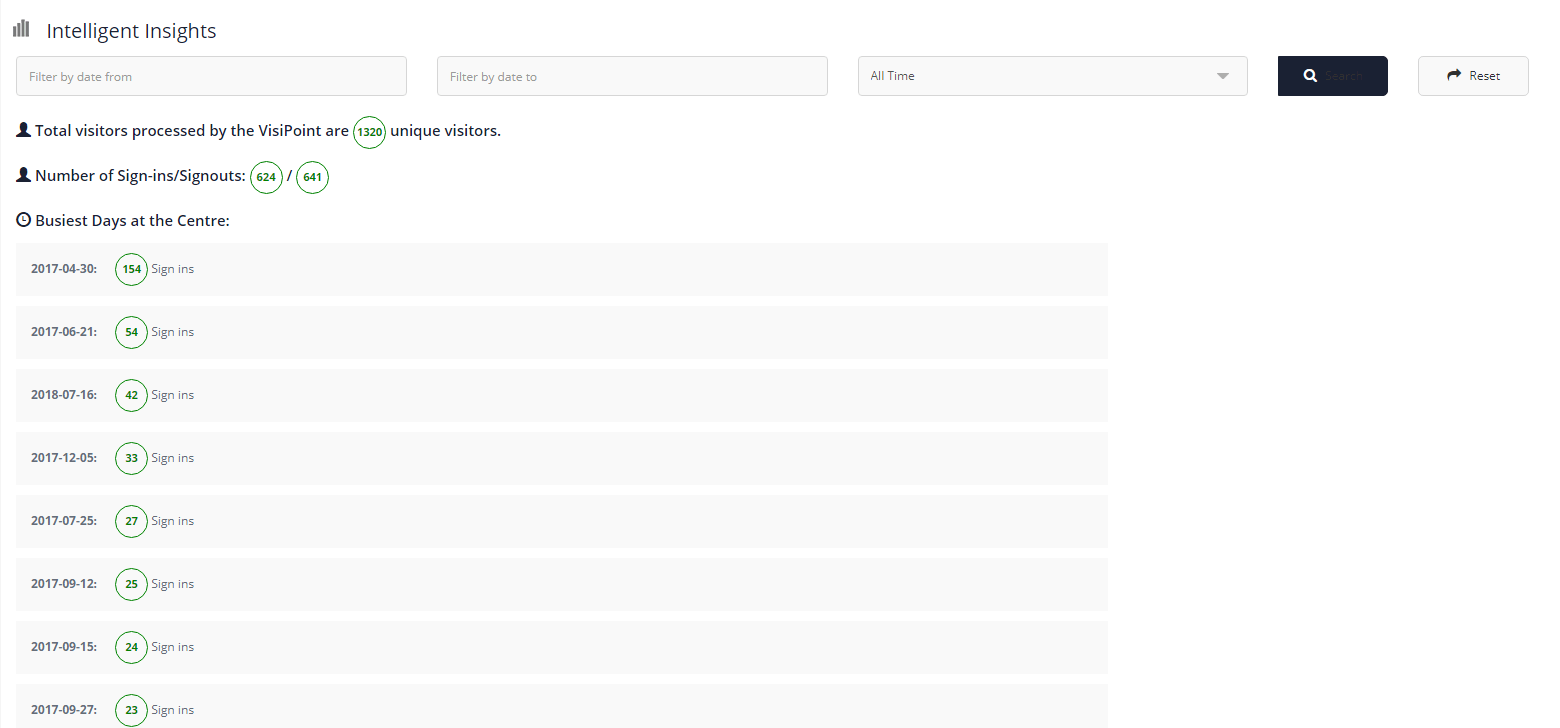
Intelligent Insights gives you data on things like most popular faciltities, sign-ins per device, and number of users that have forgotten to sign out.
You can filter by dates, export and print the reports.
[blank_space height=’3em’]
[divider style=’full’]
Example Scenarios
[blank_space height=’3em’]
[thrive_icon_box color=’blue’ style=’1′ image=’https://www.visipoint.net/wp-content/uploads/2018/10/visipoint-lightbulb-icons8-red.png’]
You want to add your own buttons to your default sign-in screen. Example: You want to create a sign-in button for your volunteers. [/thrive_icon_box]
- Create your Custom User Types, selecting Default Destination and Location. Visit our Knowledge Base Post on Custom User Types.
- Edit the Default Kiosk Layout, selecting the Custom User Types you’ve just created. Visit our Knowledge Base Post on Kiosk Layout.[blank_space height=’3em’]
No further settings required!
[blank_space height=’3em’]
[thrive_icon_box color=’blue’ style=’1′ image=’https://www.visipoint.net/wp-content/uploads/2018/10/visipoint-lightbulb-icons-8-red.png’]You have another entrance point or building where you want a different sign-in screen layout. Example: You have a secondary entrance which only certain User Types can use to sign in.
[/thrive_icon_box]
[blank_space height=’3em’]
- Create your Custom User Types, selecting Default Destination and Location. Visit our Knowledge Base Post on Custom User Types.
- Create a New Kiosk Layout, selecting the Custom User Types you want to access through this sign-in process. Visit our Knowledge Base Post on Kiosk Layout.
- Create a new Area, selecting your device and the new Kiosk Layout you have created. Visit our Knowledge Base Post on Areas and Destinations.[blank_space height=’3em’]
You’re good to go!
[blank_space height=’3em’]
[thrive_icon_box color=’blue’ style=’1′ image=’https://www.visipoint.net/wp-content/uploads/2018/10/visipoint-lightbulb-icons8-red.png’]
To create a new sign-in process to direct users to specific facilities or track use of specific facilities. Example: You have a Sports Centre where you want to track entry to specific facilities like the Gym, Swimming Pool, Playing Courts etc.
[/thrive_icon_box][blank_space height=’3em’]
- Create a new Destination (e.g. Sports Centre) and Locations within that (e.g. Gym, Swimming Pool, Playing Courts). Visit our Knowledge Base Post on Areas and Destinations.
- If you need new User Types, go to Custom User Types and Create your Custom User Types, selecting the Destination and Locations you’ve just created. If you don’t need new User Types remember to edit your existing User Types to include the new Destination and Locations. Visit our Knowledge Base Post on Custom User Types.
- Create a new Kiosk Layout selecting your User Types. Visit our Knowledge Base Post on Kiosk Layout.
- Create a new Area, selecting your devices and the Kiosk Layout you want to apply to the devices. Visit our Knowledge Base Post on Areas and Destinations.[blank_space height=’3em’]
All done!
[blank_space height=’3em’]
[divider style=’full’]
[blank_space height=’3em’]
We hope you like getting to grips with our new features. We’re going to have some more exciting features to announce very soon!
If you have any questions, you can speak to our friendly support team on +44 (0) 191 341 0016.
[blank_space height=’3em’]