Go straight to the section you need:
1. A Quick Explainer
2. How to Create a Destination
3. How to Create an Area
Areas and Destinations are powerful functions that create the conditions to effectively manage multiple entrances and multiple sites, where you wish for the devices at different entrances to have different settings.
Using these tools, you can:
- decide which sign-in buttons display on each of your devices
- direct users to specific locations
- track the use of specific facilities
- assign groups and clubs to locations
- create memberships for facilities
Hint. If you want to customise your welcome screen with your own sign-in buttons but want all of your devices to have the same welcome screen/ settings you can go straight to this article about Custom User Types as you will not need to create areas.
1. A Quick Explainer
4 areas of advanced VisiPoint functionality link together to create a workflow which makes multi-management and the above features possible:
- Destinations and Locations
- User Types
- Kiosk Layout
- Areas
It sounds complicated at first but bear with us – this functionality is powerful!
Areas allow you to tie a Kiosk Layout (your home screen sign-in buttons) to a device.
Destinations and Locations tie User Types to the locations or facilities they can access.
You should always create your destinations and locations before anything else. If your User Type doesn’t have a destination or location selected in the User Type settings, the sign-in button will not show for this User Type even if you’ve added the User Type to the home screen design in Kiosk Layout.
2. How to Create a Destination
- Select Destinations List from Area Settings on the left-hand menu of your Visipoint Dashboard.
- Click Add New Destination.
- Give your Destination a name.
- Add Locations to your Destination until complete.
Here’s an example of how you would use Destination and Locations if you had a Sports Centre where you wanted to track user activity for certain facilities or assign memberships:
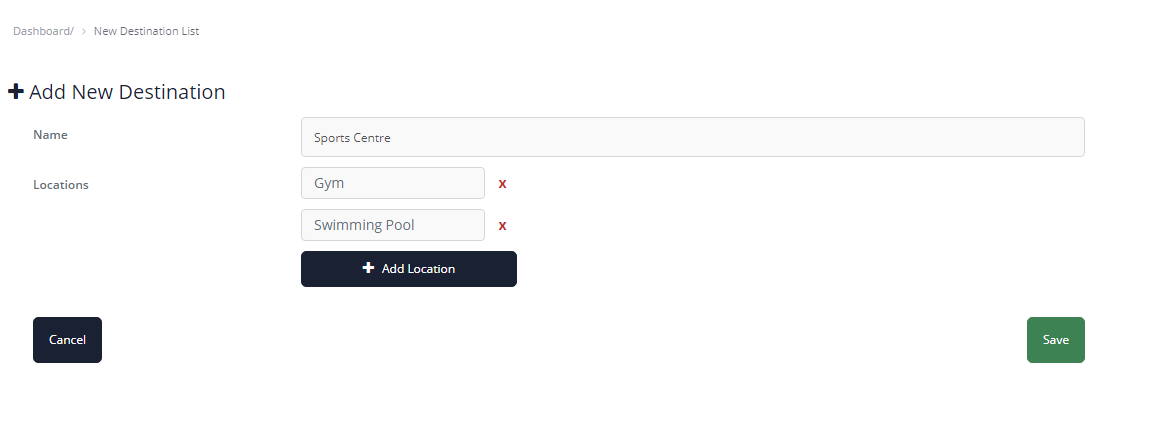
You must have locations within the Destination. If you don’t need to track Locations – such as specific facilities – you don’t need to create a destination. Instead, you can create a new Area using the next steps and select Default Destination when prompted to use standard settings.
3. How to Create an Area
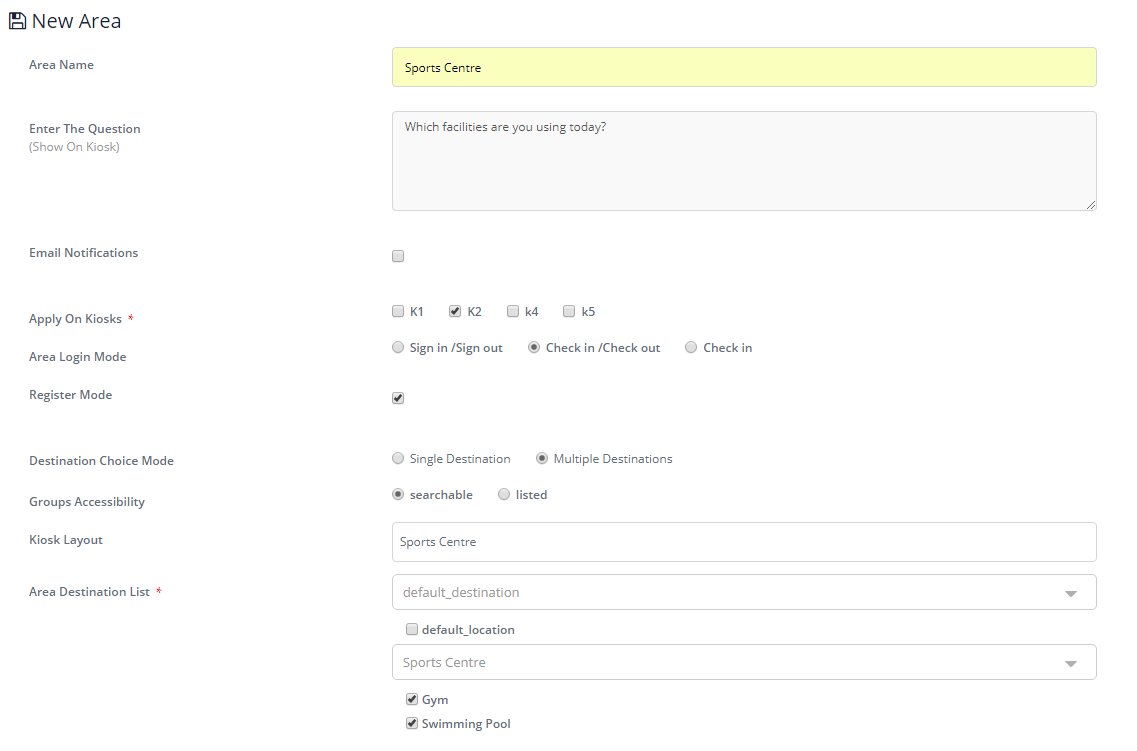
Here’s how our Sport Centre Area example would look:
A breakdown of the steps to follow:
- Select Areas List from the left-hand side menu, under ‘Area Settings’
- Click Add ‘New Area’
- Give your Area a name
- Enter The Question (Show On Kiosk) – Enter the title for the Destination screen. For example, you may enter ‘Which facilities are you using today?’ for a Sports Centre area.
- Email Notifications – Select whether or not you wish to generate email notifications for the area. Emails will be sent to your default host for your User Types.
- Apply on Kiosks – Choose which of your devices you wish to assign to this area.
- Area Login Mode – Pick from one of the below modes.
– Sign-in/out: This signifies the normal sign-in and out process conducted through VisiPoint, which signs an individual in or out of the building and keeps the evacuation lists up to date.
– Check-in/out: Check-in/out does not affect the sign-in status of an individual (and in turn the emergency list). This is commonly used where organisations want to monitor internal location when on site. For example, an organisation may want to track which floor or area staff are in for safety reasons. Therefore staff can check-in/out of areas to keep their last active location up-to-date on the dashboard.
– Check-in: Check-in is similar to the check-in/out option but it does not give users a check-out option, for where it’s not necessary to capture this information. You cannot be checked into 2 locations at the same time so when an individual checks in at their next location their last active location will be updated in the dashboard. - Register Mode – Check the tick-box here if you want this area to be able to capture new user details – new visitors, members, guests. Leave Register Mode off if you only want to allow existing users to sign-in e.g. current members, staff etc.
- Destination Choice Mode – Check the option to allow users to select one facility at a time, or multiple facilities.
Using the prior example of the Sports Centre, users can select that they are going to use the Gym and the Swimming Pool. If you are a business centre or managed office and offer your meeting rooms as a Destination, you may select the single option so that users can only sign into one meeting room at once. - Groups Accessibility – This setting is for the Events, Groups and Club Sign-In functionality. If you are not planning to use this function at this time, please select Searchable Groups as default.
– Searchable: Requires users to search for the name of the Group they’re delegated to be able to find this.
– Listed: Shows users a list view of all Groups assigned to that Area. - Kiosk Layout – Select the Kiosk Layout (the sign-in buttons on your home screen) for your devices assigned to the area. See this article for Kiosk Layout.
- Area Destination List – This pre-populates with your previously created Destinations. You can click on each Destination to drop down the list of Locations for that Destination, allowing you to choose the locations to be shown in this Area. If you’re not tracking Destinations and Locations, you can choose Default Destination and Location here to use the standard settings.
Hint. User Types must have these Destinations and Locations selected in their User Type settings, as the intelligent device technology prioritises your User Type settings over your Kiosk Layout choices.
Got further questions? You can speak to our friendly support team at +44 (0) 191 341 0016.