
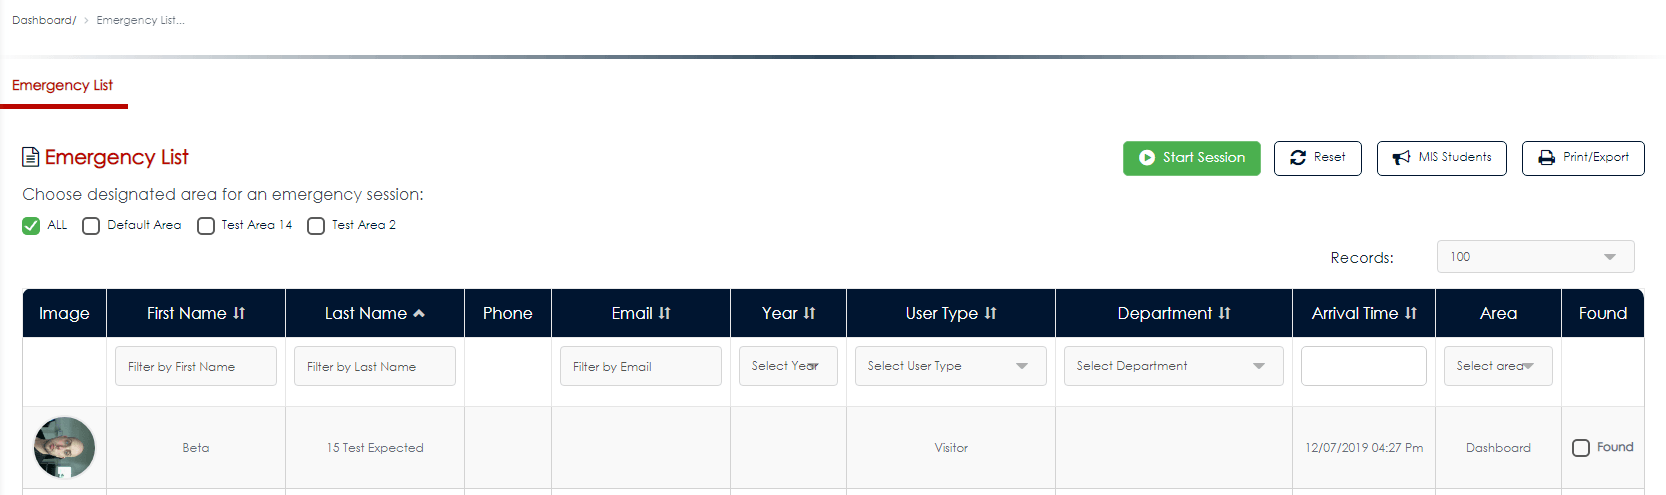
At the top right of your dashboard, you’ll find the Emergency List button. If you click this button you will see a list of everyone who is currently signed in – and must be accounted for in an emergency. An example is shown below:
Using the Emergency List for evacuations and roll-calls
You can sort the columns easily by clicking on the white arrows on each column. For example, you can sort the list of names alphabetically or sort by status of found or not found. You can also filter the information using the option at the top of each column – you can filter by area or department for example. Plus, you’ve got the photo from user profiles on the left-hand side for quick identification.
When carrying out a roll-call, you can check the box on the right for each individual, to mark them as ‘found’ and accounted for.
The list can be accessed from any device with a browser, for example, a phone or tablet, or you can choose to export or print the list from the right-hand side.
Hint. You can also access the emergency list from the VisiPoint device by tapping on your logo 8 times. Once you’ve done this a hidden settings menu will appear. From there you can select Emergency List to print it out through the badge printer.
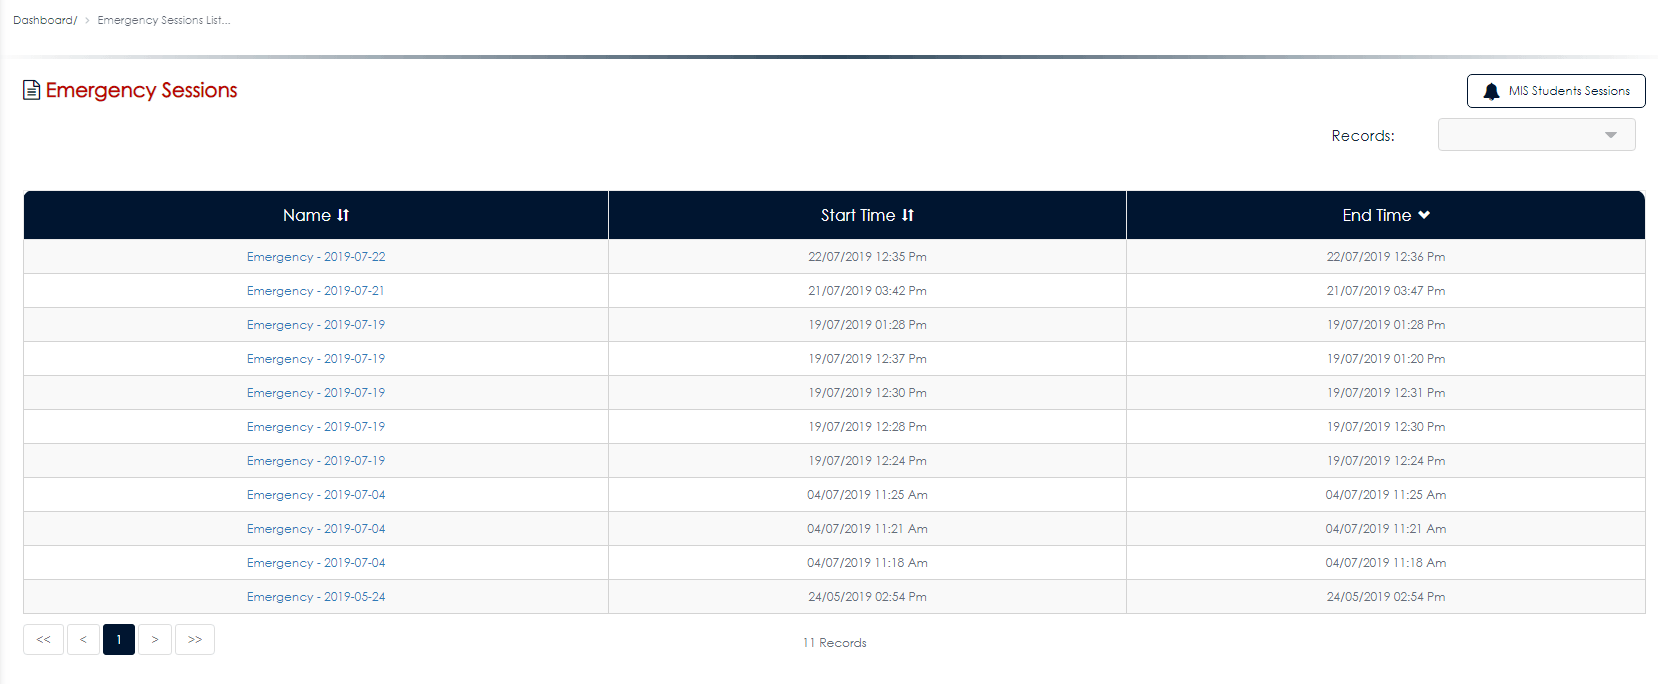
Keeping a log of roll calls with Emergency Sessions
Emergency sessions log the use of the emergency list as a ‘session’ – with start time and end time recorded – so you can go back to the session history at any time to check who was logged as found/not found.
You can use the list from multiple devices, so during a fire evacuation, several people can go through the list at the same time marking individuals as ‘found’ and the list will update in real-time to prevent any crossover. One area can be selected for the session or the session can be across all areas.
To use this function, hit the green ‘Start Session’ button above the list. Then you can carry on using the Emergency List as per usual.
Once you close that session it will be logged and you can access the roll-call history from that session at any time, by hitting the ‘Emergency Sessions’ options under Favourites on the left-hand navigation. Clicking on a session will give you the history from that session, including the list and the status of each individual at the close of that session.
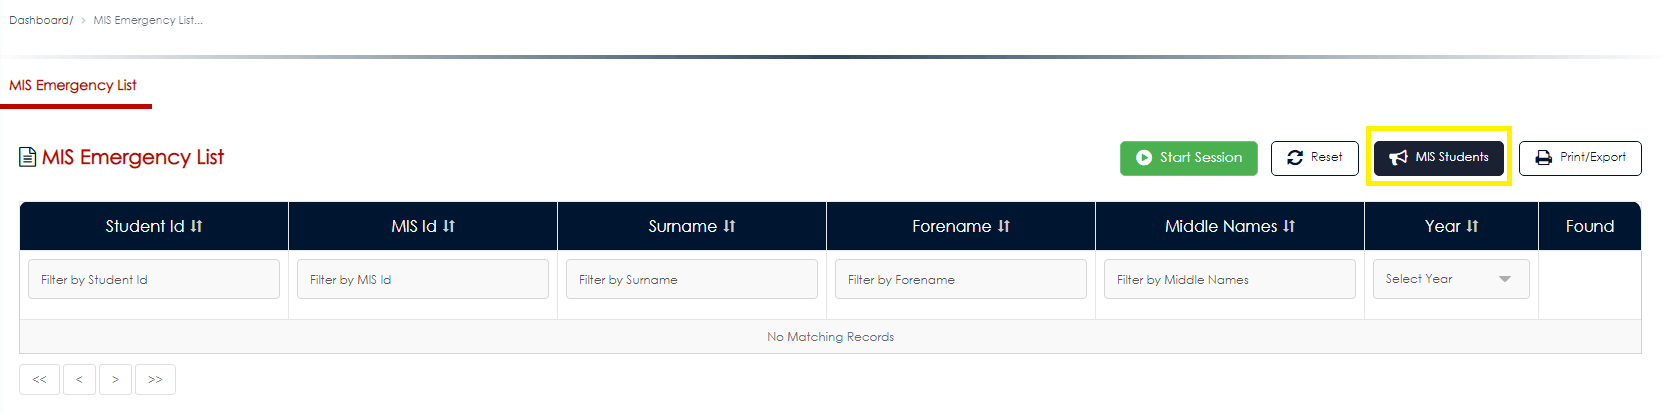
Using the MIS integration for student emergency lists
For schools using the MIS integration, we have introduced the ‘MIS Students’ button. This pulls a list of your students who are currently marked as present in your MIS system. This means you can carry out all your emergency roll calls from one place quickly and easily!
If a student signs out early for a medical appointment they will not be shown as present in your MIS and so will not appear on your MIS Students Emergency List in VisiPoint.
Note – This only applies if you have full write-back integration with your MIS. If your integration is read-only, VisiPoint will only have the student’s latest status if admin staff have updated the attendance records in MIS.
To see the MIS students list, click the ‘MIS Students’ button within the Emergency List. When the Emergency List is in MIS Students mode, the button will show as blue.
You can log an Emergency Session for students by clicking the ‘Start Session’ button when in MIS Students mode.
Accessing this session to see the history is simple. When in Emergency Sessions just click the ‘MIS Students Session’ button on the top right and click on the session you need to see details for. to exit the MIS Students Session mode, click the button again and you’ll enter the regular Emergency Sessions logs once again.
Need some extra support? Get in touch with our expert team at support@visipoint.net.
